Homemade Whipped Cream
Imagine the moment when you first plunge a spoon into a bowl of freshly whipped cream. Its silky texture glides like a dream, gently yielding before your taste buds. As you bring a scoop closer, the sweet aroma wafts tantalizingly, teasing your senses with the promise of decadence. With that first soft bite, you experience an exquisite blend of creamy richness laid with just a whisper of sweetness. Each spoonful melts on the tongue, leaving behind a soft, cloud-like caress that is utterly irresistible.
Whipped cream transforms any dessert into a lavish affair. Think about a bowl of berries crowned with a cloud of this creamy delight or a slice of rich chocolate cake enveloped in its luscious embrace. As you savor these bites, the lightness of the whipped cream cuts through sweet flavors, balancing every mouthful and enhancing its allure. Homemade whipped cream truly elevates any dessert from delightful to divine, and it’s easier to make than you might think.
Why You’ll Love This Homemade Whipped Cream
There’s something uniquely satisfying about creating your own whipped cream. You control the sweetness and flavor, ensuring that each dollop is perfectly tailored to your palate. With just three simple ingredients—heavy whipping cream, powdered sugar, and vanilla extract—you can whip up a treat that sings in every recipe. The beautiful, billowy transformation features light, airy peaks that beckon to be folded into desserts, adorning everything from a cozy slice of pie to an extravagant sundae. This freshly whipped wonder not only tastes better than the store-bought variety; it sings with pure, velvety flavors that come alive in your mouth.
The cheerful, homemade touch adds heart to any occasion, whether celebrating a birthday, hosting a dinner party, or simply indulging in a quiet night on the couch with a bowl of ice cream. Each time you serve this delectable cream, you breathe life into your culinary creations, making even the simplest desserts shine with an allure that draws everyone in. Plus, it’s a fantastic way to engage with family or friends in the kitchen, bringing laughter and love into the mix while you whip up this simple, yet enchanting recipe.
Preparation Phase & Tools to Use
To embark on your homemade whipped cream adventure, gather a few essential tools. Your kitchen will shine with the gleaming presence of:
- Mixing Bowl: A deep bowl helps contain the cream as you whip it to perfection. A glass or stainless-steel bowl chills beautifully in the fridge, promoting better whipping.
- Electric Mixer: Skip the arm workout and let an electric mixer lend a helping hand. Look for one with multiple speed settings for optimal control.
- Spatula: A flexible spatula assists in folding whipped cream into other ingredients without deflating its fluffy structure.
- Chilling Time: Remember to chill both your bowl and beaters for about 10 minutes prior to whipping. This small step is magic; it helps the cream whip faster and achieve firmer peaks.
As you prepare your kitchen space, the air will fill with anticipation. Picture yourself drizzling that first batch over your dessert, the soft peaks tumbling gently down like clouds on a blue sky.
Ingredients for Homemade Whipped Cream
- 1 cup heavy whipping cream: The star of the show! This ingredient’s high fat content (36% or more) ensures optimum volume and stability.
- 2 tablespoons powdered sugar: This provides sweetness and a touch of smooth texture, dissolving easily for a creamy finish.
- 1 teaspoon vanilla extract: Vanilla adds a warm, aromatic depth that elevates the simple cream to sublime.
Should you wish to experiment or customize, consider alternatives like flavored extracts—almond or peppermint—or a sugar substitute for a low-calorie experience. The beauty of homemade whipped cream lies in its versatility!
How to Make Homemade Whipped Cream
- Combine Ingredients: In a medium mixing bowl, add the heavy whipping cream, powdered sugar, and vanilla extract. This combination is where the magic begins!
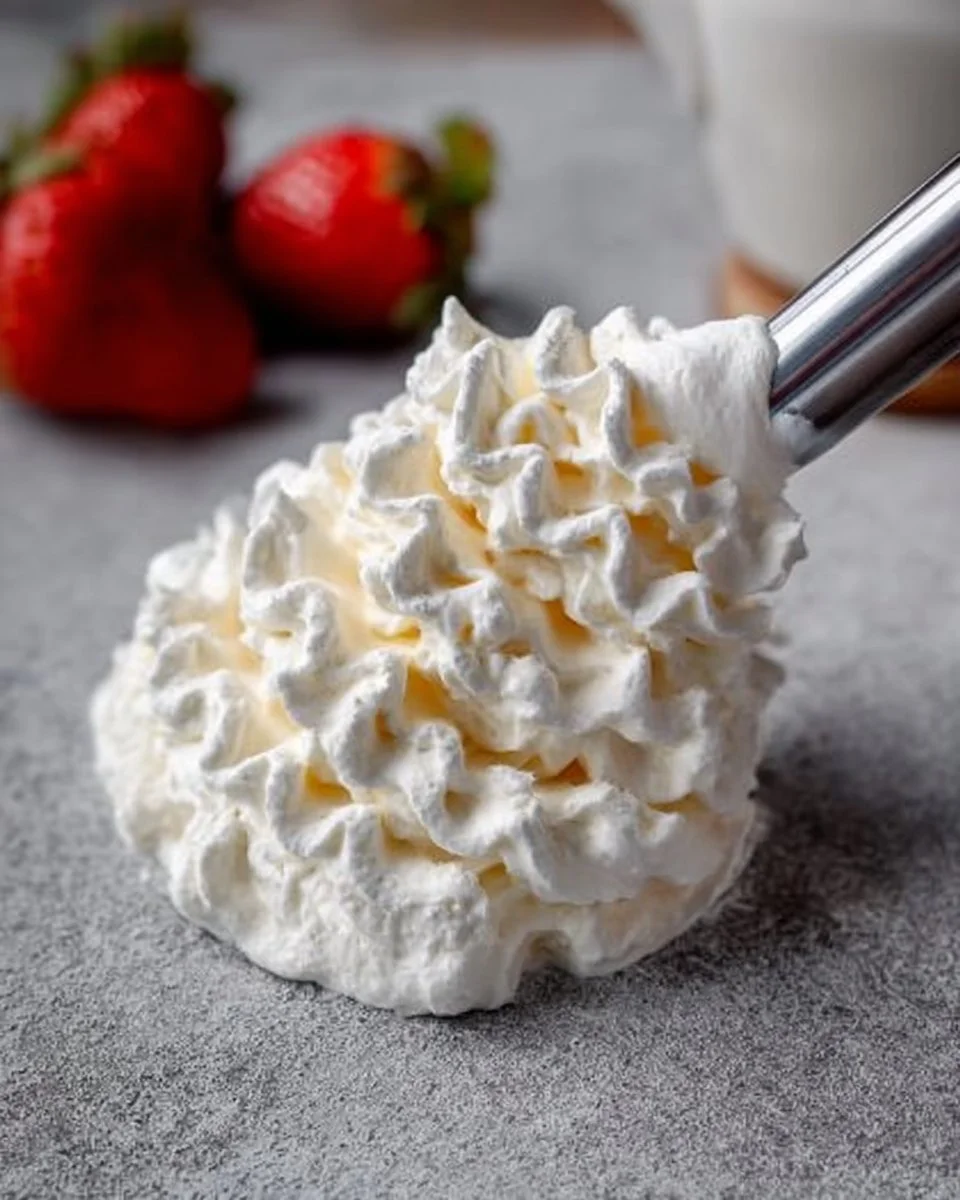
- Whip to Soft Peaks: Using an electric mixer, beat the mixture on medium-high speed until soft peaks form. You’re looking for a fluffy consistency that holds its shape lightly.
- Achieve Stiff Peaks: Continue whipping until you reach stiff peaks. Take care here—stop just before it turns to butter. The cream should hold firm peaks while being soft and luscious.
- Serve or Store: Spoon your heavenly whipped cream onto your favorite desserts immediately for the best experience, or store it in the refrigerator for up to 2 days.
Chef’s Notes & Helpful Tips
- Make-ahead tips: Whipped cream can be prepared a few hours in advance. Just keep it covered in the fridge until you’re ready to serve.
- Cooking alternatives: If you desire a higher volume and longer-lasting whipped cream, consider adding a tablespoon of cornstarch or gelatin during the mixing process, which helps with stabilizing.
- Customization ideas: Get creative—try adding citrus zests for an invigorating twist or a splash of coffee for a mocha-style finish.
Common Mistakes to Avoid
Creating the perfect whipped cream doesn’t come without its pitfalls! Avoid these common mistakes to ensure your cream emerges flawlessly fluffy:
- Over-whipping: This happens when you whip too long, causing the cream to turn grainy or even separate into butter. Keep a watchful eye on those peaks!
- Warm Ingredients: If the heavy cream isn’t cold, it may not whip properly. Always ensure your mixing bowl, beaters, and cream are chilled—the colder, the better.
- Ignoring Measurements: Whipped cream is all about balance. Too much sugar can weigh it down, while too little can leave it flat. Stick with recommended measurements for the best results.
What to Serve With Homemade Whipped Cream
Your homemade whipped cream opens up a world of delightful pairings. Imagine a marvelous dessert table featuring:
- Strawberries: Fresh, juicy, and dripping with sweetness, they make a perfect duo with the creamy whipped topping.
- Chocolate Cake: Every slice feels richer with a snowy dollop of whipped cream cascading down the sides.
- Warm Brownies: Placing cold whipped cream atop a warm brownie creates a divine contrast of temperatures and textures.
- Pumpkin Pie: Swirling whipped cream on this seasonal favorite amplifies its spiced notes perfectly.
- Ice Cream: There’s no denying that a scoop of creamy vanilla ice cream enriched with homemade whipped cream becomes decadence in a bowl.
- Pancakes or Waffles: A breakfast staple, adding whipped cream elevates the morning meal into a special occasion.
- Hot Chocolate: Finished off with a mountain of fluffy whipped cream, this classic drink warms the soul on chilly evenings.
- Banana Split: The perfect crowning touch to this ice cream extravaganza, balancing hearty flavors with soft swirls.
Storage & Reheating Instructions
- Refrigeration: Store any leftovers in an airtight container in the refrigerator for up to 2 days. It may become slightly less fluffy over time but will still retain its delightful taste.
- Freezing: Freeze whipped cream dollops on a parchment-lined baking sheet, then transfer to a zip-top bag. This allows you to enjoy it anytime you want a creamy topping.
- Reheating: Should you need to use previously frozen whipped cream, simply thaw overnight in the fridge and re-whip gently if needed.
Estimated Nutrition Information
This delightful treat is a sumptuous indulgence. Here’s a rough estimate per serving (based on 1 tablespoon):
- Calories: 50
- Fat: 5g
- Carbohydrates: 2g
- Sugar: 2g
(Since recipes vary, these values are approximations and can differ based on ingredients and portion sizes.)
FAQs
1. Can I use whipping cream instead of heavy whipping cream?
Yes! While heavy whipping cream contains more fat and will whip up stiffer and creamier, regular whipping cream still works well. You may find the texture slightly lighter, but it will still delight your taste buds.
2. How can I make flavored whipped cream?
You can infuse delightful flavors by adding extracts, zest, or even pureed fruits during mixing. Just ensure to adjust the sugar levels accordingly for balance.
3. Why didn’t my whipped cream thicken?
Possible reasons include using warm cream or not enough fat content. Make sure your cream is heavy (at least 36% fat) and well-chilled before whipping.
4. How can I stabilize my whipped cream?
To create longer-lasting whipped cream, consider incorporating cornstarch, gelatin, or commercial whipped cream stabilizers. Each of these helps the cream maintain its form for days without separation.
5. Is it safe to eat whipped cream with raw egg whites?
In this recipe, we don’t use eggs, making it safe. If you’re considering recipes that do, pasteurization ensures food safety.
Conclusion
Homemade whipped cream transforms ordinary desserts into extraordinary indulgences. With its airy texture and luscious mouthfeel, you’ll find it hard to resist serving this delectable treat at every occasion. Your taste buds will sing as you slather it on cakes, scoop it on ice creams, or simply enjoy it straight from the bowl. So why wait? Gather your ingredients, dust off your mixing bowl, and prepare to whisk up something utterly magical—your desserts deserve this creamy delight!
Print
Homemade Whipped Cream
- Total Time: 10 minutes
- Yield: 8 servings 1x
- Diet: Vegetarian
Description
Elevate your desserts with this light and creamy homemade whipped cream, perfect for any occasion.
Ingredients
- 1 cup heavy whipping cream
- 2 tablespoons powdered sugar
- 1 teaspoon vanilla extract
Instructions
- Combine ingredients: In a medium mixing bowl, add the heavy whipping cream, powdered sugar, and vanilla extract.
- Whip to soft peaks: Using an electric mixer, beat the mixture on medium-high speed until soft peaks form.
- Achieve stiff peaks: Continue whipping until you reach stiff peaks, stopping just before it turns to butter.
- Serve or store: Spoon your heavenly whipped cream onto your favorite desserts immediately or store it in the refrigerator for up to 2 days.
Notes
Chill your bowl and beaters for 10 minutes before whipping for the best results. Customize with flavored extracts or zests.
- Prep Time: 10 minutes
- Cook Time: 0 minutes
- Category: Dessert
- Method: Whipping
- Cuisine: American
Nutrition
- Serving Size: 1 tablespoon
- Calories: 50
- Sugar: 2g
- Sodium: 3mg
- Fat: 5g
- Saturated Fat: 3g
- Unsaturated Fat: 2g
- Trans Fat: 0g
- Carbohydrates: 2g
- Fiber: 0g
- Protein: 0g
- Cholesterol: 20mg
Keywords: whipped cream, dessert topping, homemade whipped cream, easy recipe