Red Velvet Vampire Kiss: Indulge in Delectable Bliss!
Introduction to Red Velvet Vampire Kiss
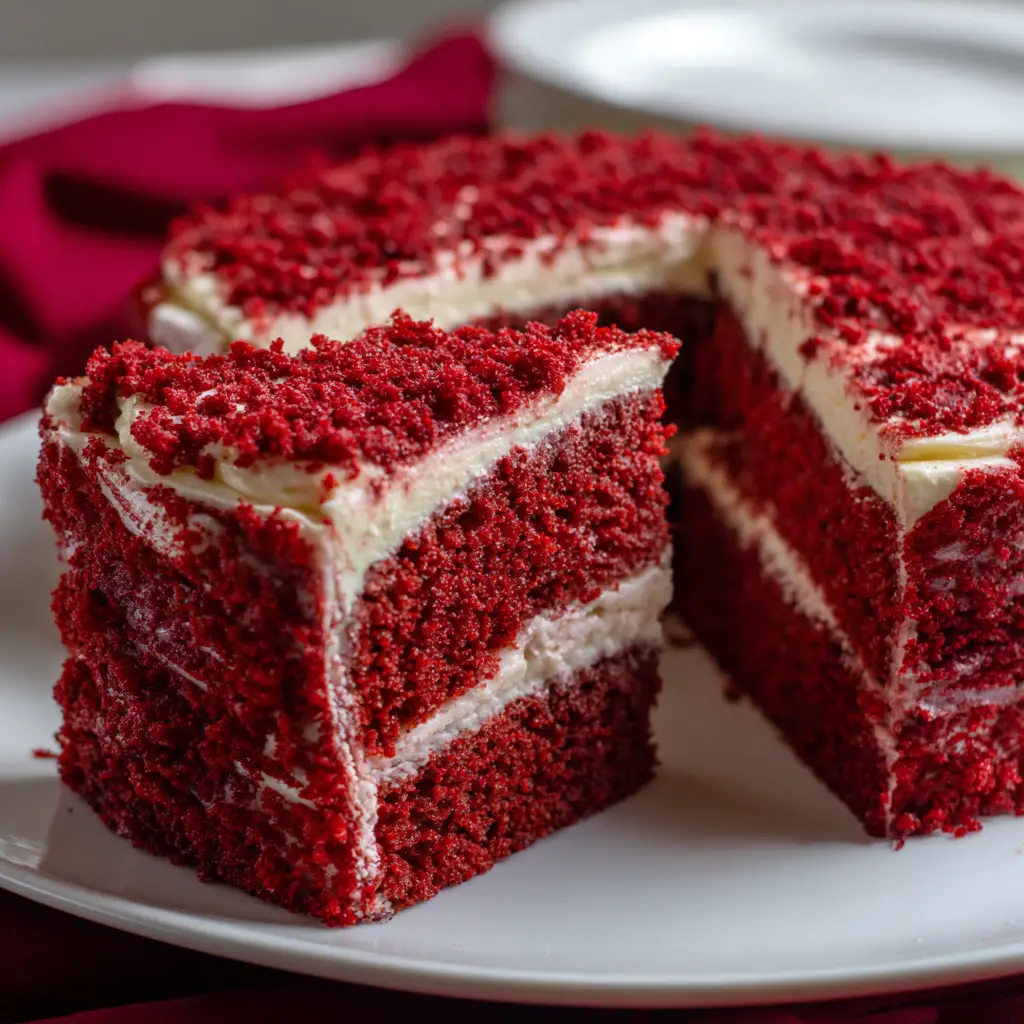
As a busy mom, I know how precious time can be, especially when it comes to whipping up something special in the kitchen. That’s why I’m excited to share my Red Velvet Vampire Kiss recipe with you! This delightful cake is not just a feast for the eyes; it’s a deliciously rich and moist treat that’s perfect for Halloween or any occasion that calls for a little indulgence. Imagine the smiles on your loved ones’ faces as they sink their teeth into this velvety goodness. Trust me, this recipe is a quick solution for those busy days when you want to impress!
Why You’ll Love This Red Velvet Vampire Kiss
This Red Velvet Vampire Kiss is a true crowd-pleaser! It’s incredibly easy to make, even on the busiest of days. The rich, velvety texture combined with the sweet cream cheese frosting creates a taste sensation that’s hard to resist. Plus, it’s visually stunning, making it perfect for any gathering. Whether it’s a Halloween party or a family celebration, this cake will surely steal the show and warm your heart!
Ingredients for Red Velvet Vampire Kiss
Gathering the right ingredients is the first step to creating your Red Velvet Vampire Kiss. Here’s what you’ll need:
- All-purpose flour: This is the backbone of your cake, providing structure and texture.
- Granulated sugar: Sweetness is key! It balances the flavors and keeps the cake moist.
- Baking soda: This leavening agent helps the cake rise, giving it that fluffy texture.
- Salt: Just a pinch enhances the flavors and balances the sweetness.
- Cocoa powder: A hint of cocoa adds depth to the flavor without overpowering the red velvet essence.
- Vegetable oil: This keeps the cake moist and tender, making each bite melt in your mouth.
- Buttermilk: The acidity in buttermilk reacts with the baking soda, creating a light and airy cake.
- Eggs: They bind the ingredients together and add richness to the cake.
- Red food coloring: This is what gives the cake its signature vibrant hue. Feel free to adjust for a deeper color!
- Vanilla extract: A splash of vanilla adds warmth and enhances the overall flavor.
- White vinegar: This helps to activate the baking soda and adds a subtle tang.
- Cream cheese: The star of the frosting! It provides a rich, tangy flavor that pairs perfectly with the cake.
- Unsalted butter: Adds creaminess to the frosting and balances the sweetness.
- Powdered sugar: This sweetens the frosting and gives it that smooth, spreadable texture.
- Vanilla extract (for frosting): Just like in the cake, it adds a lovely flavor to the frosting.
For exact measurements, check the bottom of the article where you can find everything listed for easy printing. Happy baking!
How to Make Red Velvet Vampire Kiss
Step 1: Preheat and Prepare
Let’s kick things off by preheating your oven to 350°F (175°C). This step is crucial for achieving that perfect bake. While the oven warms up, grab two 9-inch round cake pans and grease them well. I like to use a bit of butter or cooking spray to ensure the cakes slide out easily later. You can also line the bottoms with parchment paper for extra insurance. Trust me, there’s nothing worse than a cake that sticks!
Step 2: Mix Dry Ingredients
Now, let’s sift together the dry ingredients. In a large bowl, combine the all-purpose flour, granulated sugar, baking soda, salt, and cocoa powder. Sifting is key here; it helps to aerate the flour and removes any lumps. This will ensure a smooth batter that bakes evenly. As you mix, take a moment to appreciate the beautiful colors and textures. The cocoa powder adds a lovely depth to the vibrant red velvet cake!
Step 3: Combine Wet Ingredients
In another bowl, it’s time to mix the wet ingredients. Combine the vegetable oil, buttermilk, eggs, red food coloring, vanilla extract, and white vinegar. Whisk them together until everything is well blended. The vibrant red hue will start to shine through, and the smell will be heavenly! This mixture is what gives your cake that rich flavor and moist texture. Don’t rush this step; take your time to ensure it’s perfectly combined.
Step 4: Combine Wet and Dry Mixtures
Now comes the fun part! Gradually add the wet ingredients to the dry ingredients. I like to do this in three parts, mixing gently after each addition. This helps to avoid overmixing, which can lead to a dense cake. You want a smooth batter that flows easily but still has a bit of body. As you mix, you’ll see the colors blend beautifully, creating that signature red velvet look!
Step 5: Bake the Cakes
Once your batter is ready, it’s time to divide it evenly between the prepared cake pans. Use a spatula to smooth the tops for an even bake. Pop them in the preheated oven and bake for 25-30 minutes. Keep an eye on them! You’ll know they’re done when a toothpick inserted in the center comes out clean. The aroma wafting through your kitchen will be irresistible, and your family will be eagerly waiting!
Step 6: Cool the Cakes
After baking, let the cakes cool in the pans for about 10 minutes. This allows them to set a bit. Then, carefully transfer them to wire racks to cool completely. Cooling is essential; if you frost them too soon, the frosting will melt and slide off. Patience is key here! While they cool, you can start dreaming about that luscious cream cheese frosting.
Step 7: Make the Cream Cheese Frosting
While the cakes are cooling, let’s whip up that delicious cream cheese frosting. In a mixing bowl, beat together the softened cream cheese and unsalted butter until smooth and creamy. Gradually add the powdered sugar and a splash of vanilla extract. Keep mixing until it’s fluffy and spreadable. This frosting is the perfect complement to your Red Velvet Vampire Kiss, adding a tangy sweetness that balances the cake beautifully!
Step 8: Frost the Cake
Now for the grand finale! Once the cakes are completely cool, place one layer on a serving plate. Spread a generous amount of frosting on top, then gently place the second layer on top. Frost the top and sides of the cake, making it as pretty as you like. Don’t worry about perfection; a little rustic charm adds character! Your Red Velvet Vampire Kiss is now ready to impress!
Tips for Success
- Always use room temperature ingredients for a smoother batter.
- Don’t skip the sifting step; it ensures a light and fluffy cake.
- For a deeper red color, feel free to add a bit more food coloring.
- Let the cakes cool completely before frosting to avoid melting.
- Use a bench scraper for smooth frosting on the sides.
Equipment Needed
- Two 9-inch round cake pans (or one 9×13-inch pan for a single layer)
- Mixing bowls (a large one for dry ingredients and a medium one for wet)
- Whisk (or an electric mixer for ease)
- Spatula (for smoothing the batter and frosting)
- Wire racks (for cooling the cakes)
Variations of Red Velvet Vampire Kiss
- Chocolate Chip Red Velvet: Add semi-sweet chocolate chips to the batter for a delightful surprise in every bite.
- Gluten-Free Option: Substitute all-purpose flour with a gluten-free blend to make this cake suitable for gluten-sensitive friends.
- Vegan Version: Replace eggs with flaxseed meal and use plant-based butter and cream cheese for a vegan-friendly treat.
- Spiced Red Velvet: Add a pinch of cinnamon or nutmeg to the batter for a warm, spiced flavor that’s perfect for fall.
- Red Velvet Cupcakes: Transform this recipe into cupcakes for easy serving at parties or gatherings.
Serving Suggestions for Red Velvet Vampire Kiss
- Pair with a scoop of vanilla ice cream for a delightful contrast.
- Serve alongside a warm cup of spiced chai or coffee to enhance the flavors.
- Garnish with fresh berries or edible flowers for a stunning presentation.
- Slice into generous pieces and serve on festive Halloween-themed plates.
FAQs about Red Velvet Vampire Kiss
Can I make the Red Velvet Vampire Kiss ahead of time?
Absolutely! This cake can be made a day in advance. Just store it in the refrigerator after frosting. The flavors will meld beautifully overnight, making it even more delicious!
What can I substitute for buttermilk?
If you don’t have buttermilk on hand, you can easily make a substitute. Just mix one cup of milk with a tablespoon of vinegar or lemon juice. Let it sit for about 5 minutes, and you’re good to go!
How do I store leftover Red Velvet Vampire Kiss?
Store any leftovers in an airtight container in the refrigerator. It should stay fresh for about 3-4 days. Just be sure to let it come to room temperature before serving for the best flavor!
Can I freeze the Red Velvet Vampire Kiss?
Yes, you can freeze this cake! Wrap it tightly in plastic wrap and then in aluminum foil. It can be frozen for up to three months. Just thaw it in the fridge overnight before serving.
What’s the best way to decorate my Red Velvet Vampire Kiss?
Get creative! You can use sprinkles, chocolate shavings, or even fresh fruit to decorate. For a spooky touch, add some Halloween-themed decorations like candy eyes or edible glitter!
Final Thoughts
Creating the Red Velvet Vampire Kiss is more than just baking; it’s about making memories. The joy of watching your loved ones savor each slice is truly priceless. This cake brings a touch of magic to any occasion, whether it’s a festive Halloween gathering or a cozy family dinner. The rich flavors and stunning appearance will leave everyone enchanted. Plus, it’s a delightful way to show your love through food. So, roll up your sleeves, embrace the mess, and enjoy the sweet rewards of your culinary adventure. Happy baking, my friends!
Print
Red Velvet Vampire Kiss: Indulge in Delectable Bliss!
- Total Time: 1 hour
- Yield: 12 servings 1x
- Diet: Vegetarian
Description
A deliciously rich and moist red velvet cake with a twist, perfect for Halloween or any special occasion.
Ingredients
- 2 cups all-purpose flour
- 1 1/2 cups granulated sugar
- 1 teaspoon baking soda
- 1 teaspoon salt
- 1 teaspoon cocoa powder
- 1 cup vegetable oil
- 1 cup buttermilk, room temperature
- 2 large eggs, room temperature
- 2 tablespoons red food coloring
- 1 teaspoon vanilla extract
- 1 teaspoon white vinegar
- 8 oz cream cheese, softened
- 1/2 cup unsalted butter, softened
- 4 cups powdered sugar
- 1 teaspoon vanilla extract (for frosting)
Instructions
- Preheat the oven to 350°F (175°C) and grease two 9-inch round cake pans.
- In a large bowl, sift together the flour, sugar, baking soda, salt, and cocoa powder.
- In another bowl, mix the oil, buttermilk, eggs, food coloring, vanilla extract, and vinegar until well combined.
- Gradually add the wet ingredients to the dry ingredients, mixing until just combined.
- Divide the batter evenly between the prepared cake pans.
- Bake for 25-30 minutes or until a toothpick inserted in the center comes out clean.
- Let the cakes cool in the pans for 10 minutes, then transfer to wire racks to cool completely.
- For the frosting, beat the cream cheese and butter together until smooth.
- Gradually add the powdered sugar and vanilla extract, mixing until creamy.
- Once the cakes are completely cool, frost the top of one layer, place the second layer on top, and frost the top and sides of the cake.
Notes
- For a more intense red color, add more food coloring as desired.
- Ensure all ingredients are at room temperature for best results.
- This cake can be made a day in advance and stored in the refrigerator.
- Prep Time: 30 minutes
- Cook Time: 30 minutes
- Category: Dessert
- Method: Baking
- Cuisine: American
Nutrition
- Serving Size: 1 slice
- Calories: 350
- Sugar: 30g
- Sodium: 300mg
- Fat: 18g
- Saturated Fat: 8g
- Unsaturated Fat: 8g
- Trans Fat: 0g
- Carbohydrates: 45g
- Fiber: 1g
- Protein: 4g
- Cholesterol: 50mg
Keywords: Red Velvet Vampire Kiss, Red Velvet Cake, Halloween Dessert, Cream Cheese Frosting