Philly Cheesesteak Sliders: A Must-Try Game Day Snack!
Introduction to Philly Cheesesteak Sliders
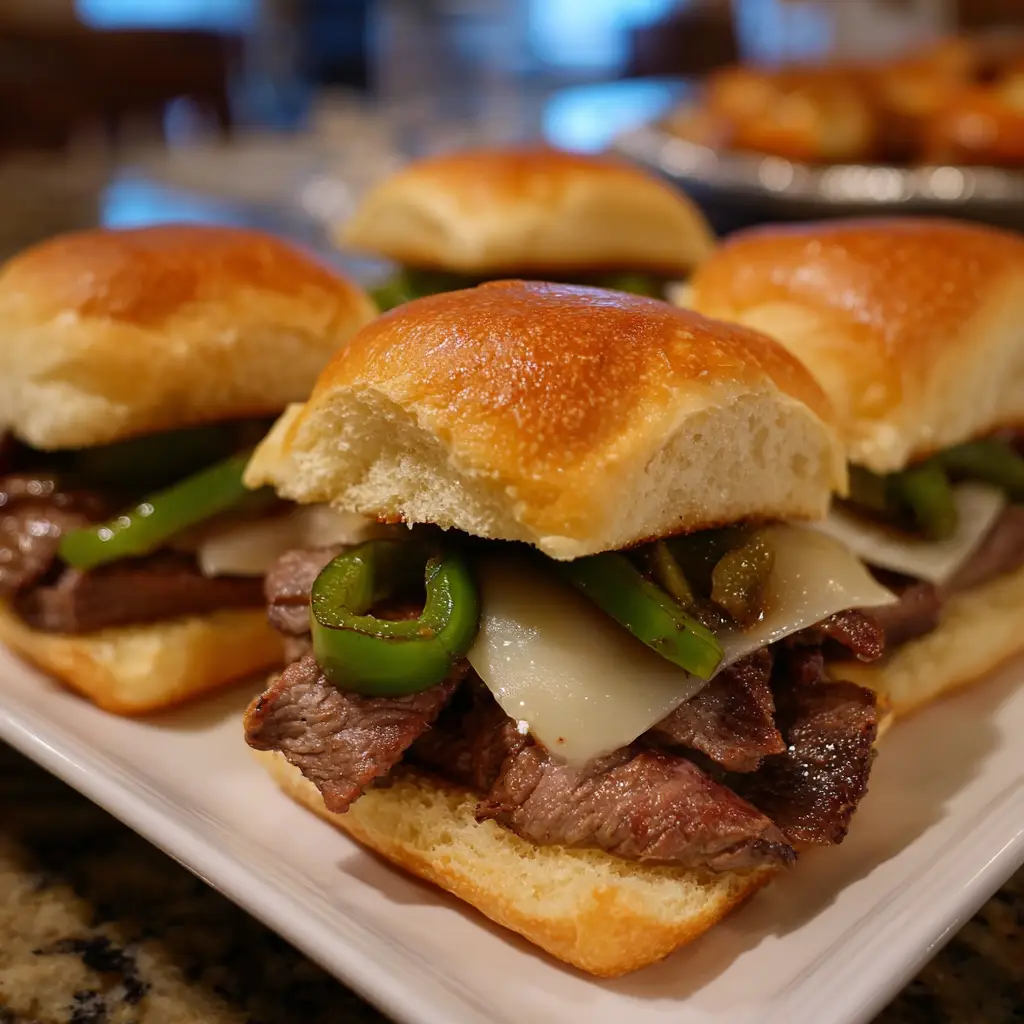
As a busy mom, I know how challenging it can be to whip up something delicious that everyone will love. That’s where my Philly Cheesesteak Sliders come in! These little gems are not just a quick solution for a hectic game day; they’re a crowd-pleaser that will impress your loved ones. Picture tender beef, gooey cheese, and sautéed veggies all nestled in soft slider buns. It’s comfort food at its finest, and trust me, they’ll disappear faster than you can say “touchdown!” Let’s dive into this easy recipe that’s sure to become a family favorite.
Why You’ll Love This Philly Cheesesteak Sliders
These Philly Cheesesteak Sliders are a game-changer for busy days! They come together in just 35 minutes, making them perfect for last-minute gatherings. The combination of savory beef, melted cheese, and colorful veggies creates a flavor explosion that’s hard to resist. Plus, they’re easy to customize, so even picky eaters can find their perfect bite. Trust me, once you try these sliders, they’ll become your go-to snack for any occasion!
Ingredients for Philly Cheesesteak Sliders
Gathering the right ingredients is key to making these Philly Cheesesteak Sliders a hit! Here’s what you’ll need:
- Thinly sliced beef: This is the star of the show! Look for ribeye or sirloin for the best flavor and tenderness.
- Provolone cheese: Melty and creamy, provolone adds that gooey goodness we all crave. You can also use mozzarella for a milder taste.
- Onion: Sliced onions bring sweetness and depth. Yellow or white onions work beautifully in this recipe.
- Green bell pepper: These add a pop of color and crunch. Feel free to swap for red or yellow peppers for a sweeter flavor.
- Olive oil: A splash of olive oil is perfect for sautéing the veggies. It adds richness and helps everything cook evenly.
- Slider buns: Soft and fluffy, slider buns are essential for holding all that delicious filling. Look for fresh ones at your local bakery.
- Salt and pepper: Simple seasonings that enhance the flavors of the beef and veggies. Don’t skip these!
For those who like to get creative, consider adding mushrooms for an earthy flavor or jalapeños for a spicy kick. You can find the exact quantities of these ingredients at the bottom of the article, ready for printing. Happy cooking!
How to Make Philly Cheesesteak Sliders
Making Philly Cheesesteak Sliders is a breeze! Follow these simple steps, and you’ll have a delicious snack ready in no time. Let’s get cooking!
Step 1: Preheat the Oven
First things first, preheat your oven to 350°F (175°C). Preheating is crucial because it ensures even cooking. You want those sliders to bake perfectly, with the cheese melting just right and the buns turning golden brown.
Step 2: Sauté the Vegetables
Next, grab a skillet and heat up some olive oil over medium heat. Add the sliced onions and bell peppers. Sauté them for about 5-7 minutes until they’re soft and slightly caramelized. This step adds a lovely sweetness and depth to your sliders. Keep stirring occasionally to avoid burning. You want them tender but not mushy!
Step 3: Cook the Beef
Now it’s time to add the star of the show—your thinly sliced beef! Toss it into the skillet with the veggies. Cook until the beef is browned, which should take about 5 minutes. Don’t forget to season with salt and pepper to enhance the flavors. The aroma will be irresistible!
Step 4: Assemble the Sliders
Take a baking dish and place the bottom halves of your slider buns in it. Layer the beef and veggie mixture generously on top. Then, sprinkle the shredded provolone cheese over everything. Finally, place the top halves of the buns on. This layering creates a melty, cheesy delight that everyone will love!
Step 5: Bake the Sliders
Pop the assembled sliders into your preheated oven. Bake for about 10-15 minutes. Keep an eye on them! You’ll know they’re done when the cheese is melted and bubbly, and the buns are golden brown. It’s hard to resist that mouthwatering smell!
Step 6: Serve and Enjoy
Once they’re out of the oven, let the sliders cool for a minute. Then, slice them apart and serve warm. These Philly Cheesesteak Sliders are perfect for game day or any gathering. Pair them with your favorite dipping sauce, and watch them disappear!
Tips for Success
- Use fresh ingredients for the best flavor. Fresh veggies and quality beef make a big difference!
- Don’t overcrowd the skillet when sautéing. This helps the veggies caramelize instead of steam.
- Feel free to prep the beef and veggies ahead of time. This saves you precious minutes on game day!
- Experiment with different cheeses like cheddar or gouda for a unique twist.
- Keep an eye on the sliders while baking to avoid overcooking.
Equipment Needed
- Skillet: A non-stick skillet works best, but any frying pan will do.
- Baking dish: A 9×13 inch dish is perfect, or use any oven-safe dish you have on hand.
- Spatula: A sturdy spatula helps with flipping and serving the sliders.
- Knife and cutting board: Essential for slicing veggies and buns.
Variations
- Mushroom Lovers: Add sautéed mushrooms for an earthy flavor that complements the beef beautifully.
- Spicy Kick: Toss in some sliced jalapeños or a drizzle of hot sauce for those who love a bit of heat.
- Cheese Swap: Experiment with different cheeses like cheddar, gouda, or even pepper jack for a unique twist.
- Vegetarian Option: Substitute the beef with sautéed portobello mushrooms or a mix of your favorite veggies for a delicious meatless version.
- Gluten-Free: Use gluten-free slider buns or lettuce wraps to make this dish suitable for gluten-sensitive friends.
Serving Suggestions
- Pair your Philly Cheesesteak Sliders with crispy sweet potato fries for a delightful contrast.
- Serve with a side of tangy coleslaw to add crunch and freshness.
- For drinks, consider ice-cold beer or a refreshing lemonade to complement the flavors.
- Presentation tip: Arrange sliders on a platter with toothpicks for easy serving!
FAQs about Philly Cheesesteak Sliders
As you embark on your culinary adventure with Philly Cheesesteak Sliders, you might have a few questions. Here are some common queries I’ve encountered, along with helpful answers!
Can I make Philly Cheesesteak Sliders ahead of time?
Absolutely! You can prepare the beef and veggie mixture in advance. Just store it in the fridge and assemble the sliders right before baking. This is a great time-saver for busy game days!
What type of beef is best for these sliders?
Thinly sliced ribeye or sirloin works wonders for Philly Cheesesteak Sliders. They’re tender and flavorful, making your sliders a hit. If you’re in a pinch, pre-packaged deli beef can also do the trick!
Can I freeze the sliders?
Yes, you can freeze the assembled sliders before baking. Just wrap them tightly in plastic wrap and foil. When you’re ready to enjoy, bake them straight from the freezer, adding a few extra minutes to the cooking time.
What can I serve with Philly Cheesesteak Sliders?
These sliders pair beautifully with crispy fries, a fresh salad, or even a side of pickles. For drinks, consider serving them with beer or a refreshing iced tea to balance the flavors.
How can I make these sliders healthier?
To lighten things up, use leaner cuts of beef, whole grain slider buns, and load up on veggies. You can also swap out cheese for a lower-fat option. Enjoying delicious food doesn’t have to mean sacrificing health!
Final Thoughts
There’s something truly special about sharing food with family and friends, and these Philly Cheesesteak Sliders are the perfect way to do just that. They bring warmth and joy to any gathering, whether it’s game day or a cozy family dinner. The combination of tender beef, melted cheese, and sautéed veggies creates a symphony of flavors that will have everyone coming back for more. Plus, the ease of preparation means you can spend less time in the kitchen and more time enjoying the company of your loved ones. Trust me, these sliders will become a cherished tradition!
Print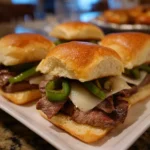
Philly Cheesesteak Sliders: A Must-Try Game Day Snack!
- Total Time: 35 minutes
- Yield: 12 sliders 1x
- Diet: None
Description
Philly Cheesesteak Sliders are a delicious and easy-to-make snack perfect for game day or any gathering. These sliders feature tender beef, melted cheese, and sautéed onions and peppers, all served on soft slider buns.
Ingredients
- 1 lb thinly sliced beef
- 1 cup provolone cheese, shredded
- 1 medium onion, sliced
- 1 medium green bell pepper, sliced
- 2 tablespoons olive oil
- 12 slider buns
- Salt and pepper to taste
Instructions
- Preheat the oven to 350°F (175°C).
- In a skillet, heat olive oil over medium heat and sauté the onions and bell peppers until soft.
- Add the sliced beef to the skillet and cook until browned. Season with salt and pepper.
- Place the bottom halves of the slider buns in a baking dish.
- Layer the beef mixture on the buns and top with shredded provolone cheese.
- Cover with the top halves of the buns.
- Bake in the preheated oven for about 10-15 minutes, or until the cheese is melted and the buns are golden.
- Serve warm and enjoy!
Notes
- Feel free to add mushrooms or other toppings as desired.
- These sliders can be made ahead of time and reheated before serving.
- For a spicier kick, add jalapeños or hot sauce.
- Prep Time: 15 minutes
- Cook Time: 20 minutes
- Category: Appetizer
- Method: Baking
- Cuisine: American
Nutrition
- Serving Size: 1 slider
- Calories: 250
- Sugar: 2g
- Sodium: 500mg
- Fat: 12g
- Saturated Fat: 5g
- Unsaturated Fat: 7g
- Trans Fat: 0g
- Carbohydrates: 30g
- Fiber: 1g
- Protein: 12g
- Cholesterol: 40mg
Keywords: Philly Cheesesteak, Sliders, Game Day Snack, Appetizer