Cherry Kiss Cookies: Discover the Sweetness of Delight!
Introduction to Cherry Kiss Cookies
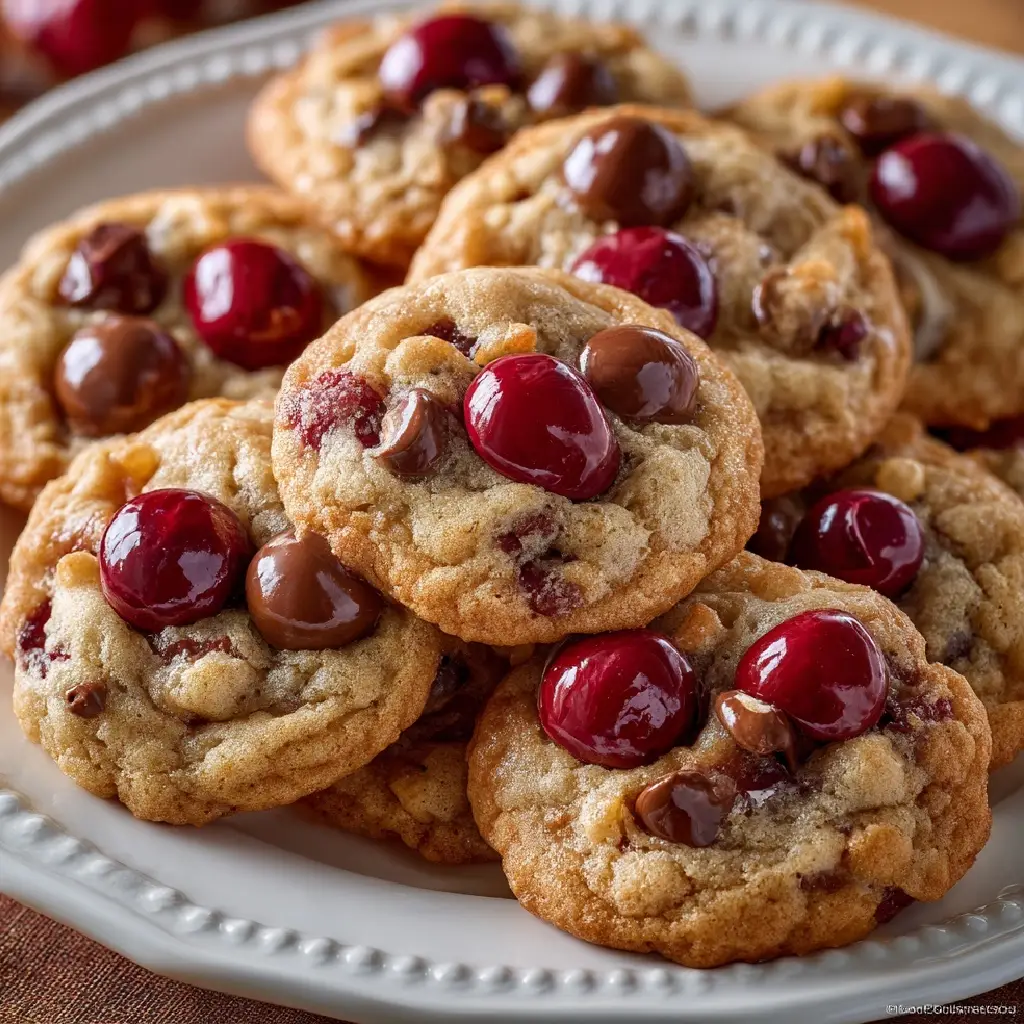
As a busy mom, I know how precious time can be, especially when it comes to baking. That’s why I adore these Cherry Kiss Cookies! They’re not just a treat; they’re a delightful way to bring a smile to your loved ones’ faces. Imagine the sweet aroma of cherries and chocolate wafting through your kitchen, making even the busiest days feel special. These cookies are quick to whip up and perfect for any occasion, whether it’s a family gathering or a simple afternoon snack. Trust me, once you try them, you’ll be hooked!
Why You’ll Love This Cherry Kiss Cookies
These Cherry Kiss Cookies are a game-changer for busy days! They come together in just 32 minutes, making them a quick and satisfying treat. The combination of sweet cherries and rich chocolate kisses creates a flavor explosion that’s hard to resist. Plus, they’re perfect for sharing, whether at a potluck or a cozy family night. You’ll love how easy they are to make and how much joy they bring!
Ingredients for Cherry Kiss Cookies
Gathering the right ingredients is the first step to creating these delightful Cherry Kiss Cookies. Here’s what you’ll need:
- Unsalted butter: This adds richness and helps create a tender cookie. Make sure it’s softened for easy mixing.
- Granulated sugar: This sweetener gives the cookies their delightful sweetness and helps with browning.
- Brown sugar: Packed with moisture, it adds a lovely caramel flavor and chewiness to the cookies.
- Large eggs: They bind the ingredients together and contribute to the cookie’s structure and texture.
- Vanilla extract: A splash of this adds warmth and depth to the flavor profile.
- All-purpose flour: The base of the cookie, providing structure and stability.
- Baking soda: This leavening agent helps the cookies rise and become fluffy.
- Salt: Just a pinch enhances the flavors and balances the sweetness.
- Chopped maraschino cherries: These sweet gems are the star of the show, adding bursts of fruity flavor.
- Chocolate kisses: The perfect finishing touch, these melt in your mouth and complement the cherries beautifully.
For those looking to mix things up, consider using colored chocolate kisses for a festive flair or swapping in dried cherries for a chewier texture. You can find all the exact measurements at the bottom of the article, ready for printing!
How to Make Cherry Kiss Cookies
Step 1: Preheat the Oven
Preheating your oven to 350°F (175°C) is crucial for baking these Cherry Kiss Cookies. It ensures that the cookies bake evenly and rise properly. A hot oven helps create that perfect golden edge while keeping the center soft and chewy. Trust me, this step is non-negotiable!
Step 2: Cream the Butter and Sugars
In a large bowl, cream together the softened unsalted butter, granulated sugar, and brown sugar until the mixture is light and fluffy. This process is essential because it incorporates air into the dough, giving your cookies a delightful texture. The sugars also help to create that beautiful golden color as they caramelize during baking. Take your time here; it’s worth it!
Step 3: Add Eggs and Vanilla
Next, add the large eggs and vanilla extract to the creamed mixture. The eggs act as a binding agent, helping to hold everything together. Meanwhile, the vanilla adds a warm, inviting flavor that complements the cherries and chocolate perfectly. Mix until just combined, and you’ll be on your way to cookie bliss!
Step 4: Combine Dry Ingredients
In a separate bowl, whisk together the all-purpose flour, baking soda, and salt. Mixing these dry ingredients separately is important because it ensures that the baking soda is evenly distributed throughout the flour. This step helps your cookies rise uniformly, giving them that perfect fluffy texture we all love.
Step 5: Mix Wet and Dry Ingredients
Now, gradually add the dry mixture to the wet ingredients, stirring gently until just combined. Be careful not to overmix; this can lead to tough cookies. You want to see a few flour streaks remaining. This is where the magic happens, as the flavors meld together to create a delicious dough bursting with cherry goodness!
Step 6: Fold in Cherries
Gently fold in the chopped maraschino cherries, ensuring they’re well-drained to avoid excess moisture. Folding is a technique that helps maintain the lightness of the dough while evenly distributing the cherries. Each bite will be a delightful surprise of fruity flavor, making these cookies truly special!
Step 7: Shape the Cookies
Using a rounded tablespoon, drop the cookie dough onto ungreased baking sheets, spacing them about two inches apart. This spacing allows the cookies to spread without merging into one another. If you want uniform cookies, consider using a cookie scoop for perfectly shaped treats every time!
Step 8: Bake the Cookies
Bake the cookies in your preheated oven for 10-12 minutes, or until the edges are lightly golden. Keep an eye on them, as oven temperatures can vary. You want them to be set but still soft in the center. This is the sweet spot for that chewy texture!
Step 9: Add Chocolate Kisses
As soon as you pull the cookies from the oven, press a chocolate kiss into the center of each cookie. The heat from the cookies will melt the kisses slightly, creating a gooey, chocolatey center. This step adds a delightful touch that elevates your Cherry Kiss Cookies to a whole new level!
Step 10: Cool and Enjoy
Allow the cookies to cool on the baking sheet for a few minutes before transferring them to a wire rack. This cooling time is essential for the cookies to set properly. The anticipation of tasting these sweet treats is almost unbearable, but trust me, the wait is worth it!
Tips for Success
- Make sure your butter is softened to room temperature for easy creaming.
- Don’t skip the step of draining the cherries well; excess moisture can ruin the dough.
- Use a cookie scoop for uniform cookie sizes and even baking.
- Experiment with different flavored chocolate kisses for a fun twist.
- Store cookies in an airtight container to keep them fresh and chewy.
Equipment Needed
- Mixing bowls: A large bowl for wet ingredients and a medium bowl for dry ingredients. You can use any size you have on hand.
- Electric mixer: A hand mixer works great, but a whisk and some elbow grease will do the trick!
- Baking sheets: Use ungreased sheets or line them with parchment paper for easy cleanup.
- Cookie scoop: This is optional, but it helps create uniform cookies. A tablespoon works just as well!
Variations
- Dried Cherries: Swap maraschino cherries for dried cherries for a chewier texture and a more intense cherry flavor.
- Nutty Delight: Add chopped walnuts or pecans for a crunchy contrast to the soft cookies.
- Gluten-Free Option: Use a gluten-free all-purpose flour blend to make these cookies gluten-free without sacrificing taste.
- Chocolate Lovers: Substitute half of the chocolate kisses with chocolate chips for an extra chocolatey experience.
- Minty Fresh: Use mint chocolate kisses instead of regular ones for a refreshing twist on the classic flavor.
Serving Suggestions
- Pair these Cherry Kiss Cookies with a tall glass of cold milk for a classic treat.
- Serve them alongside a scoop of vanilla ice cream for an indulgent dessert.
- For a festive touch, arrange cookies on a decorative platter with fresh cherries.
- Enjoy with a cup of hot coffee or tea for a cozy afternoon break.
FAQs about Cherry Kiss Cookies
Can I use fresh cherries instead of maraschino cherries?
Absolutely! Fresh cherries can be used, but make sure to pit and chop them first. Just keep in mind that they may add a bit more moisture, so adjust accordingly.
How do I store Cherry Kiss Cookies?
To keep your cookies fresh, store them in an airtight container at room temperature. They’ll stay chewy and delicious for up to a week!
Can I freeze Cherry Kiss Cookies?
Yes! These cookies freeze beautifully. Just place them in a single layer in a freezer-safe container. They can last up to three months in the freezer. Thaw them at room temperature before enjoying!
What can I substitute for chocolate kisses?
If you want to switch things up, try using chocolate chips, peanut butter cups, or even caramel candies. Each option will give your cookies a unique twist!
Are Cherry Kiss Cookies suitable for a gluten-free diet?
Yes! You can easily make these cookies gluten-free by using a gluten-free all-purpose flour blend. Just ensure that all other ingredients are also gluten-free.
Final Thoughts
Making Cherry Kiss Cookies is more than just baking; it’s about creating sweet memories in the kitchen. The joy of mixing, baking, and finally tasting those delightful cookies brings a smile to my face every time. Whether you’re sharing them with family or enjoying them solo with a cup of coffee, these cookies are sure to brighten your day. Plus, the combination of cherries and chocolate is simply irresistible! So, gather your ingredients, roll up your sleeves, and let the magic happen. You’ll find that these cookies are not just treats; they’re little bites of happiness!
Print
Cherry Kiss Cookies: Discover the Sweetness of Delight!
- Total Time: 32 minutes
- Yield: 36 cookies 1x
- Diet: Vegetarian
Description
Cherry Kiss Cookies are delightful treats that combine the sweetness of cherries with the rich flavor of chocolate kisses, perfect for any occasion.
Ingredients
- 1 cup unsalted butter, softened
- 1 cup granulated sugar
- 1 cup brown sugar, packed
- 2 large eggs
- 1 teaspoon vanilla extract
- 3 cups all-purpose flour
- 1 teaspoon baking soda
- 1/2 teaspoon salt
- 1 cup chopped maraschino cherries, drained
- 36 chocolate kisses, unwrapped
Instructions
- Preheat the oven to 350°F (175°C).
- In a large bowl, cream together the butter, granulated sugar, and brown sugar until smooth.
- Add the eggs and vanilla extract, mixing well.
- In another bowl, whisk together the flour, baking soda, and salt.
- Gradually add the dry ingredients to the wet mixture, stirring until combined.
- Fold in the chopped cherries.
- Drop rounded tablespoons of dough onto ungreased baking sheets.
- Bake for 10-12 minutes or until the edges are lightly golden.
- Remove from the oven and immediately press a chocolate kiss into the center of each cookie.
- Allow to cool on the baking sheet for a few minutes before transferring to a wire rack to cool completely.
Notes
- Ensure cherries are well-drained to avoid excess moisture in the dough.
- For a festive touch, use colored chocolate kisses.
- Store cookies in an airtight container to maintain freshness.
- Prep Time: 20 minutes
- Cook Time: 12 minutes
- Category: Dessert
- Method: Baking
- Cuisine: American
Nutrition
- Serving Size: 1 cookie
- Calories: 120
- Sugar: 10g
- Sodium: 50mg
- Fat: 6g
- Saturated Fat: 3g
- Unsaturated Fat: 2g
- Trans Fat: 0g
- Carbohydrates: 15g
- Fiber: 0g
- Protein: 1g
- Cholesterol: 20mg
Keywords: Cherry Kiss Cookies, dessert, cookies, chocolate, cherries