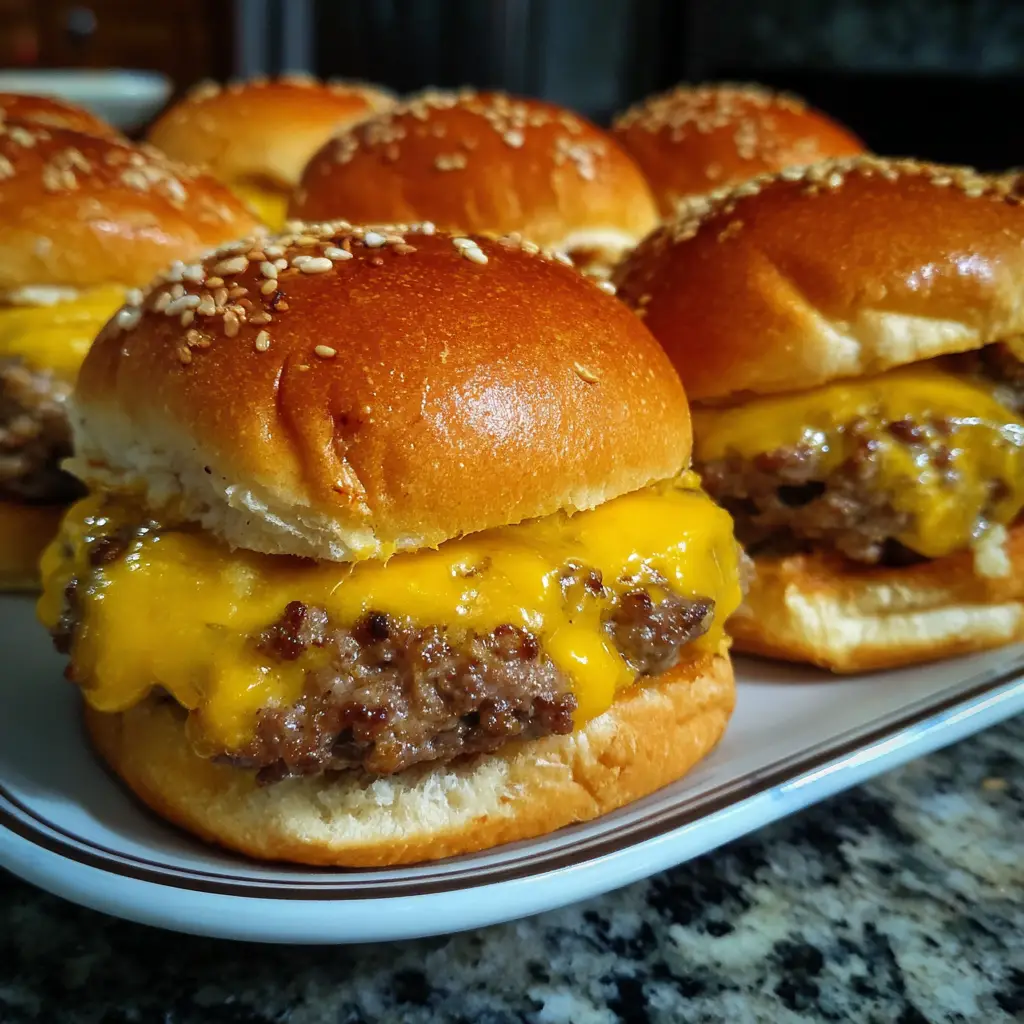
Cheeseburger Sliders: A Quick and Tasty Treat!
Introduction to Cheeseburger Sliders
As a busy mom, I know how challenging it can be to whip up something delicious that everyone will love. That’s where my Cheeseburger Sliders come in! These mini burgers are not just a quick solution for a hectic day; they’re also a fun way to bring the family together. Picture this: a cozy evening, laughter filling the air, and everyone enjoying these tasty bites. Whether it’s a casual weeknight dinner or a gathering with friends, these sliders are sure to impress and satisfy. Let’s dive into this delightful recipe!
Why You’ll Love This Cheeseburger Sliders
These Cheeseburger Sliders are a game-changer for busy families! They’re incredibly easy to make, taking just 25 minutes from start to finish. The best part? They’re packed with flavor that even picky eaters can’t resist. Plus, you can customize them with your favorite toppings, making them perfect for any occasion. Whether it’s a quick weeknight meal or a party appetizer, these sliders are sure to be a hit!
Ingredients for Cheeseburger Sliders
Gathering the right ingredients is the first step to creating these mouthwatering Cheeseburger Sliders. Here’s what you’ll need:
- Ground Beef: The star of the show! Choose lean ground beef for a juicy yet healthier option.
- Shredded Cheddar Cheese: This adds that melty, gooey goodness that makes every bite irresistible.
- Slider Buns: Soft and fluffy, these mini buns are perfect for holding all the delicious fillings.
- Diced Onions: They bring a sweet crunch and enhance the overall flavor of the sliders.
- Sliced Pickles: A tangy addition that cuts through the richness of the beef and cheese.
- Ketchup: A classic condiment that adds a touch of sweetness and moisture.
- Mustard: For a little zing! It complements the flavors beautifully.
- Salt and Pepper: Essential seasonings that elevate the taste of the beef.
Feel free to get creative! You can swap out the cheddar for your favorite cheese or add toppings like jalapeños for a spicy kick. If you’re looking for gluten-free options, there are plenty of slider buns available that cater to dietary needs. For exact quantities, check the bottom of the article where you can find everything available for printing.
How to Make Cheeseburger Sliders
Now that we have our ingredients ready, let’s dive into the fun part: making these delicious Cheeseburger Sliders! Follow these simple steps, and you’ll have a mouthwatering meal in no time.
Step 1: Preheat the Oven
First things first, preheat your oven to 350°F (175°C). Preheating is crucial because it ensures even cooking. You want those sliders to bake perfectly, with the cheese melting just right and the buns turning golden brown. Trust me, this step is worth it!
Step 2: Cook the Ground Beef
Next, grab a skillet and cook the ground beef over medium heat. Stir it occasionally until it’s browned all over. This usually takes about 5-7 minutes. Once it’s cooked, drain any excess fat. This step is important because it keeps your sliders from being greasy. Nobody wants a soggy bun!
Step 3: Add Onions and Seasoning
Now, it’s time to add the diced onions, salt, and pepper to the beef. Cook for another 2 minutes. The onions will soften and release their sweetness, enhancing the flavor of the beef. This is where the magic happens! The aroma will fill your kitchen, making everyone eager for dinner.
Step 4: Assemble the Sliders
Let’s get assembling! Place the slider buns on a baking sheet. Layer the beef mixture generously on the bottom half of each bun. Then, sprinkle the shredded cheddar cheese on top. This cheesy goodness is what makes these sliders so irresistible. Finally, cover them with the top half of the buns. It’s like building a delicious little tower!
Step 5: Bake the Sliders
Pop the baking sheet into your preheated oven and bake for 10-12 minutes. Keep an eye on them! You’ll know they’re done when the cheese is melted and the buns are golden. The smell will be heavenly, and you might find it hard to wait!
Step 6: Serve and Enjoy
Once they’re out of the oven, let the sliders cool for a minute. Serve them warm with pickles, ketchup, and mustard on the side. You can even set up a little slider bar with extra toppings like lettuce, tomatoes, or jalapeños. This way, everyone can customize their own sliders. Enjoy the smiles around the table!
Tips for Success
- Use lean ground beef for a healthier option without sacrificing flavor.
- Don’t skip the draining step; it keeps your sliders from getting soggy.
- Experiment with different cheeses like pepper jack for a spicy twist.
- Make a double batch and freeze extras for a quick meal later.
- Let the sliders cool slightly before serving to avoid burning your mouth!
Equipment Needed
- Skillet: A non-stick skillet works best, but any frying pan will do.
- Baking Sheet: A regular baking sheet is perfect; line it with parchment for easy cleanup.
- Spatula: Use a spatula to flip the beef and assemble the sliders.
- Measuring Cups: Handy for measuring out ingredients, but you can eyeball it too!
Variations
- Turkey Sliders: Swap ground beef for ground turkey for a leaner option that’s still delicious.
- Veggie Sliders: Use black beans or lentils as a base for a hearty vegetarian alternative.
- Cheesy Jalapeño Sliders: Add diced jalapeños to the beef mixture for a spicy kick that cheese lovers will adore.
- BBQ Sliders: Mix in your favorite BBQ sauce with the beef for a smoky flavor that’s perfect for summer gatherings.
- Gluten-Free Sliders: Use gluten-free slider buns to accommodate dietary restrictions without sacrificing taste.
Serving Suggestions
- Fries: Serve with crispy French fries or sweet potato fries for a classic combo.
- Salad: A fresh garden salad adds a light touch to balance the richness of the sliders.
- Drinks: Pair with iced tea, lemonade, or a cold beer for a refreshing experience.
- Presentation: Arrange sliders on a platter with colorful toppings for a festive look.
FAQs about Cheeseburger Sliders
As you embark on your journey to make these delightful Cheeseburger Sliders, you might have a few questions. Here are some common queries I’ve encountered, along with helpful answers to guide you!
Can I make Cheeseburger Sliders ahead of time?
Absolutely! You can prepare the beef mixture and assemble the sliders a few hours in advance. Just cover them and store them in the fridge. When you’re ready, pop them in the oven to bake. This makes for a stress-free meal!
What can I use instead of slider buns?
If you’re looking for alternatives, consider using lettuce wraps for a low-carb option or even mini pita pockets. Both options can hold the delicious fillings while adding a unique twist to your sliders.
How do I store leftover Cheeseburger Sliders?
Store any leftovers in an airtight container in the fridge for up to three days. You can reheat them in the oven or microwave. Just be careful not to overheat, or the buns might get too chewy!
Can I freeze Cheeseburger Sliders?
Yes! These sliders freeze beautifully. Just assemble them without baking, wrap them tightly, and store them in the freezer. When you’re ready to enjoy, bake them straight from the freezer, adding a few extra minutes to the cooking time.
What toppings can I add to my sliders?
The sky’s the limit! You can add toppings like avocado, sautéed mushrooms, or even crispy bacon. Get creative and let your family customize their sliders for a fun meal experience!
Final Thoughts
Making Cheeseburger Sliders is more than just cooking; it’s about creating moments. The joy of watching my family gather around the table, eagerly reaching for these mini delights, warms my heart. Each bite is a burst of flavor, a reminder that simple meals can bring us together. Whether it’s a busy weeknight or a weekend gathering, these sliders are a hit every time. So, roll up your sleeves, embrace the fun of cooking, and enjoy the smiles that come with every slider. Trust me, you’ll be making these again and again!
Print
Cheeseburger Sliders: A Quick and Tasty Treat!
- Total Time: 25 minutes
- Yield: 12 sliders 1x
- Diet: Gluten Free
Description
Cheeseburger sliders are mini burgers that are perfect for parties or a quick meal. They are easy to make and packed with flavor.
Ingredients
- 1 lb ground beef
- 1 cup shredded cheddar cheese
- 12 slider buns
- 1/4 cup diced onions
- 1/4 cup pickles, sliced
- 1/4 cup ketchup
- 1/4 cup mustard
- Salt and pepper to taste
Instructions
- Preheat the oven to 350°F (175°C).
- In a skillet, cook the ground beef over medium heat until browned. Drain excess fat.
- Add diced onions, salt, and pepper to the beef and cook for an additional 2 minutes.
- Place the slider buns on a baking sheet and layer the beef mixture on the bottom half of each bun.
- Top the beef with shredded cheddar cheese.
- Cover with the top half of the buns.
- Bake in the preheated oven for 10-12 minutes, or until the cheese is melted and the buns are golden.
- Serve with pickles, ketchup, and mustard on the side.
Notes
- Feel free to customize with your favorite toppings.
- These sliders can be made ahead of time and reheated.
- For a spicier kick, add jalapeños or hot sauce.
- Prep Time: 10 minutes
- Cook Time: 15 minutes
- Category: Appetizer
- Method: Baking
- Cuisine: American
Nutrition
- Serving Size: 1 slider
- Calories: 250
- Sugar: 2g
- Sodium: 400mg
- Fat: 15g
- Saturated Fat: 7g
- Unsaturated Fat: 5g
- Trans Fat: 0g
- Carbohydrates: 20g
- Fiber: 1g
- Protein: 12g
- Cholesterol: 40mg
Keywords: Cheeseburger Sliders, Mini Burgers, Party Food, Quick Meal