Red Velvet Cupcakes: Indulge in Irresistible Delight!
Introduction to Red Velvet Cupcakes
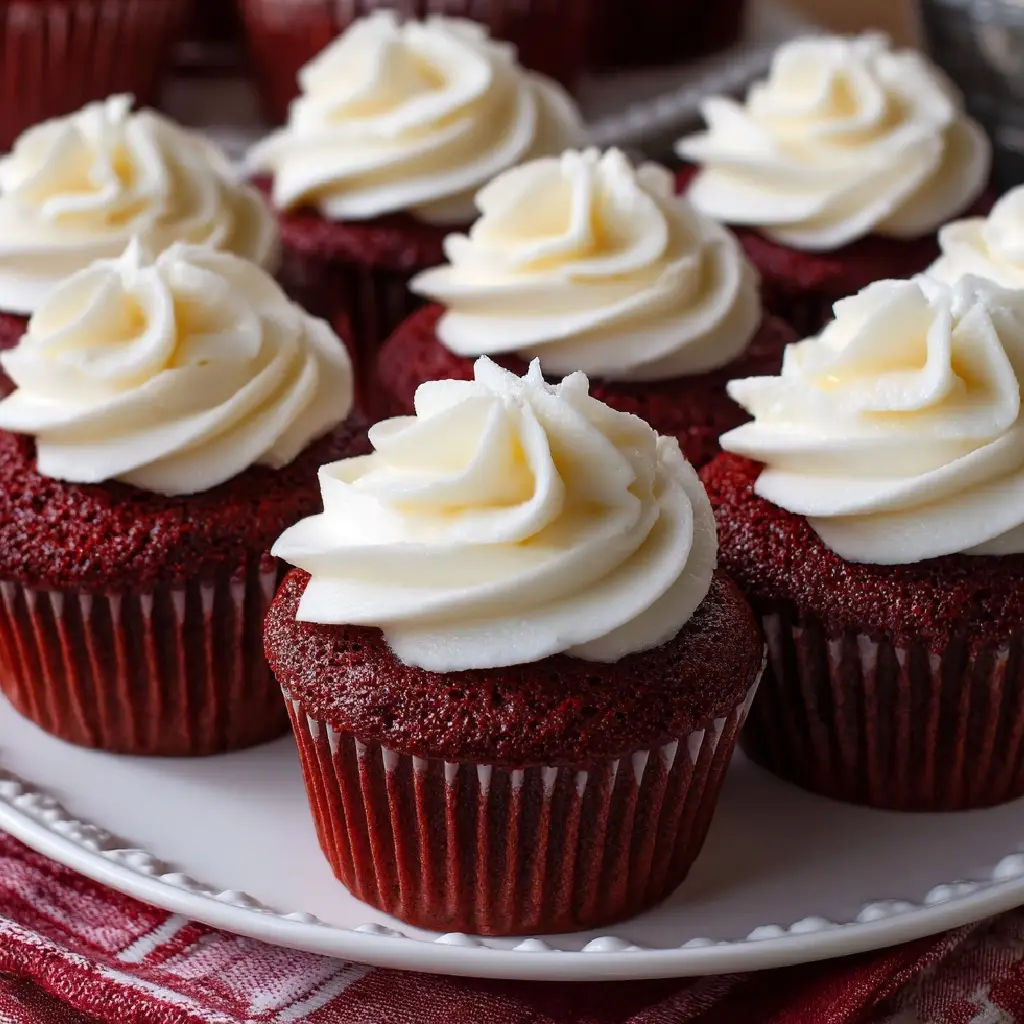
There’s something magical about Red Velvet Cupcakes that makes them a delightful treat for any occasion. Whether you’re celebrating a birthday, hosting a gathering, or simply craving something sweet, these cupcakes are a quick solution for a busy day. I remember the first time I baked them; the vibrant color and rich flavor instantly brightened my kitchen. With their moist texture and luscious cream cheese frosting, they’re sure to impress your loved ones. Trust me, once you take a bite, you’ll understand why these cupcakes are a favorite in my home!
Why You’ll Love This Red Velvet Cupcakes
These Red Velvet Cupcakes are not just a feast for the eyes; they’re a treat for the taste buds too! They come together quickly, making them perfect for busy moms like me. The fluffy texture and rich flavor will have everyone asking for seconds. Plus, the cream cheese frosting adds a tangy sweetness that perfectly complements the cupcakes. Trust me, you’ll love how easy it is to whip up this delightful dessert!
Ingredients for Red Velvet Cupcakes
Gathering the right ingredients is the first step to creating these scrumptious Red Velvet Cupcakes. Here’s what you’ll need:
- All-purpose flour: This is the backbone of your cupcakes, providing structure and fluffiness.
- Granulated sugar: Sweetness is key! It helps create that moist texture we all love.
- Baking soda: This is your leavening agent, giving the cupcakes their lift and lightness.
- Cocoa powder: Just a hint of cocoa adds depth to the flavor without overpowering the red velvet essence.
- Salt: A pinch of salt enhances all the flavors, balancing the sweetness beautifully.
- Vegetable oil: This keeps the cupcakes moist and tender, making each bite melt in your mouth.
- Buttermilk: The secret to that rich flavor and tender crumb! Make sure it’s at room temperature for best results.
- Large eggs: Eggs provide structure and moisture, helping bind everything together.
- Red food coloring: This is what gives the cupcakes their signature vibrant hue. Adjust the amount to your liking!
- Vanilla extract: A splash of vanilla adds warmth and enhances the overall flavor.
- White vinegar: This might seem unusual, but it reacts with the baking soda to create a lighter texture.
- Cream cheese: The star of the frosting! It adds a rich, tangy flavor that pairs perfectly with the sweetness.
- Unsalted butter: This adds creaminess to the frosting, making it smooth and spreadable.
- Powdered sugar: Essential for sweetness and achieving that perfect frosting consistency.
- Vanilla extract (for frosting): Just like in the cupcakes, it adds a lovely flavor to the frosting.
For exact measurements, check the bottom of the article where you can find everything listed for easy printing. Happy baking!
How to Make Red Velvet Cupcakes
Now that you have all your ingredients ready, let’s dive into the fun part: making these delightful Red Velvet Cupcakes! Follow these simple steps, and you’ll be on your way to baking success.
Step 1: Preheat the Oven and Prepare the Pan
First things first, preheat your oven to 350°F (175°C). This step is crucial because it ensures your cupcakes bake evenly. While the oven warms up, line your cupcake pan with liners. This not only makes for easy removal but also adds a pop of color to your presentation!
Step 2: Mix the Dry Ingredients
In a large bowl, whisk together the flour, sugar, baking soda, cocoa powder, and salt. This step is essential because it evenly distributes the leavening agents and flavors. A well-mixed dry blend sets the stage for fluffy cupcakes. Trust me, you want to avoid any clumps!
Step 3: Combine the Wet Ingredients
In another bowl, mix the vegetable oil, buttermilk, eggs, red food coloring, vanilla extract, and white vinegar. Each ingredient plays a role: the oil keeps things moist, while the buttermilk adds richness. The food coloring? That’s your secret weapon for that stunning red hue! Mix until everything is well combined.
Step 4: Combine Wet and Dry Ingredients
Now, it’s time to bring the two mixtures together. Gradually add the wet ingredients to the dry ingredients. Mix gently until just combined. Overmixing can lead to dense cupcakes, and we want them light and fluffy! A few lumps are perfectly fine.
Step 5: Fill the Cupcake Liners
Using a scoop or a measuring cup, fill each cupcake liner about two-thirds full with batter. This allows room for the cupcakes to rise without overflowing. If you have a little extra batter, don’t worry! Just bake a few mini cupcakes for a sweet treat.
Step 6: Bake the Cupcakes
Place the cupcake pan in the preheated oven and bake for 20-22 minutes. To check for doneness, insert a toothpick into the center of a cupcake. If it comes out clean or with a few crumbs, they’re ready! Keep an eye on them; every oven is a little different.
Step 7: Cool the Cupcakes
Once baked, remove the cupcakes from the oven and let them cool in the pan for about 5 minutes. Then, transfer them to a wire rack to cool completely. This step is vital because frosting warm cupcakes can lead to a melty mess!
Step 8: Make the Cream Cheese Frosting
While the cupcakes cool, let’s whip up that luscious cream cheese frosting. In a bowl, beat the softened cream cheese and butter until smooth. Gradually add the powdered sugar and vanilla extract, mixing until creamy. If it’s too thick, a splash of milk can help achieve the perfect consistency.
Step 9: Frost the Cupcakes
Now comes the fun part—frosting! Use a piping bag for a beautiful swirl, or simply spread it on with a knife. Don’t be shy; a generous layer of frosting is what makes these Red Velvet Cupcakes truly irresistible. Add sprinkles or a dusting of cocoa powder for an extra touch!
Tips for Success
- Always use room temperature ingredients for a smoother batter.
- Don’t skip the vinegar; it helps create that light texture.
- For even baking, rotate the cupcake pan halfway through the baking time.
- Let the cupcakes cool completely before frosting to avoid melting.
- Experiment with different food coloring brands for vibrant results.
Equipment Needed
- Cupcake pan: A standard 12-cup pan works perfectly. If you don’t have one, use a muffin tin.
- Mixing bowls: A large bowl for dry ingredients and a medium bowl for wet ingredients. Any size will do!
- Whisk: Essential for mixing. A fork can work in a pinch.
- Measuring cups and spoons: Accurate measurements are key. Use a kitchen scale if you prefer precision.
- Piping bag or spatula: For frosting. A zip-top bag with a corner cut off can substitute!
Variations of Red Velvet Cupcakes
- Chocolate Chip Red Velvet: Add semi-sweet chocolate chips to the batter for a delightful surprise in every bite.
- Gluten-Free Option: Substitute all-purpose flour with a gluten-free blend to make these cupcakes suitable for gluten-sensitive friends.
- Vegan Red Velvet: Replace eggs with flaxseed meal and use plant-based milk and vegan butter for a delicious dairy-free version.
- Red Velvet Mini Cakes: Bake the batter in small cake pans instead of cupcake liners for a charming mini cake presentation.
- Spiced Red Velvet: Add a pinch of cinnamon or nutmeg to the batter for a warm, spiced flavor twist.
Serving Suggestions for Red Velvet Cupcakes
- Pair with Coffee: A rich cup of coffee complements the sweetness perfectly.
- Serve with Ice Cream: A scoop of vanilla or cream cheese ice cream adds a delightful contrast.
- Presentation: Arrange on a decorative platter and garnish with fresh berries for a pop of color.
- Festive Touch: Use themed liners and sprinkles for special occasions to elevate the presentation.
FAQs about Red Velvet Cupcakes
As a passionate home cook, I often get questions about Red Velvet Cupcakes. Here are some common queries that might help you on your baking journey!
Can I make these cupcakes ahead of time?
Absolutely! You can bake the cupcakes a day in advance. Just store them in an airtight container at room temperature. Frost them on the day you plan to serve for the best flavor and texture.
What can I substitute for buttermilk?
If you don’t have buttermilk on hand, you can make a quick substitute. Just mix one cup of milk with one tablespoon of vinegar or lemon juice. Let it sit for about 5 minutes, and you’re good to go!
How do I store leftover cupcakes?
Store any leftover Red Velvet Cupcakes in an airtight container at room temperature for up to three days. If you want to keep them longer, consider refrigerating them for up to a week.
Can I freeze Red Velvet Cupcakes?
Yes! You can freeze the unfrosted cupcakes for up to three months. Just wrap them tightly in plastic wrap and place them in a freezer bag. Thaw them in the fridge before frosting and serving.
What’s the best way to frost these cupcakes?
For a beautiful finish, use a piping bag fitted with a star tip. If you prefer a more rustic look, a simple spatula works just as well. Don’t forget to add a sprinkle of cocoa powder or festive sprinkles for that extra touch!
Final Thoughts
Baking Red Velvet Cupcakes is more than just a recipe; it’s an experience filled with joy and creativity. The vibrant color and rich flavor bring smiles to faces, making them perfect for any occasion. I love how these cupcakes can turn an ordinary day into something special, whether it’s a family gathering or a simple treat for myself. Each bite is a reminder of the love and care that goes into homemade desserts. So, roll up your sleeves, embrace the mess, and enjoy the sweet rewards of your baking adventure. Trust me, you won’t regret it!
Print
Red Velvet Cupcakes: Indulge in Irresistible Delight!
- Total Time: 42 minutes
- Yield: 12 cupcakes 1x
- Diet: Vegetarian
Description
Deliciously moist and fluffy red velvet cupcakes topped with cream cheese frosting, perfect for any occasion.
Ingredients
- 1 1/2 cups all-purpose flour
- 1 cup granulated sugar
- 1 teaspoon baking soda
- 1 teaspoon cocoa powder
- 1 teaspoon salt
- 1 cup vegetable oil
- 1 cup buttermilk, room temperature
- 2 large eggs
- 2 tablespoons red food coloring
- 1 teaspoon vanilla extract
- 1 teaspoon white vinegar
- 8 oz cream cheese, softened
- 1/2 cup unsalted butter, softened
- 4 cups powdered sugar
- 1 teaspoon vanilla extract (for frosting)
Instructions
- Preheat the oven to 350°F (175°C) and line a cupcake pan with liners.
- In a large bowl, whisk together flour, sugar, baking soda, cocoa powder, and salt.
- In another bowl, mix oil, buttermilk, eggs, food coloring, vanilla extract, and vinegar until well combined.
- Gradually add the wet ingredients to the dry ingredients and mix until just combined.
- Fill each cupcake liner about 2/3 full with batter.
- Bake for 20-22 minutes or until a toothpick inserted comes out clean.
- Let the cupcakes cool completely before frosting.
- For the frosting, beat cream cheese and butter until smooth, then gradually add powdered sugar and vanilla extract until creamy.
- Frost the cooled cupcakes and enjoy!
Notes
- Ensure the buttermilk is at room temperature for best results.
- Adjust the amount of food coloring to achieve desired color intensity.
- Store cupcakes in an airtight container at room temperature for up to 3 days.
- Prep Time: 20 minutes
- Cook Time: 22 minutes
- Category: Dessert
- Method: Baking
- Cuisine: American
Nutrition
- Serving Size: 1 cupcake
- Calories: 320
- Sugar: 30g
- Sodium: 200mg
- Fat: 15g
- Saturated Fat: 8g
- Unsaturated Fat: 5g
- Trans Fat: 0g
- Carbohydrates: 45g
- Fiber: 1g
- Protein: 3g
- Cholesterol: 50mg
Keywords: Red Velvet Cupcakes, Cupcake Recipe, Dessert, Baking