Strawberry Lemonade Bars: Perfect Summer Treats to Try!

Introduction to Strawberry Lemonade Bars
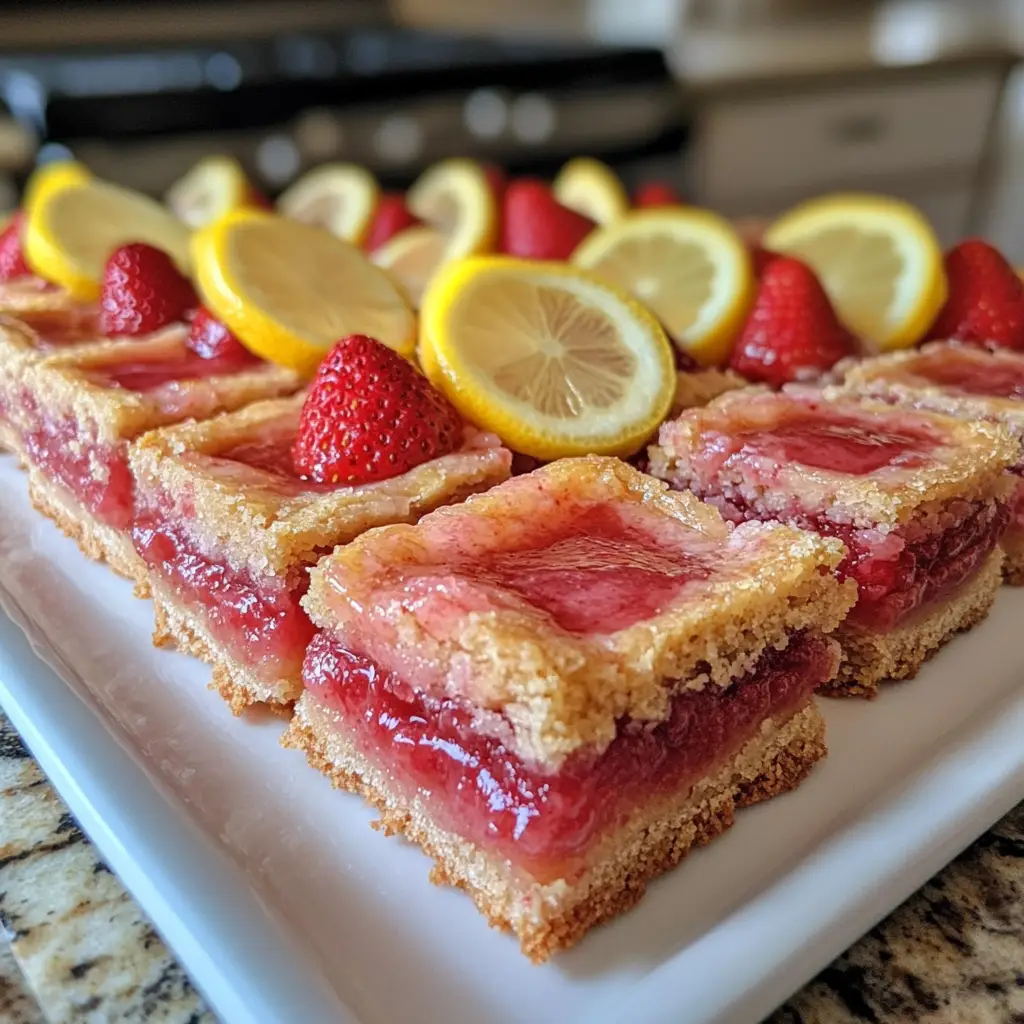
As summer rolls in, I find myself craving something light and refreshing. That’s where these delightful Strawberry Lemonade Bars come into play! They’re the perfect blend of sweet strawberries and zesty lemon, making them a fantastic treat for any gathering. Whether you’re hosting a backyard barbecue or just need a quick dessert for the family, these bars are a lifesaver. They’re easy to whip up, and trust me, they’ll impress your loved ones. So, let’s dive into this delicious recipe that’s sure to brighten your summer days!
Why You’ll Love This Strawberry Lemonade Bars
These Strawberry Lemonade Bars are not just a treat; they’re a game-changer for busy moms and professionals alike. They come together in under an hour, making them a quick solution for those hectic summer days. The balance of sweet and tart flavors is simply irresistible, and they’re perfect for sharing. Plus, they can be made ahead of time, so you can enjoy more moments with your loved ones!
Ingredients for Strawberry Lemonade Bars
Gathering the right ingredients is the first step to creating these delightful Strawberry Lemonade Bars. Here’s what you’ll need:
- All-purpose flour: This forms the base of your crust, giving it a nice texture.
- Granulated sugar: Sweetens the crust and filling, balancing the tartness of the lemon.
- Unsalted butter: Adds richness to the crust. You can substitute with coconut oil for a dairy-free option.
- Salt: Just a pinch enhances the flavors, making everything pop.
- Large eggs: These help bind the filling together, giving it a lovely, custardy texture.
- Fresh strawberries: Pureed for that vibrant flavor and color. Frozen strawberries can work in a pinch, just thaw and drain excess liquid.
- Fresh lemon juice: The star of the show! It brings that zesty brightness. Bottled lemon juice can be used, but fresh is always best.
- Lemon zest: Adds an extra punch of lemon flavor. Feel free to add more if you love that citrus kick!
- Powdered sugar: For dusting on top, giving your bars a beautiful finish. You can skip this if you prefer a less sweet treat.
For exact measurements, check the bottom of the article where you can find everything listed for easy printing. Happy baking!
How to Make Strawberry Lemonade Bars
Now that we have our ingredients ready, let’s get to the fun part—making these Strawberry Lemonade Bars! Follow these simple steps, and you’ll have a delicious treat in no time.
Step 1: Preheat the Oven
First things first, preheat your oven to 350°F (175°C). This step is crucial because it ensures even baking. While the oven warms up, grab your baking dish and grease it lightly. This will help your bars come out easily once they’re baked.
Step 2: Prepare the Crust
In a mixing bowl, combine the all-purpose flour, granulated sugar, melted butter, and salt. Use a fork or your fingers to mix until the texture resembles coarse crumbs. You want it crumbly but still able to hold together when pressed. This will be the base of your bars, so make sure it’s well mixed!
Step 3: Bake the Crust
Now, press the crust mixture firmly into the bottom of your prepared baking dish. Bake it in the preheated oven for about 15 minutes. Keep an eye on it; you’re looking for a light golden color. This step creates a sturdy foundation for your luscious filling.
Step 4: Make the Filling
While the crust is baking, let’s whip up the filling! In a separate bowl, whisk together the eggs, strawberry puree, fresh lemon juice, and lemon zest. Mix until everything is well combined and smooth. The filling should be a lovely pink color, bursting with flavor. If it’s too thick, you can add a splash of water to loosen it up.
Step 5: Combine and Bake Again
Once your crust is done baking, carefully pour the strawberry mixture over it. Spread it evenly with a spatula. Pop it back into the oven and bake for another 20-25 minutes. You’ll know it’s ready when the filling is set and slightly jiggles in the center. It’s like a little dance of joy!
Step 6: Cool and Dust
After baking, remove the dish from the oven and let it cool completely. This is the hardest part, but trust me, it’s worth the wait! Once cooled, dust the top with powdered sugar for that beautiful finishing touch. Slice into bars, and you’re ready to serve these delightful Strawberry Lemonade Bars!
Tips for Success
- Use fresh strawberries for the best flavor; they make a world of difference!
- Don’t skip the cooling step; it helps the bars set properly.
- For a fun twist, try adding a splash of vanilla extract to the filling.
- Keep an eye on the baking time; ovens can vary, so check for doneness.
- Store leftovers in the fridge for a refreshing treat all week!
Equipment Needed
- Baking dish: A 9×9 inch dish works perfectly. You can also use a larger dish for thinner bars.
- Mixing bowls: A couple of medium-sized bowls will do the trick.
- Whisk: Essential for mixing the filling. A fork can work in a pinch!
- Spatula: Great for spreading the filling evenly over the crust.
- Measuring cups and spoons: For accurate ingredient measurements.
Variations of Strawberry Lemonade Bars
- Berry Medley: Swap out strawberries for a mix of berries like blueberries and raspberries for a colorful twist.
- Gluten-Free Option: Use a gluten-free flour blend instead of all-purpose flour to make these bars suitable for gluten-sensitive friends.
- Vegan Version: Replace eggs with flaxseed meal mixed with water and use coconut oil instead of butter for a plant-based treat.
- Herbal Infusion: Add a hint of fresh mint or basil to the filling for a refreshing herbal note that complements the lemon.
- Chocolate Drizzle: Once cooled, drizzle melted dark chocolate over the bars for a decadent touch that pairs beautifully with the fruity flavors.
Serving Suggestions for Strawberry Lemonade Bars
- Pair with a scoop of vanilla ice cream for a delightful contrast of flavors.
- Serve alongside fresh fruit salad for a colorful and refreshing plate.
- Complement with iced tea or lemonade for a perfect summer drink.
- Garnish with fresh mint leaves for a pop of color and flavor.
- Present on a beautiful platter, dusted with extra powdered sugar for an elegant touch.
FAQs about Strawberry Lemonade Bars
As you embark on your journey to make these delightful Strawberry Lemonade Bars, you might have a few questions. Here are some common queries I’ve encountered, along with helpful answers!
Can I use frozen strawberries instead of fresh?
Absolutely! Frozen strawberries can work just fine. Just make sure to thaw them and drain any excess liquid before pureeing. This way, you’ll still get that vibrant flavor!
How do I store leftover Strawberry Lemonade Bars?
Store any leftovers in an airtight container in the refrigerator. They’ll stay fresh for up to a week. Enjoy them chilled for a refreshing treat!
Can I make these bars ahead of time?
Yes! These bars are perfect for making ahead. Just bake them, cool completely, and store in the fridge. They’ll be ready to serve when you are!
What can I substitute for eggs in the recipe?
If you’re looking for an egg substitute, try using flaxseed meal mixed with water. It works wonderfully and keeps the bars moist!
Can I add more lemon juice for extra tartness?
Definitely! If you love that zesty kick, feel free to add a bit more lemon juice or zest. Just keep in mind that it may alter the texture slightly, so adjust accordingly.
Final Thoughts
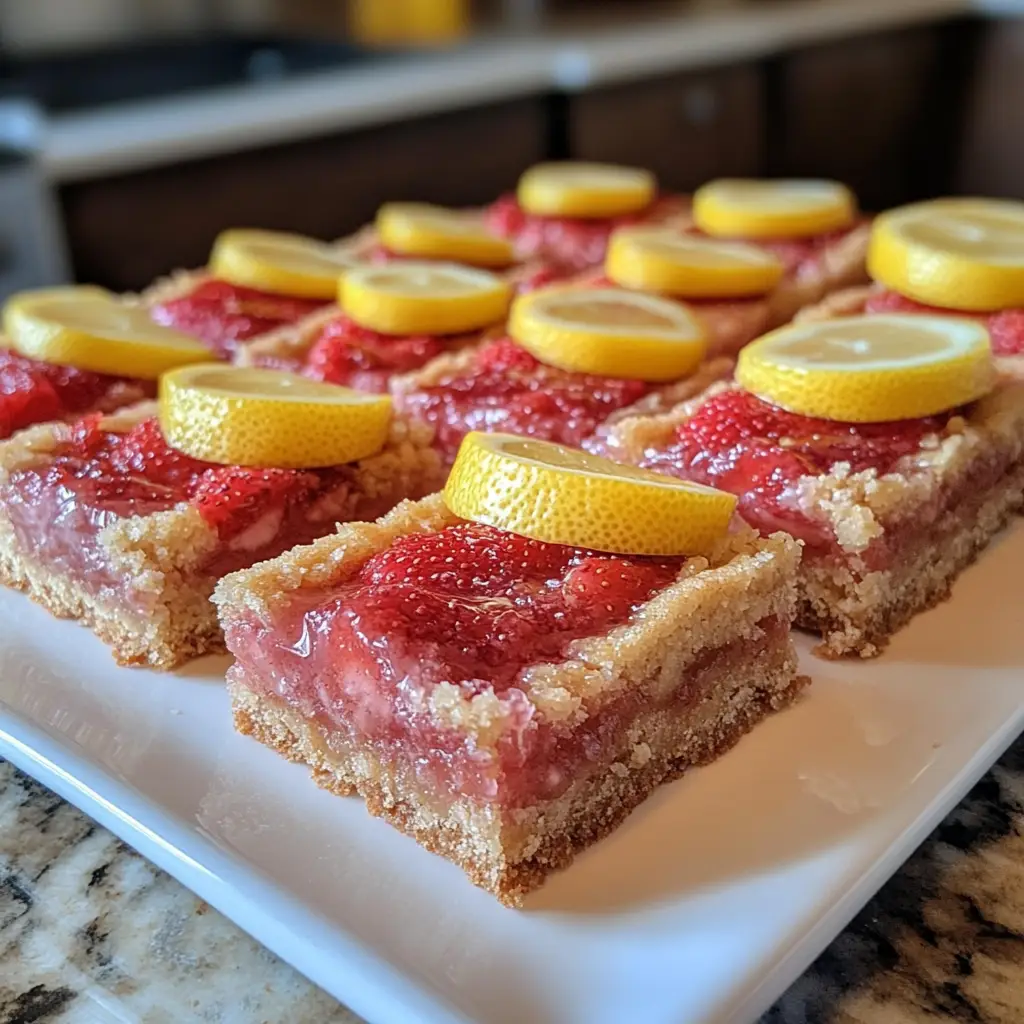
Making these Strawberry Lemonade Bars is more than just baking; it’s about creating joyful moments with family and friends. The vibrant colors and refreshing flavors bring a smile to everyone’s face, making them perfect for summer gatherings. I love how easy they are to prepare, allowing me to spend more time enjoying the company of my loved ones. Whether you’re savoring a bar on a sunny afternoon or sharing them at a picnic, these treats are sure to become a cherished favorite. So, roll up your sleeves and let the summer sweetness begin!
Print
Strawberry Lemonade Bars: Perfect Summer Treats to Try!
- Total Time: 55 minutes
- Yield: 12 bars 1x
- Diet: Vegetarian
Description
Strawberry Lemonade Bars are a refreshing and tangy dessert perfect for summer gatherings, combining the sweetness of strawberries with the tartness of lemon.
Ingredients
- 1 cup all-purpose flour
- 1/2 cup granulated sugar
- 1/4 cup unsalted butter, melted
- 1/4 teaspoon salt
- 2 large eggs
- 1 cup fresh strawberries, pureed
- 1/2 cup fresh lemon juice
- 1 teaspoon lemon zest
- 1/4 cup powdered sugar (for dusting)
Instructions
- Preheat the oven to 350°F (175°C) and grease a baking dish.
- In a bowl, mix flour, granulated sugar, melted butter, and salt until crumbly.
- Press the mixture into the bottom of the prepared baking dish to form a crust.
- Bake the crust for 15 minutes or until lightly golden.
- In another bowl, whisk together eggs, strawberry puree, lemon juice, and lemon zest.
- Pour the strawberry mixture over the baked crust.
- Bake for an additional 20-25 minutes until set.
- Allow to cool, then dust with powdered sugar before serving.
Notes
- For a stronger lemon flavor, add more lemon zest.
- These bars can be stored in the refrigerator for up to a week.
- Serve chilled for a refreshing treat.
- Prep Time: 15 minutes
- Cook Time: 40 minutes
- Category: Dessert
- Method: Baking
- Cuisine: American
Nutrition
- Serving Size: 1 bar
- Calories: 150
- Sugar: 10g
- Sodium: 50mg
- Fat: 5g
- Saturated Fat: 3g
- Unsaturated Fat: 2g
- Trans Fat: 0g
- Carbohydrates: 22g
- Fiber: 1g
- Protein: 2g
- Cholesterol: 30mg
Keywords: Strawberry Lemonade Bars, Summer Desserts, Refreshing Treats