Pumpkin Patch Dirt Cups: A Fun Delicious Delight!

Introduction to Pumpkin Patch Dirt Cups
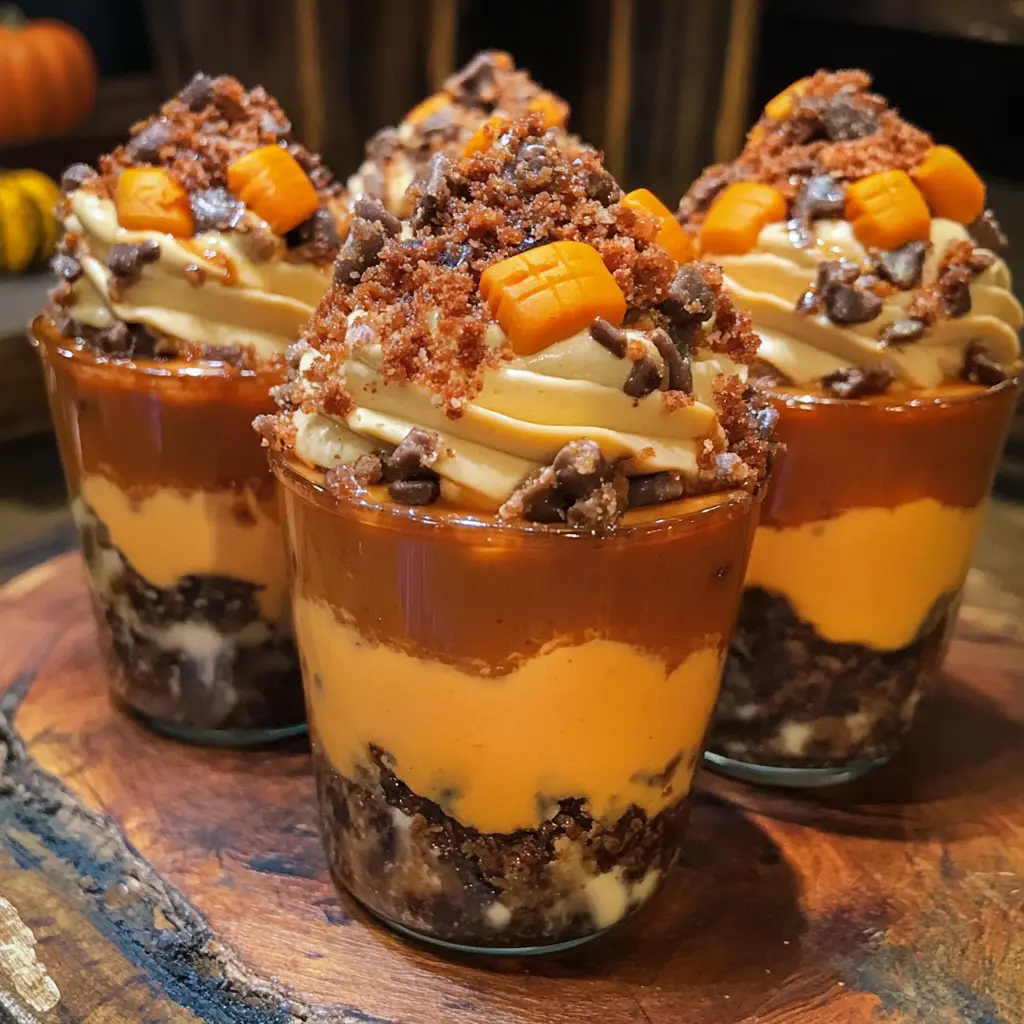
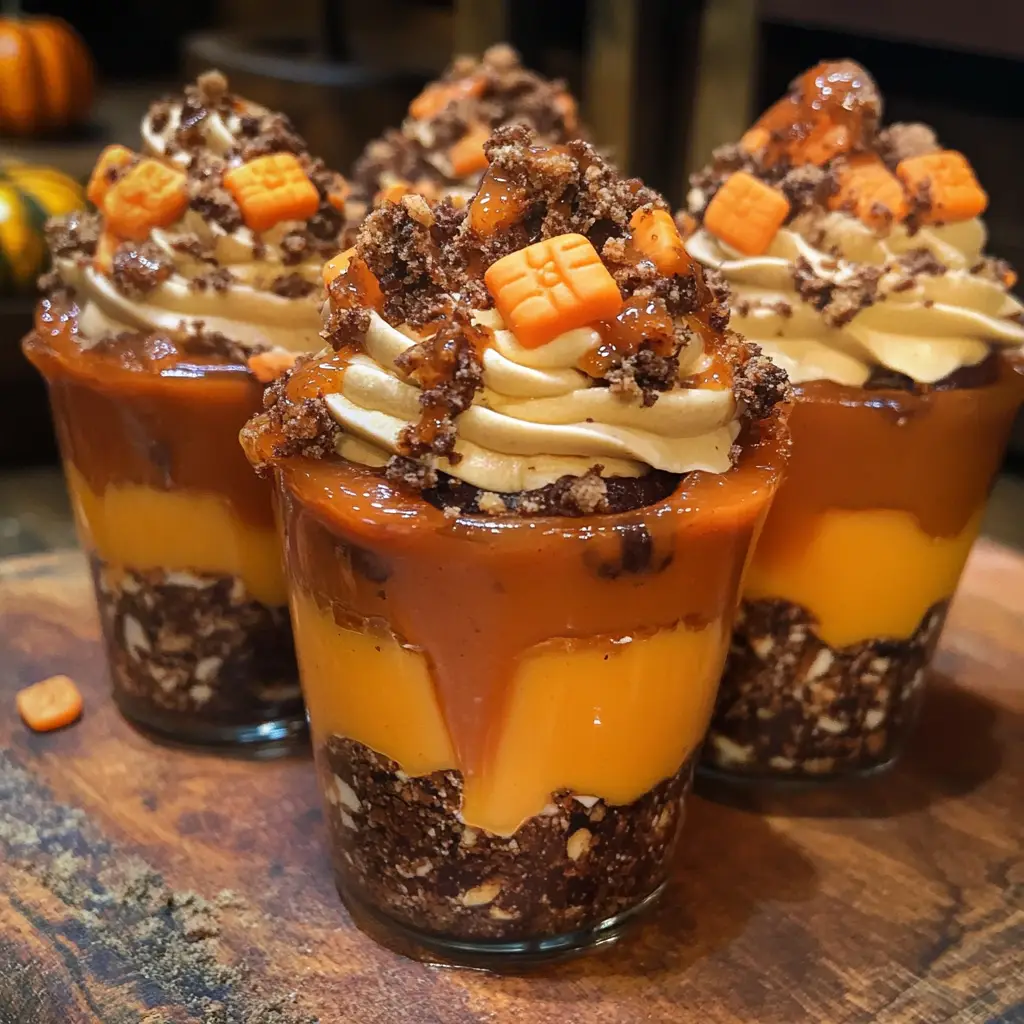
As the leaves turn and the air gets crisp, I find myself craving cozy treats that bring a smile to my family’s faces. That’s where these delightful Pumpkin Patch Dirt Cups come in! They’re not just a dessert; they’re a fun experience for everyone. Perfect for busy moms like us, this no-bake recipe takes just 15 minutes to whip up. Whether you’re hosting a Halloween party or simply want to surprise your loved ones, these cups are sure to impress. Plus, who can resist the charm of chocolate pudding layered with crushed cookies and gummy worms?
Why You’ll Love This Pumpkin Patch Dirt Cups
These Pumpkin Patch Dirt Cups are a lifesaver for busy days! They come together in a flash, making them perfect for last-minute gatherings or a sweet treat after dinner. The combination of creamy chocolate pudding and crunchy cookie layers is simply irresistible. Plus, the kids will love the playful gummy worms! It’s a dessert that brings joy and laughter, making it a must-try for any fall celebration.
Ingredients for Pumpkin Patch Dirt Cups
Gathering the right ingredients is half the fun! Here’s what you’ll need to create these delightful Pumpkin Patch Dirt Cups:
- Chocolate pudding mix: This is the star of the show, providing a rich and creamy base that everyone loves.
- Milk: Essential for mixing with the pudding mix, it helps achieve that smooth texture. You can use any type of milk you prefer!
- Crushed chocolate sandwich cookies: These add a crunchy, “dirt-like” layer that contrasts beautifully with the pudding. Feel free to use gluten-free cookies if needed.
- Gummy worms: These playful candies are the perfect finishing touch, adding a whimsical element that kids adore.
- Green candy melts: Melted and drizzled on top, they mimic grass and enhance the festive look of your cups.
- Small plastic pumpkins (optional): These cute decorations can elevate your presentation, making your dessert even more festive.
For exact quantities, check the bottom of the article where you can find a printable version of the recipe. Happy cooking!
How to Make Pumpkin Patch Dirt Cups
Now that you have all your ingredients ready, let’s dive into the fun part—making these delightful Pumpkin Patch Dirt Cups! Follow these simple steps, and you’ll have a festive treat that’s sure to impress.
Step 1: Prepare the Pudding
Start by grabbing a mixing bowl. Whisk together the chocolate pudding mix and milk until it’s smooth and creamy. I love using a whisk for this; it really helps to break up any lumps. The rich chocolate aroma will fill your kitchen, making it hard to resist sneaking a taste!
Step 2: Let It Set
Once your pudding is mixed, it’s time to let it set. Pop it in the refrigerator for about 5 minutes. This step is crucial! It allows the pudding to thicken up, giving you that perfect, velvety texture. Trust me, the wait is worth it!
Step 3: Layer the Cups
Now comes the fun part—layering! Grab your clear cups and start with a generous layer of chocolate pudding. Then, sprinkle a layer of crushed chocolate sandwich cookies on top. This creates that “dirt” effect that makes these cups so charming. Repeat the layers until you reach the top of the cup. It’s like building a little dessert masterpiece!
Step 4: Add the Toppings
Time to get creative! Top your layered cups with gummy worms, letting them peek out as if they’re crawling through the dirt. Then, melt some green candy melts and drizzle them over the top. This mimics grass and adds a pop of color. Your Pumpkin Patch Dirt Cups are starting to look festive!
Step 5: Optional Decoration
If you want to take your dessert to the next level, consider adding small plastic pumpkins on top. They’re adorable and really enhance the Halloween vibe. Plus, it’s a great way to get the kids involved—let them help with the decorating!
Step 6: Serve or Chill
Finally, it’s time to serve! You can enjoy these cups immediately or chill them until you’re ready to serve. If you’re making them ahead of time, just cover them with plastic wrap to keep them fresh. Either way, they’re sure to be a hit!
Tips for Success
- Use a whisk for mixing the pudding; it helps achieve a smooth consistency.
- Chill your cups in the refrigerator for a bit before serving for a refreshing treat.
- Experiment with different cookie types for unique flavors and textures.
- Get the kids involved in decorating; it makes the process more fun!
- Make these cups a day in advance to save time on busy days.
Equipment Needed
- Mixing bowl: A medium-sized bowl works best, but any bowl will do.
- Whisk: A hand whisk is ideal, but a fork can work in a pinch.
- Clear cups: Use any clear cups or small jars to showcase your layers.
- Spatula: A rubber spatula helps with layering and scraping the bowl clean.
Variations of Pumpkin Patch Dirt Cups
- Dark Chocolate Delight: Swap the regular chocolate pudding mix for dark chocolate pudding for a richer flavor that chocolate lovers will adore.
- Healthier Option: Use sugar-free pudding mix and low-fat milk to create a lighter version without sacrificing taste.
- Gluten-Free Treat: Choose gluten-free chocolate sandwich cookies to make these cups suitable for those with gluten sensitivities.
- Fruit Twist: Add layers of fresh fruit like sliced strawberries or bananas between the pudding and cookie layers for a fruity surprise.
- Vegan Version: Use a plant-based chocolate pudding mix and almond or oat milk to create a vegan-friendly dessert.
Serving Suggestions for Pumpkin Patch Dirt Cups
- Pair with warm apple cider for a cozy fall treat.
- Serve alongside mini pumpkin muffins for a delightful dessert spread.
- Garnish with fresh mint leaves for a pop of color and freshness.
- Present in themed Halloween cups for added festive flair.
- Consider a side of whipped cream for an extra creamy touch.
FAQs about Pumpkin Patch Dirt Cups
As you embark on your journey to create these delightful Pumpkin Patch Dirt Cups, you might have a few questions. Here are some common queries I’ve encountered, along with helpful answers to guide you along the way!
Can I make Pumpkin Patch Dirt Cups in advance?
Absolutely! These cups can be made a day in advance. Just store them in the refrigerator, covered with plastic wrap. This not only saves you time but also allows the flavors to meld beautifully.
What can I use instead of chocolate sandwich cookies?
If you’re looking for alternatives, consider using crushed graham crackers or even vanilla wafers. They’ll still give you that fun “dirt” effect while adding a different flavor profile.
How can I make these cups healthier?
To lighten things up, opt for sugar-free pudding mix and low-fat milk. You can also add layers of fresh fruit for a nutritious twist. It’s a great way to sneak in some vitamins!
Can I use different types of candy for decoration?
Of course! Feel free to get creative with your toppings. You can use chocolate rocks, candy corn, or even edible glitter to make your Pumpkin Patch Dirt Cups uniquely yours!
Are these cups suitable for a gluten-free diet?
Yes! Just make sure to use gluten-free chocolate sandwich cookies. This way, everyone can enjoy this festive treat without worry!
Final Thoughts
Creating these Pumpkin Patch Dirt Cups is more than just making a dessert; it’s about crafting joyful moments with your loved ones. The smiles on their faces as they dig into these whimsical treats are priceless. I cherish the laughter and excitement that fills the room when everyone sees the gummy worms peeking out. This recipe is a reminder that even on the busiest days, we can find time to create something special. So, gather your ingredients, invite the kids to help, and enjoy the delightful experience of making these fun, festive cups together!
Print
Pumpkin Patch Dirt Cups: A Fun Delicious Delight!
- Total Time: 15 minutes
- Yield: 4 servings 1x
- Diet: Vegetarian
Description
Pumpkin Patch Dirt Cups are a fun and delicious dessert that combines chocolate pudding, crushed cookies, and gummy worms to create a festive treat perfect for Halloween or any fall celebration.
Ingredients
- 1 package of chocolate pudding mix
- 2 cups of milk
- 1 package of crushed chocolate sandwich cookies
- Gummy worms
- Green candy melts (for decoration)
- Small plastic pumpkins (optional)
Instructions
- In a mixing bowl, whisk together the chocolate pudding mix and milk until smooth.
- Let the pudding set in the refrigerator for about 5 minutes.
- In clear cups, layer the chocolate pudding and crushed cookies to create a ‘dirt’ effect.
- Top with gummy worms and melted green candy to resemble grass.
- Optionally, place small plastic pumpkins on top for decoration.
- Serve immediately or chill until ready to serve.
Notes
- For a more intense chocolate flavor, use dark chocolate pudding mix.
- Feel free to add other candies or decorations to customize your cups.
- These can be made a day in advance and stored in the refrigerator.
- Prep Time: 15 minutes
- Cook Time: 0 minutes
- Category: Dessert
- Method: No-bake
- Cuisine: American
Nutrition
- Serving Size: 1 cup
- Calories: 250
- Sugar: 20g
- Sodium: 150mg
- Fat: 10g
- Saturated Fat: 5g
- Unsaturated Fat: 3g
- Trans Fat: 0g
- Carbohydrates: 35g
- Fiber: 2g
- Protein: 3g
- Cholesterol: 10mg
Keywords: Pumpkin Patch Dirt Cups, Halloween dessert, chocolate pudding, fun dessert