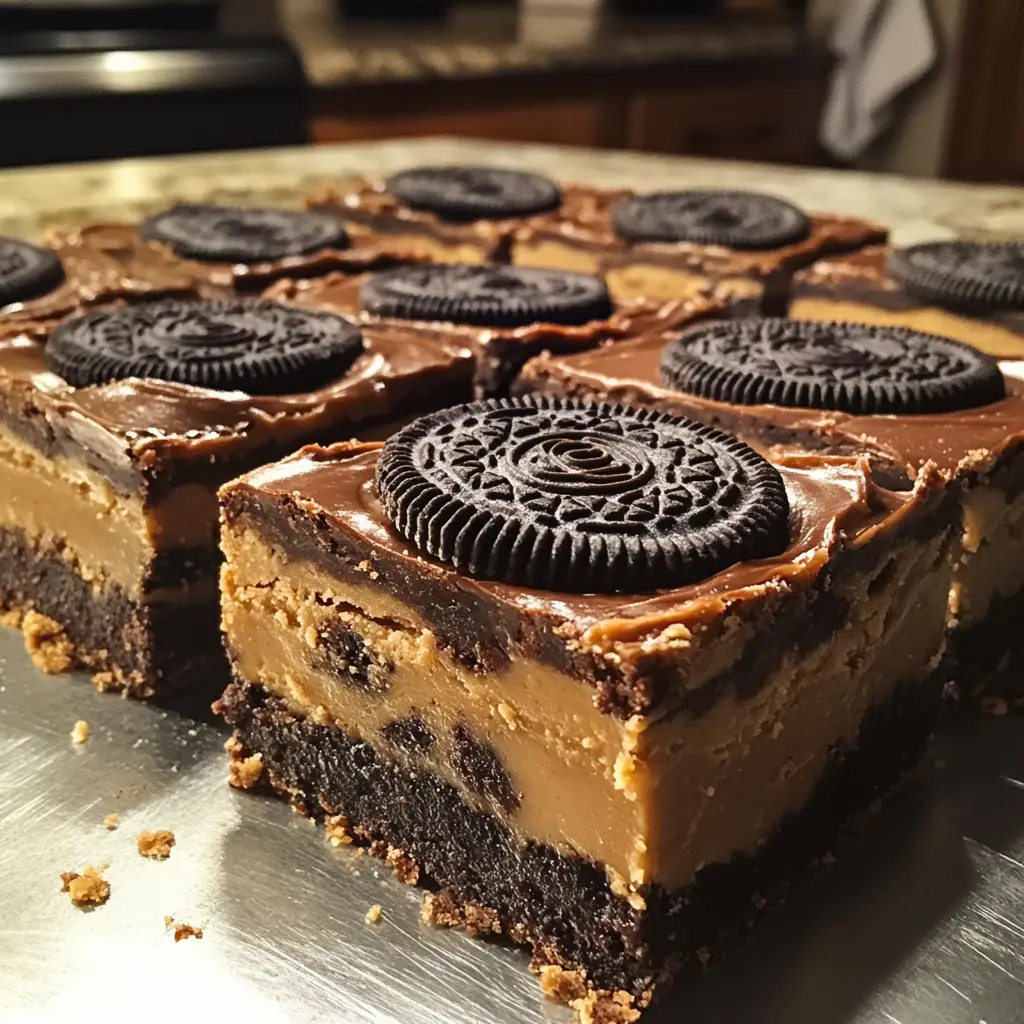
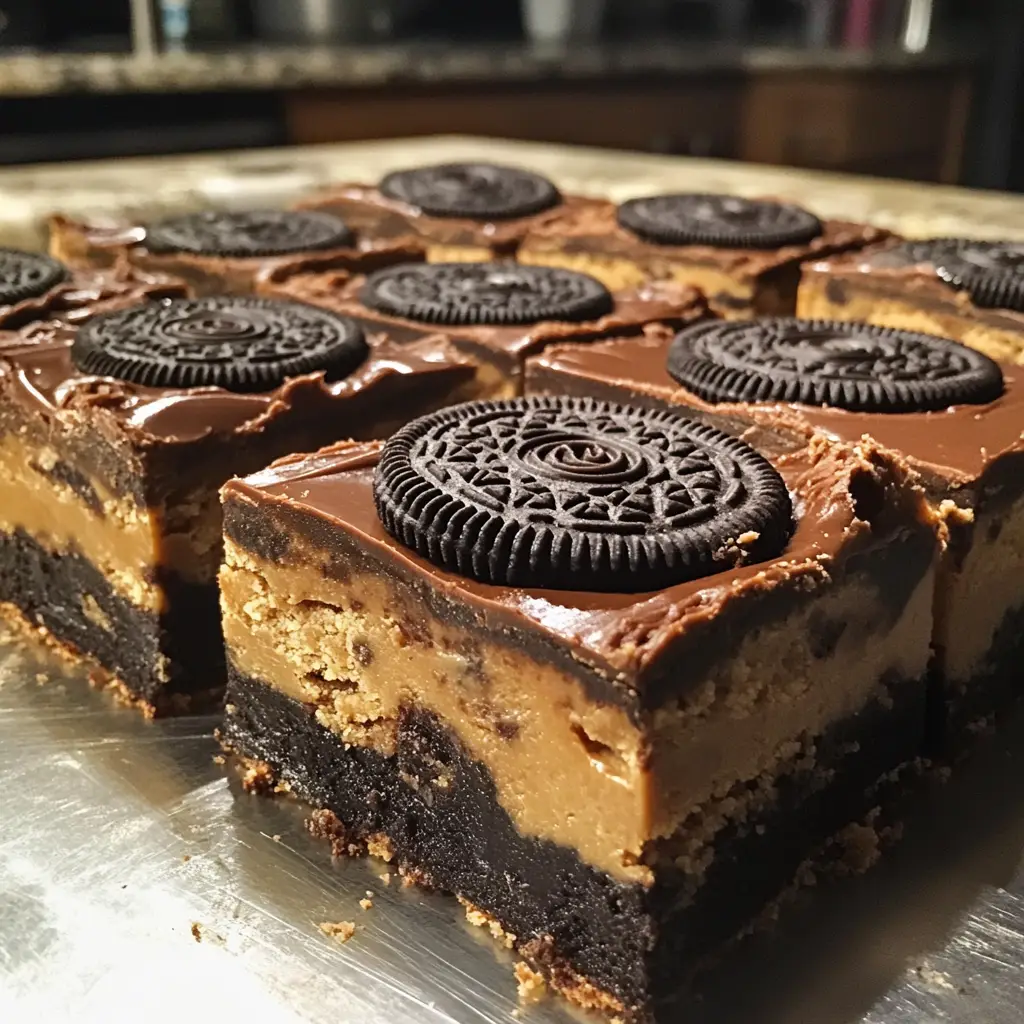
Oreo Peanut Butter Bars: Discover the Ultimate Decadence!

Introduction to Oreo Peanut Butter Bars
Hey there, fellow dessert lovers! If you’re anything like me, you know that life can get pretty hectic. Between juggling work, family, and everything in between, finding time to whip up a delicious treat can feel impossible. That’s where these Oreo Peanut Butter Bars come in! They’re the perfect solution for a busy day, combining the rich flavors of Oreo cookies and creamy peanut butter into one decadent bite. Trust me, whether you’re looking to impress your loved ones or simply satisfy your sweet tooth, these bars are a delightful way to bring a little joy to your day.
Why You’ll Love This Oreo Peanut Butter Bars
These Oreo Peanut Butter Bars are a dream come true for busy moms and professionals alike. They’re incredibly easy to make, requiring just a handful of ingredients and minimal prep time. Plus, the combination of chocolate and peanut butter is simply irresistible! You can whip them up in no time, making them the perfect treat for unexpected guests or a sweet reward after a long day. Trust me, your taste buds will thank you!
Ingredients for Oreo Peanut Butter Bars
Let’s dive into the deliciousness that makes up these Oreo Peanut Butter Bars! Here’s what you’ll need:
- Oreo cookies: The star of the show! These chocolatey cookies provide a rich, crunchy base that pairs perfectly with peanut butter.
- Creamy peanut butter: This adds a smooth, nutty flavor that balances the sweetness of the Oreos. You can use natural or processed, depending on your preference.
- Unsalted butter: Melted butter helps bind the crust together and adds richness. Unsalted is best to control the saltiness of the bars.
- Powdered sugar: This sweetens the peanut butter layer and gives it a smooth texture. It’s a must for that melt-in-your-mouth experience!
- Chocolate chips: These are melted and poured over the top, creating a luscious finish. You can use semi-sweet, dark, or even white chocolate for a twist.
For those looking to mix things up, consider adding chopped peanuts for a crunchy texture or a sprinkle of sea salt on top for a sweet-salty contrast. If you’re in a pinch, store-bought peanut butter cookie dough can also work as a crust substitute!
Don’t worry about the exact measurements just yet; you can find them at the bottom of the article, ready for printing. Let’s get cooking!
How to Make Oreo Peanut Butter Bars
Now that we have our ingredients ready, let’s dive into the fun part—making these Oreo Peanut Butter Bars! Follow these simple steps, and you’ll have a delicious treat in no time.
Step 1: Preheat the Oven
First things first, preheat your oven to 350°F (175°C). Preheating is crucial because it ensures that your bars bake evenly. If you skip this step, you might end up with a gooey mess instead of a delicious treat!
Step 2: Prepare the Oreo Crust
Next, grab those Oreo cookies and crush them into fine crumbs. You can use a food processor or place them in a zip-top bag and smash them with a rolling pin. Once crushed, mix the crumbs with melted butter and creamy peanut butter until everything is well combined. This mixture will form the base of your bars, so make sure it’s nice and cohesive!
Step 3: Press the Mixture into the Baking Dish
Now, take your Oreo mixture and press it firmly into the bottom of a greased 9×9 inch baking dish. Use the back of a measuring cup or your hands to create an even layer. This solid base is essential for holding everything together, so don’t rush this step!
Step 4: Make the Peanut Butter Layer
In a separate bowl, mix the powdered sugar with the remaining creamy peanut butter until smooth. This will create a luscious layer that complements the Oreo crust perfectly. If it feels too thick, you can add a splash of milk to achieve your desired consistency.
Step 5: Spread the Peanut Butter Mixture
Now it’s time to spread that peanut butter mixture over the Oreo crust. Use a spatula to ensure an even layer. This step is key to getting that perfect bite of peanut butter goodness in every bar!
Step 6: Melt the Chocolate Chips
For the final touch, melt your chocolate chips. You can do this in the microwave in 30-second intervals, stirring in between, or use a double boiler on the stove. Be careful not to overheat the chocolate; it should be smooth and pourable, not burnt!
Step 7: Assemble and Refrigerate
Pour the melted chocolate over the peanut butter layer, spreading it evenly. Now, it’s time to refrigerate your creation for at least 2 hours. This step is crucial for setting the bars, so be patient! Once set, you can cut them into squares and enjoy your delicious Oreo Peanut Butter Bars!
Tips for Success
- Use room temperature ingredients for a smoother mixture.
- Don’t skip the refrigeration step; it’s key for the bars to set properly.
- For easier cutting, use a sharp knife and wipe it clean between cuts.
- Experiment with different types of chocolate chips for unique flavors.
- Store leftovers in an airtight container to keep them fresh longer.
Equipment Needed
- 9×9 inch baking dish: A square dish is ideal, but you can use an 8×8 inch dish if that’s what you have.
- Mixing bowls: A couple of medium-sized bowls will do the trick for mixing ingredients.
- Food processor or rolling pin: Use either to crush the Oreo cookies into fine crumbs.
- Spatula: A rubber spatula is perfect for spreading the peanut butter mixture evenly.
- Microwave or double boiler: Either method works for melting chocolate chips safely.
Variations
- Nutty Delight: Add chopped peanuts or walnuts to the peanut butter layer for an extra crunch.
- Healthier Twist: Substitute half of the creamy peanut butter with Greek yogurt for a lighter version.
- Gluten-Free Option: Use gluten-free Oreo cookies to make these bars suitable for gluten-sensitive friends.
- Flavor Infusion: Mix in a teaspoon of vanilla extract or a pinch of sea salt to enhance the flavors.
- Chocolate Lovers: Use chocolate sandwich cookies instead of Oreos for a double chocolate experience!
Serving Suggestions
- Pair these Oreo Peanut Butter Bars with a glass of cold milk for a classic treat.
- Serve alongside fresh fruit, like strawberries or bananas, for a refreshing contrast.
- For a fun presentation, drizzle extra melted chocolate on top before serving.
- Consider adding a scoop of vanilla ice cream for an indulgent dessert experience.
- Cut into fun shapes using cookie cutters for a playful twist at parties!
FAQs about Oreo Peanut Butter Bars
As you embark on your journey to create these delightful Oreo Peanut Butter Bars, you might have a few questions. Don’t worry; I’ve got you covered! Here are some common queries that pop up when making this scrumptious treat.
Can I make Oreo Peanut Butter Bars ahead of time?
Absolutely! These bars are perfect for making in advance. Just prepare them, refrigerate, and they’ll be ready to enjoy whenever you need a sweet treat.
How should I store leftover bars?
Store any leftovers in an airtight container in the refrigerator. They’ll stay fresh for about a week, but I doubt they’ll last that long!
Can I freeze Oreo Peanut Butter Bars?
Yes, you can freeze these bars! Just wrap them tightly in plastic wrap and place them in a freezer-safe container. They’ll keep for up to three months. Perfect for those days when you need a quick dessert fix!
What can I substitute for peanut butter?
If you’re looking for alternatives, try almond butter or sunflower seed butter. They’ll give you a similar creamy texture and flavor, making them great substitutes for those with peanut allergies.
Can I use different types of chocolate?
Definitely! Feel free to experiment with semi-sweet, dark, or even white chocolate chips. Each type will bring a unique flavor to your Oreo Peanut Butter Bars!
Final Thoughts
Creating these Oreo Peanut Butter Bars is more than just baking; it’s about bringing joy to your kitchen and your loved ones. The delightful combination of flavors and textures makes every bite a little celebration. Whether you’re sharing them at a family gathering or sneaking a piece after a long day, these bars are sure to bring smiles. Plus, they’re so easy to make that you’ll find yourself whipping them up again and again. So, roll up your sleeves, gather your ingredients, and let the sweet magic of Oreo Peanut Butter Bars brighten your day!
Print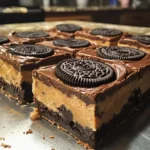
Oreo Peanut Butter Bars: Discover the Ultimate Decadence!
- Total Time: 2 hours 30 minutes
- Yield: 16 bars 1x
- Diet: Vegetarian
Description
Oreo Peanut Butter Bars are a deliciously decadent treat combining the rich flavors of Oreo cookies and creamy peanut butter, perfect for satisfying your sweet tooth.
Ingredients
- 1 package Oreo cookies (about 36 cookies)
- 1 cup creamy peanut butter
- 1/2 cup unsalted butter, melted
- 1 cup powdered sugar
- 1 cup chocolate chips
Instructions
- Preheat your oven to 350°F (175°C).
- Crush the Oreo cookies into fine crumbs and mix with melted butter and peanut butter until well combined.
- Press the mixture into the bottom of a greased 9×9 inch baking dish.
- In a separate bowl, mix the powdered sugar with the remaining peanut butter until smooth.
- Spread the peanut butter mixture over the Oreo crust.
- Melt the chocolate chips in the microwave or over a double boiler and pour over the peanut butter layer.
- Refrigerate for at least 2 hours until set, then cut into bars and serve.
Notes
- For a crunchier texture, add chopped peanuts to the peanut butter layer.
- Store leftovers in an airtight container in the refrigerator.
- These bars can be frozen for up to 3 months.
- Prep Time: 20 minutes
- Cook Time: 10 minutes
- Category: Dessert
- Method: Baking
- Cuisine: American
Nutrition
- Serving Size: 1 bar
- Calories: 250
- Sugar: 15g
- Sodium: 150mg
- Fat: 15g
- Saturated Fat: 6g
- Unsaturated Fat: 8g
- Trans Fat: 0g
- Carbohydrates: 30g
- Fiber: 1g
- Protein: 4g
- Cholesterol: 10mg
Keywords: Oreo Peanut Butter Bars, dessert, no-bake bars, chocolate, peanut butter