Frankenstein Monster Cookies: Bake Fun Treats Today!
Introduction to Frankenstein Monster Cookies
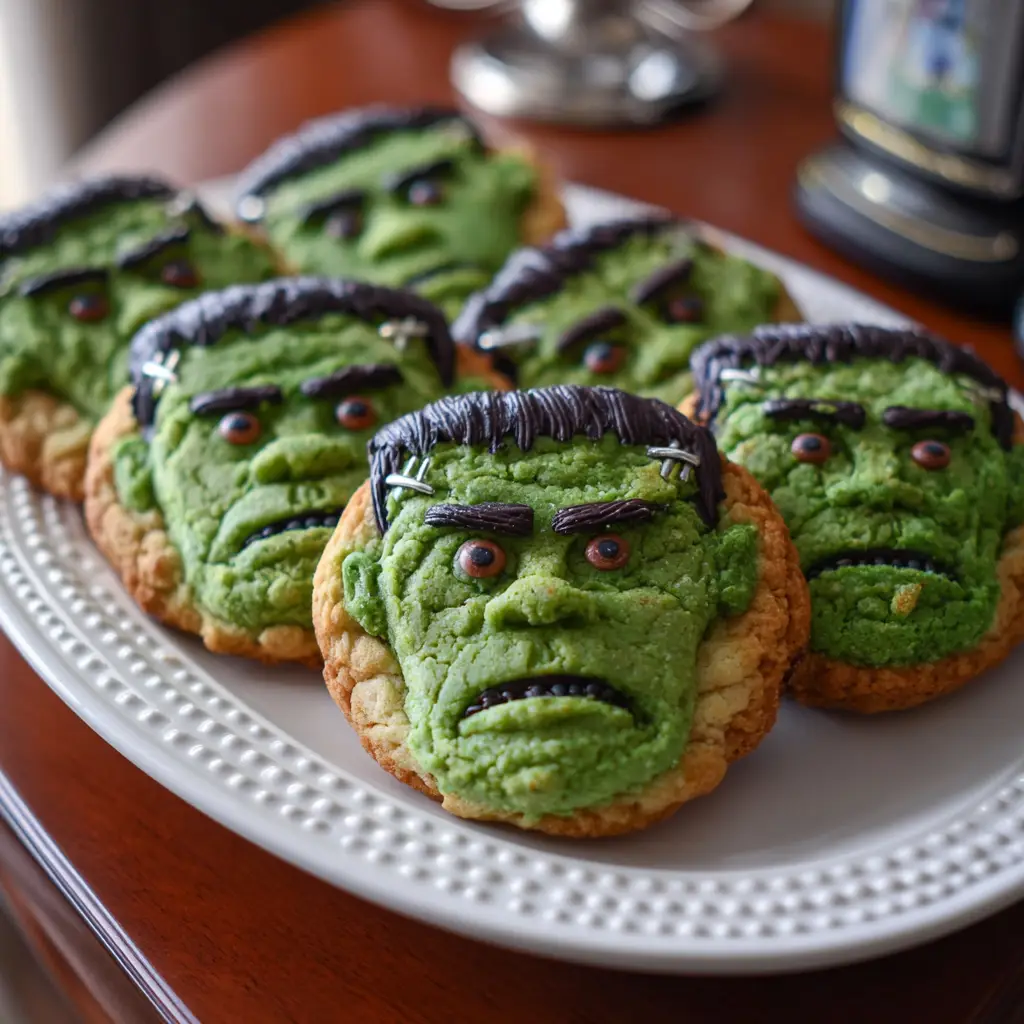
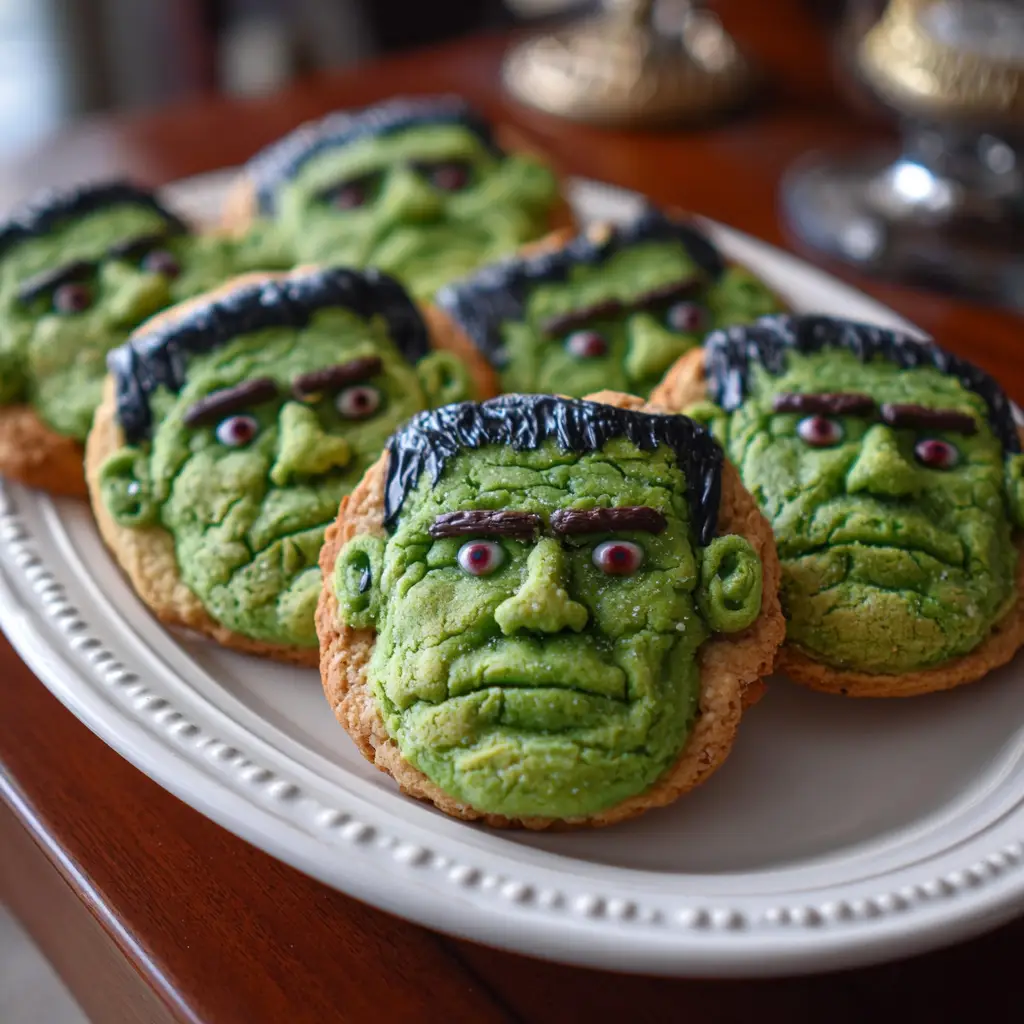
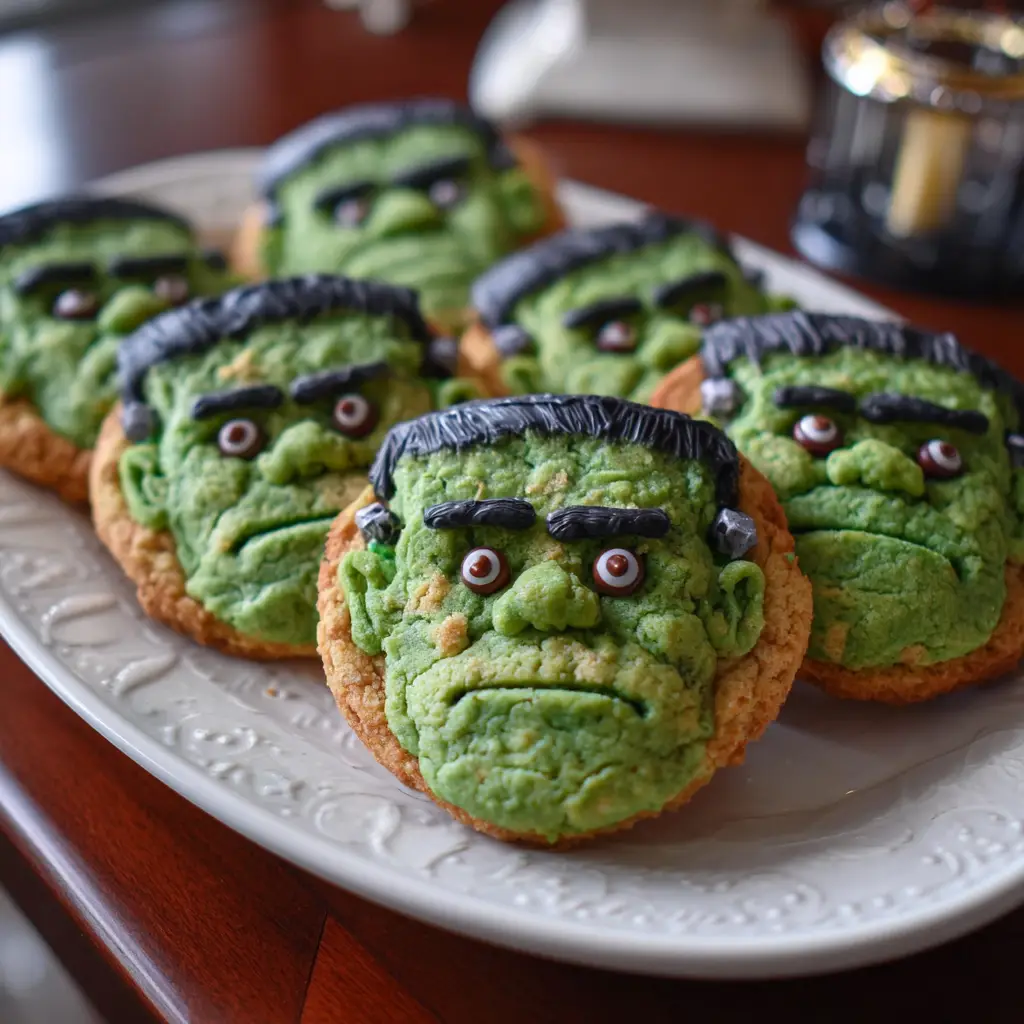
As a busy mom, I know how challenging it can be to whip up something fun and festive, especially during the hectic Halloween season. That’s where these delightful Frankenstein Monster Cookies come in! They’re not just a treat; they’re a way to bring a little joy and creativity into your kitchen. With their vibrant colors and playful designs, these cookies are sure to impress your loved ones and make any gathering a hit. Plus, they’re quick to make, so you can spend less time baking and more time enjoying the spooky season!
Why You’ll Love This Frankenstein Monster Cookies
These Frankenstein Monster Cookies are a delightful blend of ease and fun! They come together quickly, making them perfect for busy days when you want to create something special without spending hours in the kitchen. The taste? Absolutely scrumptious! With a chewy texture and a hint of chocolate, they’re a treat that both kids and adults will adore. Plus, the decorating part is a fantastic way to unleash your creativity!
Ingredients for Frankenstein Monster Cookies
Gathering the right ingredients is the first step to creating these fun Frankenstein Monster Cookies. Here’s what you’ll need:
- Unsalted butter: This adds richness and helps achieve that perfect chewy texture.
- Brown sugar: It gives the cookies a lovely caramel flavor and moisture.
- Granulated sugar: Balances the sweetness and helps with the cookie’s structure.
- Large eggs: They bind the ingredients together and add moisture.
- Vanilla extract: A splash of this enhances the overall flavor, making the cookies irresistible.
- All-purpose flour: The base of the cookies, providing structure and stability.
- Baking soda: This leavening agent helps the cookies rise and become fluffy.
- Salt: Just a pinch enhances the sweetness and balances flavors.
- Chocolate chips: These add delightful pockets of chocolatey goodness in every bite.
- Green candy melts: Perfect for creating that iconic Frankenstein look; they melt beautifully for drizzling.
- Black icing: Use this to draw monster features, adding personality to your cookies.
- Candy eyes: These are the finishing touch, making your cookies come alive with character!
Feel free to get creative! You can swap chocolate chips for white chocolate or even add nuts for a crunch. The exact quantities for each ingredient are listed at the bottom of the article, ready for you to print out and take to the kitchen!
How to Make Frankenstein Monster Cookies
Now that you have all your ingredients ready, let’s dive into the fun part—making these delightful Frankenstein Monster Cookies! Follow these simple steps, and you’ll have a batch of spooky treats in no time.
Step 1: Preheat the Oven
First things first, preheat your oven to 350°F (175°C). Preheating is crucial because it ensures that your cookies bake evenly. If the oven isn’t hot enough, your cookies might spread too much or not rise properly. Trust me, a well-preheated oven is the secret to cookie perfection!
Step 2: Cream the Butter and Sugars
In a large bowl, cream together the softened butter, brown sugar, and granulated sugar until smooth. This step is vital for achieving that light and fluffy texture. You want to mix until the mixture is pale and creamy. It’s like giving your cookies a cozy, buttery hug!
Step 3: Add Eggs and Vanilla
Next, add the eggs and vanilla extract to the butter-sugar mixture. Mix until everything is well combined. The eggs help bind the ingredients together, while the vanilla adds a warm, inviting flavor. It’s like a little magic potion that makes your cookies taste even better!
Step 4: Combine Dry Ingredients
In a separate bowl, whisk together the all-purpose flour, baking soda, and salt. Mixing these dry ingredients separately helps ensure that the baking soda is evenly distributed. This way, every cookie gets that perfect rise and flavor. Think of it as prepping the foundation for your cookie masterpiece!
Step 5: Mix Wet and Dry Ingredients
Now, gradually add the dry ingredients to the wet mixture. Stir gently until just combined. Be careful not to overmix! Overmixing can lead to tough cookies, and we want them to be soft and chewy. It’s like a dance—gentle and rhythmic!
Step 6: Fold in Chocolate Chips
Time to fold in those delicious chocolate chips! You can use semi-sweet, dark, or even white chocolate chips for a fun twist. If you’re feeling adventurous, throw in some nuts or dried fruit for extra flavor. This is where you can really make these Frankenstein Monster Cookies your own!
Step 7: Shape the Cookies
Using a spoon or cookie scoop, drop spoonfuls of dough onto a baking sheet lined with parchment paper. Make sure to leave some space between each cookie, as they will spread while baking. Think of it as giving each cookie its own little space to shine!
Step 8: Bake the Cookies
Pop the baking sheet into the oven and bake for 10-12 minutes. Keep an eye on them! You’ll know they’re done when the edges are golden brown. The centers might look a bit soft, but they’ll firm up as they cool. It’s like watching a transformation happen right before your eyes!
Step 9: Cool the Cookies
Once baked, let the cookies cool on the baking sheet for a few minutes before transferring them to a wire rack. Cooling is essential because it allows the cookies to set properly. If you decorate them too soon, they might crumble. Patience is key here!
Step 10: Decorate with Candy Melts and Icing
Finally, it’s time to unleash your creativity! Melt the green candy melts according to the package instructions and drizzle them over the cooled cookies. Use black icing to create fun monster features, and don’t forget to add those adorable candy eyes. This is where your Frankenstein Monster Cookies come to life!
Tips for Success
- Make sure your butter is softened for easy creaming.
- Use a cookie scoop for uniform cookie sizes.
- Don’t skip the cooling step; it helps with decorating.
- Experiment with different chocolate types for variety.
- Store cookies in an airtight container to keep them fresh.
Equipment Needed
- Baking sheet: A standard one works, but you can use a stone or insulated sheet for even baking.
- Parchment paper: This helps prevent sticking; aluminum foil can be a substitute.
- Mixing bowls: Use any size, but a large bowl is best for creaming.
- Cookie scoop: A spoon works too, but a scoop ensures uniform cookies.
- Wire rack: Essential for cooling; a plate can work in a pinch.
Variations of Frankenstein Monster Cookies
- Gluten-Free: Substitute all-purpose flour with a gluten-free blend to make these cookies suitable for gluten-sensitive friends.
- Nutty Delight: Add chopped nuts like walnuts or pecans for a crunchy texture that complements the chewy cookie.
- Vegan Option: Replace butter with coconut oil and use flax eggs (1 tablespoon ground flaxseed mixed with 2.5 tablespoons water) instead of regular eggs.
- Chocolate Lovers: Use double the amount of chocolate chips or mix in some white chocolate chips for a sweet contrast.
- Spooky Spice: Add a teaspoon of cinnamon or pumpkin spice to the dough for a warm, autumnal flavor.
Serving Suggestions for Frankenstein Monster Cookies
- Pair these cookies with a glass of cold milk for a classic treat.
- Serve alongside a warm cup of hot cocoa for a cozy dessert experience.
- Present them on a spooky-themed platter for Halloween parties.
- Wrap them in colorful cellophane for fun party favors.
FAQs about Frankenstein Monster Cookies
As you embark on your baking adventure with these delightful Frankenstein Monster Cookies, you might have a few questions. Here are some common queries that can help you along the way!
Can I make these cookies ahead of time?
Absolutely! You can prepare the dough in advance and store it in the fridge for up to 3 days. Just scoop and bake when you’re ready for fresh cookies!
How should I store my cookies?
To keep your Frankenstein Monster Cookies fresh, store them in an airtight container at room temperature. They’ll stay delicious for up to a week!
Can I freeze these cookies?
Yes! These cookies freeze beautifully. Just place them in a single layer in a freezer-safe container. They can last up to 3 months in the freezer. Thaw them at room temperature before enjoying!
What if I don’t have candy melts?
No worries! You can use white chocolate chips or even colored icing as an alternative for decorating. Get creative with what you have on hand!
Can I customize the decorations?
Definitely! Feel free to let your imagination run wild. Use different colors, sprinkles, or even edible glitter to make your Frankenstein Monster Cookies uniquely yours!
Final Thoughts
Baking these Frankenstein Monster Cookies is more than just a fun kitchen project; it’s a chance to create lasting memories with your loved ones. The joy of decorating each cookie brings out the inner child in all of us, making it a delightful experience for both kids and adults. Plus, the smiles on their faces when they see these spooky treats are priceless! So, whether you’re hosting a Halloween party or just looking to add a little fun to your day, these cookies are sure to bring happiness and a sprinkle of creativity into your home.
Print
Frankenstein Monster Cookies: Bake Fun Treats Today!
- Total Time: 32 minutes
- Yield: 24 cookies 1x
- Diet: Vegetarian
Description
Frankenstein Monster Cookies are fun and festive treats perfect for Halloween or any spooky occasion. These cookies are not only delicious but also visually appealing, making them a hit with kids and adults alike.
Ingredients
- 1 cup unsalted butter, softened
- 1 cup brown sugar
- 1/2 cup granulated sugar
- 2 large eggs
- 1 teaspoon vanilla extract
- 3 cups all-purpose flour
- 1 teaspoon baking soda
- 1/2 teaspoon salt
- 1 cup chocolate chips
- 1 cup green candy melts
- 1/2 cup black icing
- 1/2 cup candy eyes
Instructions
- Preheat your oven to 350°F (175°C).
- In a large bowl, cream together the softened butter, brown sugar, and granulated sugar until smooth.
- Add the eggs and vanilla extract, mixing until well combined.
- In a separate bowl, whisk together the flour, baking soda, and salt.
- Gradually add the dry ingredients to the wet ingredients, mixing until just combined.
- Fold in the chocolate chips.
- Drop spoonfuls of dough onto a baking sheet lined with parchment paper.
- Bake for 10-12 minutes or until the edges are golden.
- Let the cookies cool completely.
- Melt the green candy melts according to package instructions and drizzle over the cooled cookies.
- Use black icing to create monster features and add candy eyes for decoration.
Notes
- Store cookies in an airtight container for up to a week.
- Feel free to customize the decorations to make different monster designs.
- These cookies can be made ahead of time and frozen for later use.
- Prep Time: 20 minutes
- Cook Time: 12 minutes
- Category: Dessert
- Method: Baking
- Cuisine: American
Nutrition
- Serving Size: 1 cookie
- Calories: 150
- Sugar: 10g
- Sodium: 100mg
- Fat: 7g
- Saturated Fat: 4g
- Unsaturated Fat: 2g
- Trans Fat: 0g
- Carbohydrates: 20g
- Fiber: 1g
- Protein: 2g
- Cholesterol: 30mg
Keywords: Frankenstein Monster Cookies, Halloween cookies, spooky treats, monster cookies