Fairy Dust Shots Recipe: Magical Party Shots
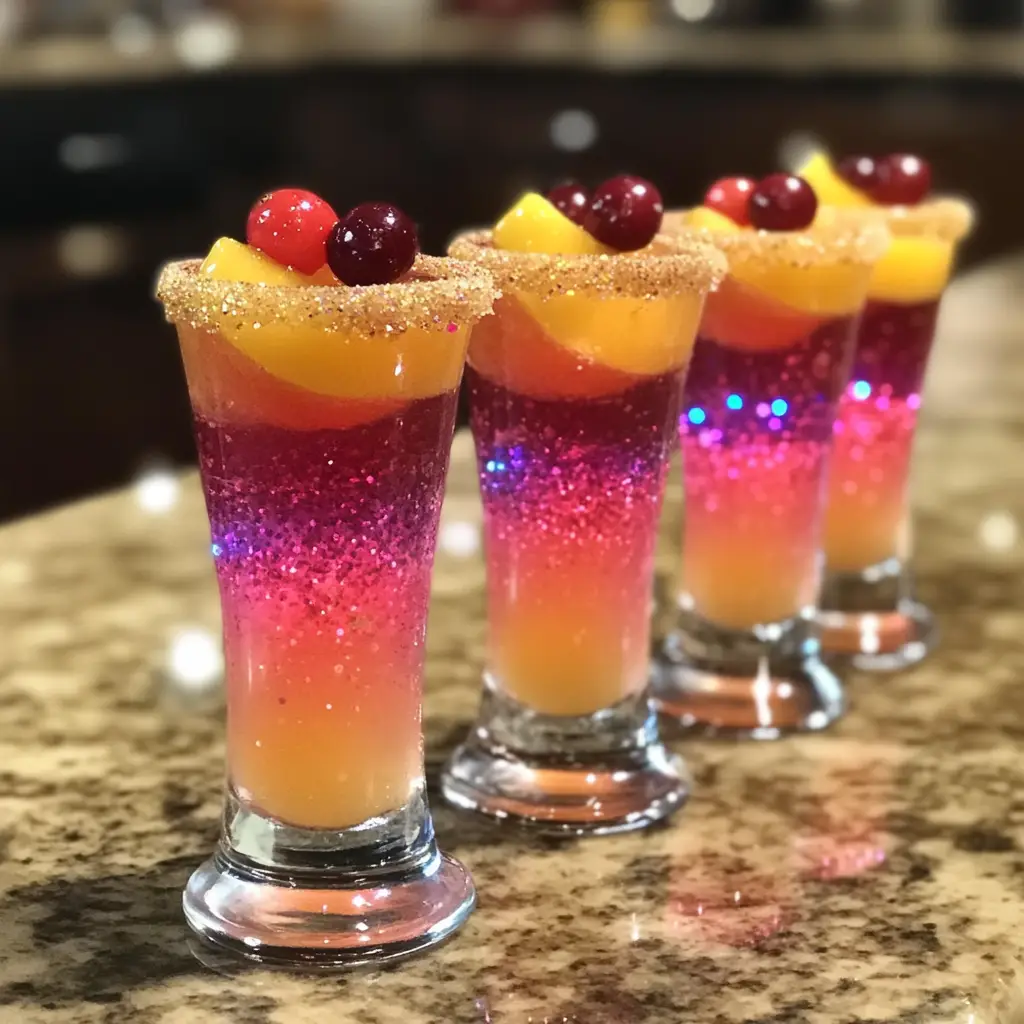
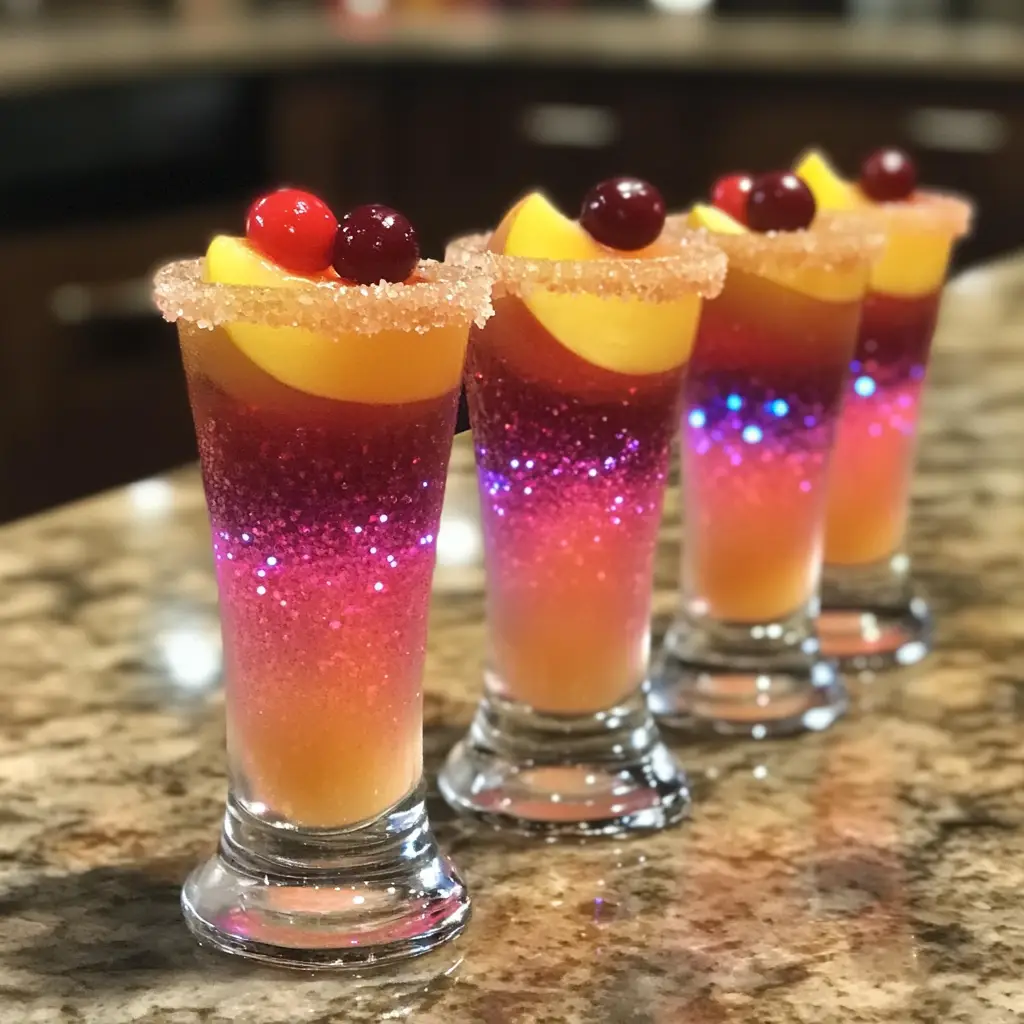
Step into a realm of pure, unadulterated magic and whimsy with the Fairy Dust Shot, a concoction that is as much a visual spectacle as it is a delightful libation. These are not merely shots; they are tiny, potent potions designed to captivate the senses and ignite the imagination. The concept is enchantingly simple: a layered shooter that mimics the look of magical, glittering fairy dust settled at the bottom of a tiny vial. The “fairy dust” itself is a shimmering, edible glitter sugar, while the potion layered on top is a beautifully hued, sweet-tart liquid that creates a stunning contrast.
Why Is This Fairy Dust Shots So Popular?
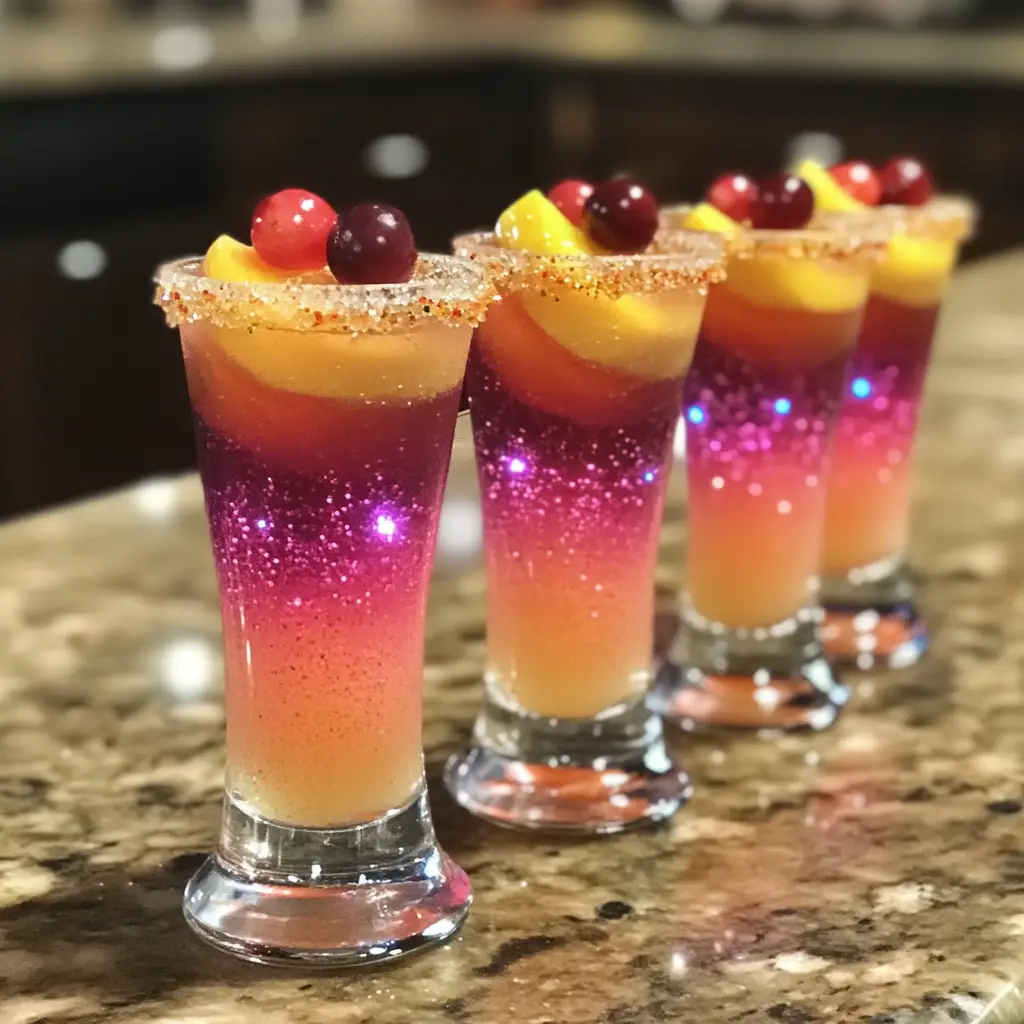
The viral, cult-like status of Fairy Dust Shots is built upon a foundation of irresistible visual appeal and interactive fun. Firstly, their sheer magical aesthetic is a massive draw. In the age of social media, a drink that looks like it was conjured from a fantasy novel is inherently shareable and “Instagrammable.” The sparkling layers create an immediate “wow” factor that delights guests before they even take a sip. Secondly, they tap into a powerful sense of nostalgia and whimsy. The theme evokes childhood stories of fairies, magic, and pixie dust, creating a fun, lighthearted, and playful drinking experience for adults. Furthermore, their versatility is key. The color of the “potion” can be easily customized to match any party theme—pink for a fairy party, blue for a frozen theme, green for a witch’s brew. They are a guaranteed icebreaker, encouraging laughter and camaraderie as guests marvel at the presentation before collectively downing their magical elixir.
Why You’ll Love This Fairy Dust Shots:
- The Ultimate Themed Party Drink: They are a guaranteed hit at any fantasy, fairy, or magical-themed event.
- Stunning Visual Impact: The layered look with edible glitter is breathtakingly beautiful and surprisingly easy to achieve.
- Incredibly Customizable: Easily change the colors and flavors to create a whole spectrum of magical potions.
- Quick and Easy to Batch: You can prepare dozens of these shots in just a few minutes for a large party.
- Fun for All: The playful theme and sweet flavor make them a crowd-pleaser, even for those who aren’t typically shot drinkers.
Here’s what you’ll need:
The Essential “Fairy Dust” Base:
- Edible Luster Dust or Sparkling Sugar: This is the non-negotiable star of the show. Choose a color that matches your theme—silver, gold, and pastel pinks and purples are classic. CRITICAL: Ensure the product is labeled “EDIBLE.” Do not use craft glitter.
For the Classic Pink Fairy Potion:
- 1 oz (30ml) Raspberry Vodka or Whipped Cream Vodka: Provides the primary flavor and alcohol base.
- 1 oz (30ml) Peach Schnapps: Adds sweetness and a fruity depth that pairs perfectly with raspberry.
- ½ oz (15ml) Fresh Lime Juice: The essential tart component that balances the sweetness and makes the shot refreshing.
- ½ oz (15ml) Simple Syrup (optional): If you prefer a sweeter shot, add this to balance the lime.
- A splash of Cranberry Juice or Pink Lemonade: For color adjustment and a touch more volume.
For the Blue Frost Fairy Variation:
- 1 oz (30ml) Blue Curaçao: Provides the vibrant blue color and a sweet orange flavor.
- 1 oz (30ml) Citrus Vodka or White Rum
- 1 oz (30ml) Pineapple Juice
- ½ oz (15ml) Fresh Lime Juice
Equipment & Garnish:
- Shot Glasses: Clear glass is essential for showcasing the layers.
- A Small Spoon or Cocktail Layering Tool
- Jiggers or a Small Liquid Measuring Cup
- A Cocktail Shaker with Ice
- Optional Garnishes: Fresh raspberries, tiny edible flowers, or a sprinkle of extra luster dust on the rim.
How to Make Fairy Dust Shots
Now that you have your ingredients ready, let’s dive into the steps for making this delightful Fairy Dust Shots. It’s as easy as pie, and I promise you’ll feel like a culinary superstar!
Step 1: Prepare the “Dust”
This is the first and most important step. Take your clear shot glasses and, using a dry spoon, add a small pile of edible luster dust or sparkling sugar to the bottom of each one. You want enough to create a visible, shimmering layer, but not so much that it overwhelms the drink—about ¼ to ½ teaspoon per shot is perfect.
Step 2: Chill and Mix the Potion
Fill a cocktail shaker ⅔ full with ice. For the Classic Pink Fairy Potion, add the raspberry vodka, peach schnapps, fresh lime juice, simple syrup (if using), and a splash of cranberry juice. Secure the lid tightly.
Step 3: Shake with Vigor
Shake the mixture vigorously for 10-15 seconds. This does three things: it chills the liquid, properly dilutes it for a smoother drink, and incorporates air to create a slight frothiness, which will help with the layering.
Step 4: The Layering Technique
This step requires a gentle hand. Do not pour the liquid directly onto the dust, as it will create a murky mixture. Instead, hold a spoon upside down, just above the surface of the fairy dust in the shot glass. Slowly and gently pour the shaken cocktail over the back of the spoon. The spoon will disperse the liquid, allowing it to float gently on top of the dust without disturbing it, creating a crisp, clean layer.
Step 5: Achieve the Perfect Fill
Continue pouring over the spoon until the shot glass is filled to your desired level. You should now have a beautiful, clear separation: a shimmering layer of “fairy dust” at the bottom and a vibrantly colored “potion” resting perfectly on top.
Step 6: Garnish with Whimsy
For an extra touch of magic, you can very carefully place a single fresh raspberry on the rim of the shot glass for the pink version, or a tiny edible flower. A light dusting of extra luster dust around the rim also looks spectacular.
Step 7: Serve the Magic
Serve the shots immediately on a tray, instructing guests not to stir them. The magic is in the reveal: the shot is taken in one go, and the final sight of the shimmering dust at the bottom of the empty glass is part of the enchanting experience.
Tips for Success:
- The Spoon is Sacred: The inverted spoon method is the absolute key to a clean layer. Pour slowly and patiently.
- Practice Makes Perfect: Do a test shot first to get a feel for the pouring speed and the amount of dust you like.
- Chill Your Ingredients: Starting with chilled liquors and juices will help the shot stay layered longer and taste better.
- Taste Your Mix: Before batching, shake and taste a small amount. Adjust the sweetness with simple syrup or the tartness with lime juice to suit your preference.
- Use a Layering Tool: For large batches, a dedicated cocktail layering tool can make the process even faster and more precise.
Equipment Needed:
- Cocktail Shaker
- Jigger (for accurate measurement)
- Clear Shot Glasses
- Small Spoon or Cocktail Layering Tool
- Fine Mesh Strainer (optional, to catch ice shards when pouring)
Variations of Fairy Dust Shots:
- “Pixie Punch” (Green): Use Midori melon liqueur, vodka, and a splash of lime juice. The green potion over gold dust is stunning.
- “Unicorn Tears” (Purple): Use a combination of raspberry vodka and a touch of Blue Curaçao to create a purple hue, or use pre-made purple liqueurs.
- “Golden Nectar” (Yellow): Use Limoncello, vodka, and pineapple juice over gold luster dust.
- “Mermaid Lagoon” (Turquoise): Use Blue Curaçao, Malibu coconut rum, and pineapple juice over aqua-colored sanding sugar.
- Non-Alcoholic “Fairy Fizz”: Use a mixture of sparkling water, a splash of flavored syrup (raspberry, peach), and lime juice. The method is identical.
Serving Suggestions for Fairy Dust Shots:
- The Enchanted Forest Display: Arrange the shots on a tray lined with moss, twinkling fairy lights, and faux flowers.
- As a Themed Party Welcome: Greet guests with a tray of these shots as they arrive to immediately set a magical tone.
- A Birthday Toast: Instead of cake, have a “shot toast” with the guest of honor.
- With a Themed Cocktail: Serve these as a starter shot alongside a larger, similarly themed cocktail like a Fairy Gin Fizz or a Magic Moonlight Martini.
Prep Time:
5 minutes (for a batch of 6)
Total Time:
5 minutes
Nutritional Information
(Please note: This is an estimated calculation per shot.)
- Calories: ~110 kcal
- Protein: 0g
- Sodium: 1mg
- Sugar: 10g
- Fat: 0g
- Carbohydrates: 12g
- Fiber: 0g
FAQs about Fairy Dust Shots:
Q: Is the glitter safe to eat?
A: Only if it is explicitly labeled “Edible Luster Dust” or “Edible Glitter.” These are made with ingredients like sugar, cornstarch, and food-grade colorants. Never, ever use craft glitter or dusting products from a craft store.
Q: Can I make a big batch in a pitcher?
A: You can pre-mix the liquid components in a pitcher and keep it chilled. However, you must still layer each shot individually over the spoon to achieve the signature look. Pouring from a pitcher directly will mix the dust and ruin the effect.
Q: My layers mixed together. What did I do wrong?
A: You likely poured too quickly or did not use the spoon as a buffer. The pour must be slow and gentle, allowing the liquid to flow over the spoon and settle on top of the denser dust.
Q: Where can I find edible luster dust?
A: It is readily available online (Amazon, Etsy), at specialty baking supply stores, or in the cake decorating aisle of some large craft stores.
Q: Can these be made non-alcoholic?
A: Absolutely! The technique is exactly the same. Simply use a mixture of fruit juices, lemonade, and sparkling water to create your “potion.” The visual magic remains intact.
Final Thoughts:
Fairy Dust Shots are more than a recipe; they are a tiny vessel of joy, a spark of fantasy, and a testament to the power of presentation. They prove that with a little creativity and attention to detail, you can transform a simple mixture of spirits into an unforgettable experience that engages the eyes and the palate in equal measure. The process of creating them is a delightful art, and the reward is the collective gasp of delight from your guests. So, stock up on edible glitter, channel your inner fairy godmother or wizard, and get ready to serve a little bit of magic. These shots are guaranteed to cast a spell of fun and wonder over any celebration, leaving your guests with a shimmering memory (and an empty, glittering glass) that lasts long after the party is over. Cheers to the magic!
Print
Fairy Dust Shots Recipe: Magical Party Shots
- Total Time: 5 minutes
Description
Create magical Fairy Dust Shots! This easy 3-ingredient recipe is the sweet, colorful, and enchanting drink for your next party or celebration.
Ingredients
The Essential “Fairy Dust” Base:
Edible Luster Dust or Sparkling Sugar: This is the non-negotiable star of the show. Choose a color that matches your theme—silver, gold, and pastel pinks and purples are classic. CRITICAL: Ensure the product is labeled “EDIBLE.” Do not use craft glitter.
For the Classic Pink Fairy Potion:
-
1 oz (30ml) Peach Schnapps: Adds sweetness and a fruity depth that pairs perfectly with raspberry.
-
½ oz (15ml) Fresh Lime Juice: The essential tart component that balances the sweetness and makes the shot refreshing.
-
½ oz (15ml) Simple Syrup (optional): If you prefer a sweeter shot, add this to balance the lime.
-
A splash of Cranberry Juice or Pink Lemonade: For color adjustment and a touch more volume.
1 oz (30ml) Raspberry Vodka or Whipped Cream Vodka: Provides the primary flavor and alcohol base.
For the Blue Frost Fairy Variation:
-
1 oz (30ml) Citrus Vodka or White Rum
-
1 oz (30ml) Pineapple Juice
-
½ oz (15ml) Fresh Lime Juice
1 oz (30ml) Blue Curaçao: Provides the vibrant blue color and a sweet orange flavor.
Equipment & Garnish:
-
A Small Spoon or Cocktail Layering Tool
-
Jiggers or a Small Liquid Measuring Cup
-
A Cocktail Shaker with Ice
-
Optional Garnishes: Fresh raspberries, tiny edible flowers, or a sprinkle of extra luster dust on the rim.
Shot Glasses: Clear glass is essential for showcasing the layers.
Instructions
Step 1: Prepare the “Dust”
This is the first and most important step. Take your clear shot glasses and, using a dry spoon, add a small pile of edible luster dust or sparkling sugar to the bottom of each one. You want enough to create a visible, shimmering layer, but not so much that it overwhelms the drink—about ¼ to ½ teaspoon per shot is perfect.
Step 2: Chill and Mix the Potion
Fill a cocktail shaker ⅔ full with ice. For the Classic Pink Fairy Potion, add the raspberry vodka, peach schnapps, fresh lime juice, simple syrup (if using), and a splash of cranberry juice. Secure the lid tightly.
Step 3: Shake with Vigor
Shake the mixture vigorously for 10-15 seconds. This does three things: it chills the liquid, properly dilutes it for a smoother drink, and incorporates air to create a slight frothiness, which will help with the layering.
Step 4: The Layering Technique
This step requires a gentle hand. Do not pour the liquid directly onto the dust, as it will create a murky mixture. Instead, hold a spoon upside down, just above the surface of the fairy dust in the shot glass. Slowly and gently pour the shaken cocktail over the back of the spoon. The spoon will disperse the liquid, allowing it to float gently on top of the dust without disturbing it, creating a crisp, clean layer.
Step 5: Achieve the Perfect Fill
Continue pouring over the spoon until the shot glass is filled to your desired level. You should now have a beautiful, clear separation: a shimmering layer of “fairy dust” at the bottom and a vibrantly colored “potion” resting perfectly on top.
Step 6: Garnish with Whimsy
For an extra touch of magic, you can very carefully place a single fresh raspberry on the rim of the shot glass for the pink version, or a tiny edible flower. A light dusting of extra luster dust around the rim also looks spectacular.
Step 7: Serve the Magic
Serve the shots immediately on a tray, instructing guests not to stir them. The magic is in the reveal: the shot is taken in one go, and the final sight of the shimmering dust at the bottom of the empty glass is part of the enchanting experience.
Notes
-
Cocktail Shaker
-
Jigger (for accurate measurement)
-
Clear Shot Glasses
-
Small Spoon or Cocktail Layering Tool
- Prep Time: 5 minutes
- Category: Drinks
- Cuisine: American
Nutrition
- Calories: 110 kcal
- Sugar: 10g
- Sodium: 1mg
- Carbohydrates: 12g