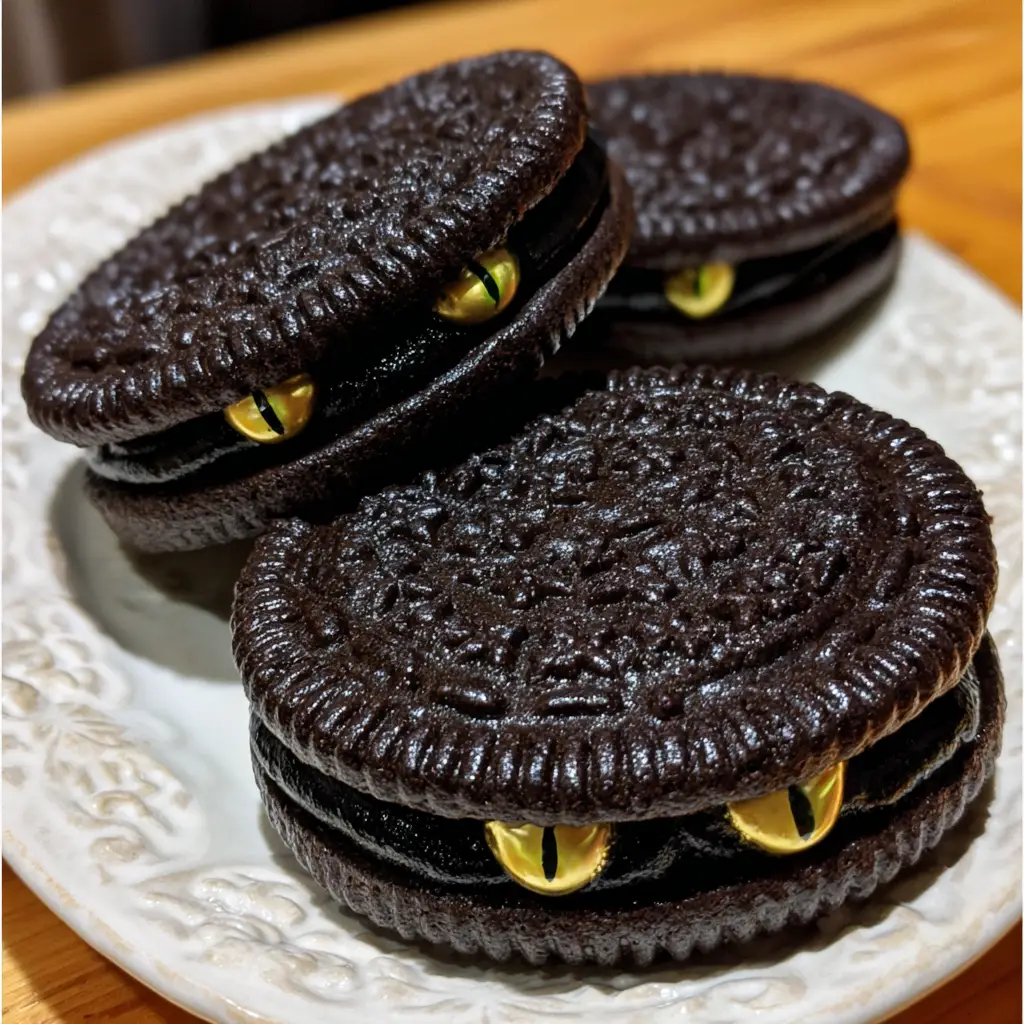
Black Cat Sandwich Cookies: Discover Irresistible Recipes!
Introduction to Black Cat Sandwich Cookies
As a busy mom, I know how challenging it can be to whip up something special, especially during the hectic Halloween season. That’s why I’m excited to share my recipe for Black Cat Sandwich Cookies! These delightful treats are not only delicious but also a fun way to bring a little spooky charm to your gatherings. Whether you’re hosting a Halloween party or just want to impress your loved ones, these cookies are a quick solution that will have everyone purring with delight. Let’s dive into this sweet adventure together!
Why You’ll Love This Black Cat Sandwich Cookies
These Black Cat Sandwich Cookies are a delightful blend of ease and flavor. They come together quickly, making them perfect for busy days when you want to create something special without spending hours in the kitchen. Plus, the rich chocolatey taste paired with the fun cat design will charm both kids and adults alike. You’ll love how these cookies not only satisfy your sweet tooth but also add a festive touch to any occasion!
Ingredients for Black Cat Sandwich Cookies
Gathering the right ingredients is the first step to creating these delightful Black Cat Sandwich Cookies. Here’s what you’ll need:
- Unsalted butter: This is the base of your cookies, providing richness and a tender texture. Make sure it’s softened for easy mixing.
- Granulated sugar: This sweetener adds sweetness and helps create that lovely, chewy texture we all adore in cookies.
- Large egg: Eggs bind the ingredients together and contribute to the cookies’ structure and moisture.
- Vanilla extract: A splash of vanilla enhances the flavor, making your cookies taste even more delicious.
- All-purpose flour: This is the backbone of your cookie dough, providing the necessary structure.
- Cocoa powder: For that rich chocolate flavor, cocoa powder is essential. You can opt for dark cocoa for a more intense taste.
- Baking powder: This leavening agent helps the cookies rise, giving them a light and fluffy texture.
- Salt: Just a pinch enhances the flavors and balances the sweetness.
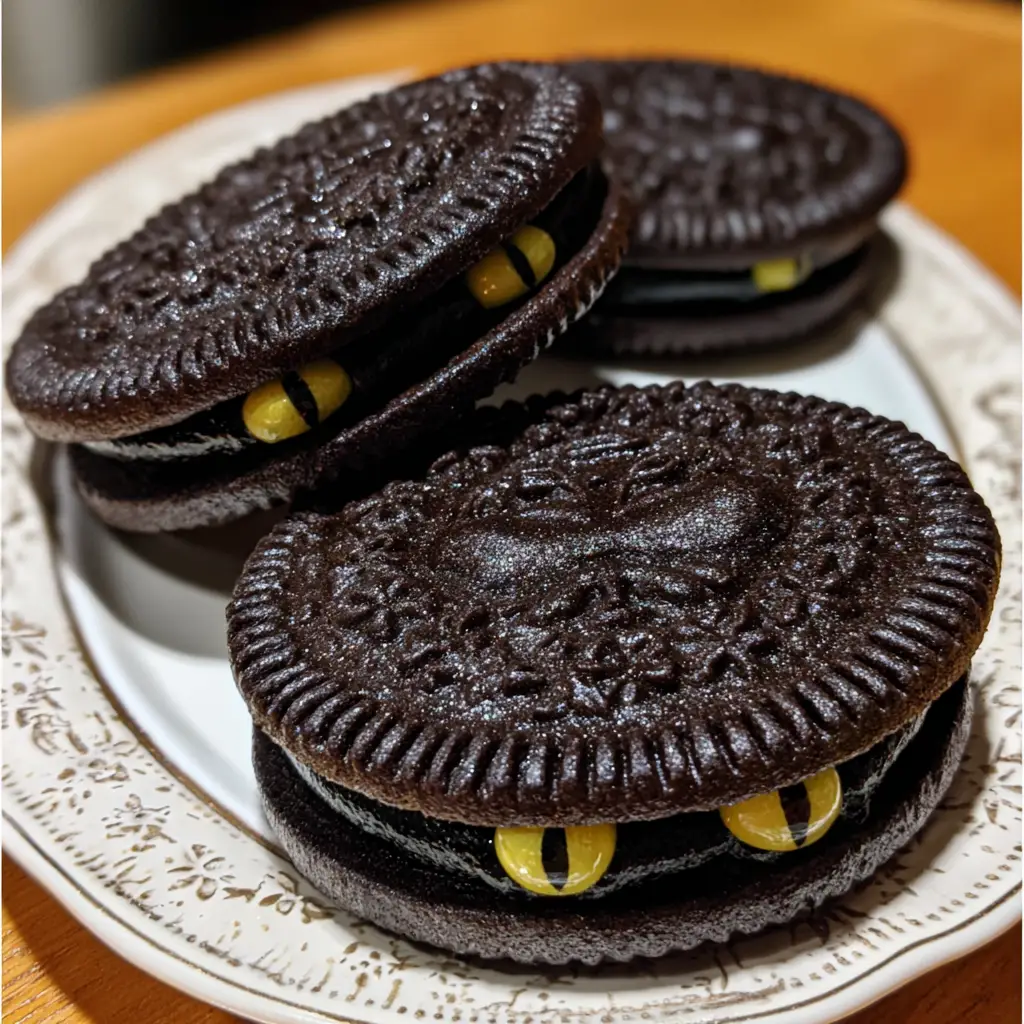
- Black icing: This is your creative tool for decorating the cookies and bringing the cat faces to life.
- Candy eyes: These fun decorations add personality to your cookies, making them irresistibly cute!
For exact measurements, check the bottom of the article where you can find everything listed for easy printing. Feel free to get creative with your ingredients! You can substitute the butter with coconut oil for a dairy-free option or use gluten-free flour if you have dietary restrictions. The possibilities are endless!

How to Make Black Cat Sandwich Cookies
Now that you have your ingredients ready, let’s get started on making these adorable Black Cat Sandwich Cookies! Follow these simple steps, and you’ll have a batch of delightful treats in no time.
Step 1: Preheat the Oven
First things first, preheat your oven to 350°F (175°C). Preheating is crucial because it ensures that your cookies bake evenly. If you skip this step, your cookies might spread too much or not rise properly. Trust me, a well-preheated oven is the secret to cookie perfection!
Step 2: Cream Butter and Sugar
In a large bowl, cream together the softened butter and granulated sugar until the mixture is light and fluffy. This process is essential for creating a tender texture in your cookies. The air you incorporate while creaming helps them rise beautifully. So, take your time and mix well!
Step 3: Add Egg and Vanilla
Next, add in the large egg and vanilla extract. Mix until everything is well combined. The egg binds the ingredients together, while the vanilla adds a warm, inviting flavor. You’ll notice the dough becoming smoother and richer at this stage, which is a good sign!
Step 4: Combine Dry Ingredients
In another bowl, whisk together the all-purpose flour, cocoa powder, baking powder, and salt. Each of these dry ingredients plays a vital role. The flour provides structure, cocoa powder gives that rich chocolate flavor, baking powder helps the cookies rise, and salt enhances all the flavors. Make sure to mix them well!
Step 5: Form the Dough
Gradually add the dry ingredients to the wet mixture, stirring until a dough forms. If the dough feels too sticky, don’t worry! Just sprinkle a little extra flour until it reaches the right consistency. You want it to be soft but not overly sticky, making it easy to roll into balls.
Step 6: Shape the Cookies
Now it’s time to shape your cookies! Roll the dough into small balls and place them on a baking sheet lined with parchment paper. Make sure to space them out, as they will spread while baking. Flatten each ball slightly with the bottom of a glass for that perfect cookie shape.
Step 7: Bake the Cookies
Pop the baking sheet into your preheated oven and bake for 10-12 minutes. Keep an eye on them! You’ll know they’re done when the edges look set but the centers are still soft. Let them cool on the baking sheet for a few minutes before transferring them to a wire rack.
Step 8: Cool and Assemble
Once your cookies are completely cool, it’s time to assemble the sandwiches. Spread a generous layer of black icing on the flat side of one cookie and top it with another. This is where the magic happens, and you’ll start to see your cute cat faces come to life!
Step 9: Decorate
Finally, let your creativity shine! Use black icing to draw whiskers and a mouth, and place candy eyes on top. You can even add little ears with extra dough if you’re feeling adventurous. The more fun you have decorating, the more your cookies will stand out at any gathering!
Tips for Success
- Make sure your butter is at room temperature for easy creaming.
- Don’t skip the cooling step; it helps the cookies firm up for easier assembly.
- Use a cookie scoop for uniform sizes, ensuring even baking.
- Experiment with different decorations to personalize your cookies.
- Store cookies in an airtight container to keep them fresh longer.
Equipment Needed
- Baking sheet: A standard one works, but a silicone mat can prevent sticking.
- Parchment paper: Great for lining your baking sheet; aluminum foil is a good alternative.
- Mixing bowls: Use any size, but a large bowl is best for creaming.
- Cookie scoop: This helps with uniform cookie sizes; a tablespoon can work too.
- Wire rack: Perfect for cooling cookies; a plate can suffice in a pinch.
Variations
- Gluten-Free: Substitute all-purpose flour with a gluten-free blend to make these cookies suitable for gluten-sensitive friends.
- Dairy-Free: Use coconut oil or a dairy-free butter alternative in place of unsalted butter for a delicious dairy-free treat.
- Nutty Twist: Add a handful of chopped nuts, like walnuts or pecans, to the dough for an extra crunch and flavor.
- Minty Fresh: Incorporate a few drops of peppermint extract into the dough for a refreshing minty flavor that pairs well with chocolate.
- Spooky Sprinkles: Top your decorated cookies with Halloween-themed sprinkles for an extra festive touch!
Serving Suggestions
- Pair these Black Cat Sandwich Cookies with a glass of cold milk for a classic treat.
- Serve them alongside a warm cup of cocoa or pumpkin spice latte for a cozy vibe.
- Present the cookies on a festive platter, surrounded by Halloween decorations for a spooky touch.
- Include a variety of cookies for a delightful dessert table at your Halloween party.
FAQs about Black Cat Sandwich Cookies
As you embark on your baking adventure with these delightful Black Cat Sandwich Cookies, you might have a few questions. Here are some common queries I’ve encountered, along with helpful answers to guide you along the way!
Can I make these cookies ahead of time?
Absolutely! You can prepare the cookie dough in advance and refrigerate it for up to three days. Just roll it into balls when you’re ready to bake. You can also bake the cookies ahead of time and decorate them later, making it a breeze to have them ready for your Halloween gathering.
What can I use instead of black icing?
If you don’t have black icing on hand, you can use dark chocolate ganache or melted chocolate as an alternative. Just let it cool slightly before spreading it on the cookies. You can also mix cocoa powder with white icing to create a darker shade!
How should I store the Black Cat Sandwich Cookies?
To keep your cookies fresh, store them in an airtight container at room temperature. They’ll stay delicious for about a week. If you want to keep them longer, you can freeze them for up to three months. Just make sure to separate layers with parchment paper to prevent sticking.
Can I customize the decorations?
Definitely! Feel free to get creative with your decorations. Use colored icing, edible glitter, or even fondant to make your Black Cat Sandwich Cookies uniquely yours. The more fun you have with the designs, the more they’ll stand out at your gathering!
What’s the best way to check if the cookies are done baking?
To check for doneness, look for set edges and a slightly soft center. The cookies will continue to firm up as they cool. If you’re unsure, you can always do a little taste test with one of the cookies!
Final Thoughts
Making Black Cat Sandwich Cookies is more than just baking; it’s about creating memories with your loved ones. The joy of decorating these spooky treats brings out the child in all of us, sparking laughter and creativity in the kitchen. Whether you’re sharing them at a Halloween party or enjoying them with a cozy cup of tea, these cookies are sure to delight. I hope you find as much joy in making and sharing these cookies as I do. So, roll up your sleeves, unleash your inner artist, and let the fun begin!
Print
Black Cat Sandwich Cookies: Discover Irresistible Recipes!
- Total Time: 32 minutes
- Yield: 24 cookies 1x
- Diet: Vegetarian
Description
Delicious and spooky Black Cat Sandwich Cookies perfect for Halloween or any cat lover’s gathering.
Ingredients
- 1 cup unsalted butter, softened
- 1 cup granulated sugar
- 1 large egg
- 2 teaspoons vanilla extract
- 2 cups all-purpose flour
- 1/2 cup cocoa powder
- 1/2 teaspoon baking powder
- 1/4 teaspoon salt
- Black icing for decoration
- Candy eyes for decoration
Instructions
- Preheat the oven to 350°F (175°C).
- In a large bowl, cream together the butter and sugar until light and fluffy.
- Add the egg and vanilla extract, mixing until well combined.
- In another bowl, whisk together the flour, cocoa powder, baking powder, and salt.
- Gradually add the dry ingredients to the wet ingredients, mixing until a dough forms.
- Roll the dough into small balls and place them on a baking sheet lined with parchment paper.
- Flatten each ball slightly with the bottom of a glass.
- Bake for 10-12 minutes, then let cool completely.
- Once cooled, spread icing on one cookie and sandwich it with another.
- Decorate the top with black icing and candy eyes to create a cat face.
Notes
- For a more intense chocolate flavor, use dark cocoa powder.
- Store cookies in an airtight container to keep them fresh.
- These cookies can be made ahead of time and decorated later.
- Prep Time: 20 minutes
- Cook Time: 12 minutes
- Category: Dessert
- Method: Baking
- Cuisine: American
Nutrition
- Serving Size: 1 cookie
- Calories: 150
- Sugar: 10g
- Sodium: 50mg
- Fat: 7g
- Saturated Fat: 4g
- Unsaturated Fat: 2g
- Trans Fat: 0g
- Carbohydrates: 20g
- Fiber: 1g
- Protein: 2g
- Cholesterol: 30mg
Keywords: Black Cat Sandwich Cookies, Halloween cookies, cat cookies, dessert recipes