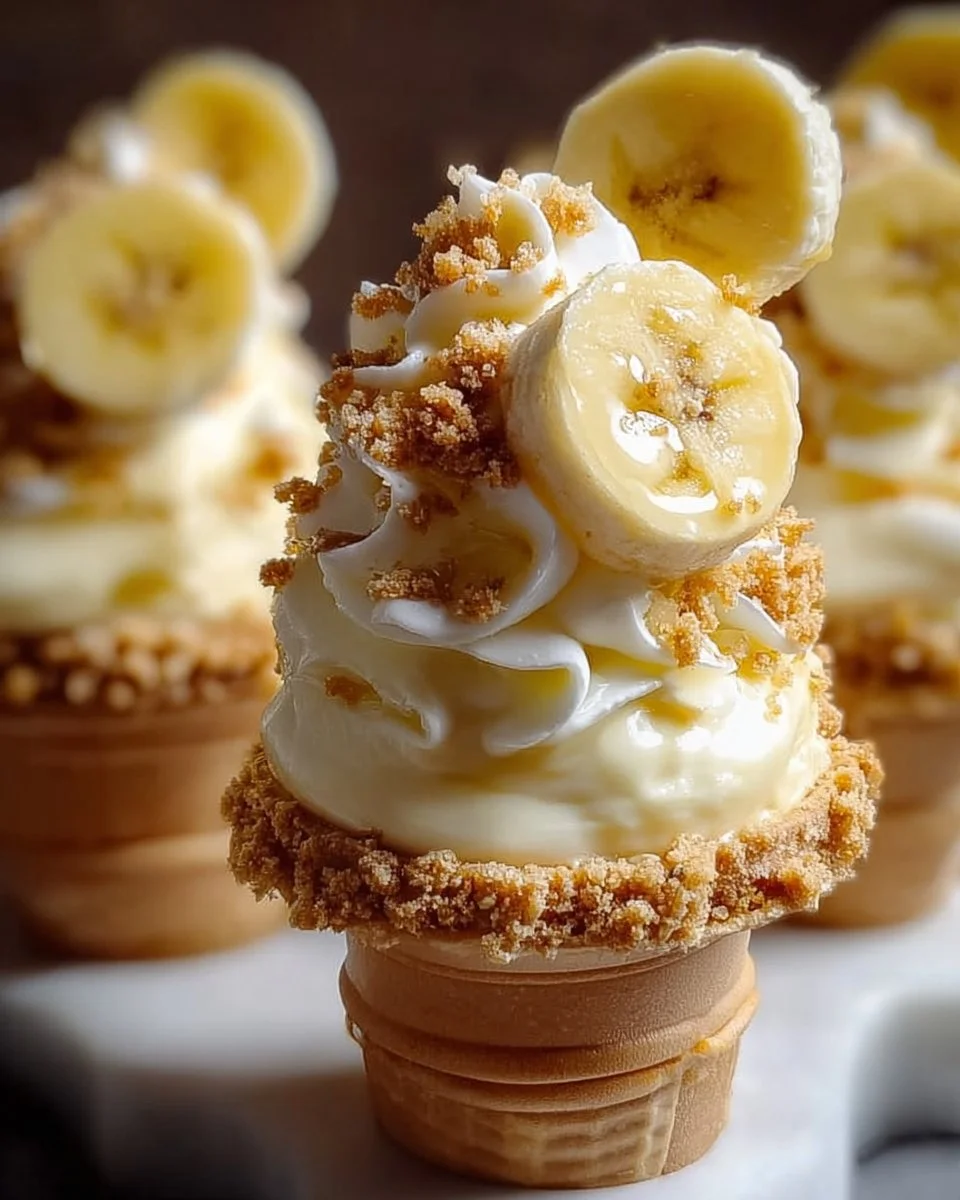
Banana Pudding Cheesecake Cones
Indulging in the delightful layers of a Banana Pudding Cheesecake Cone feels like wrapping yourself in a warm blanket on a crisp autumn evening. Imagine the aroma of ripe bananas mingling with the sweet, reassuring scent of vanilla. Each bite brings forth an explosion of flavors—creamy cheesecake, the crunch of graham crackers, and the luscious taste of banana pudding. With every creamy spoonful, the velvety texture dances on your tongue, while the satisfying crunch of the cone elevates each experience. These cones not only satiate your sweet cravings but also whisk you back to carefree days spent enjoying dessert under the sun.
Picture a gathering of friends on a lazy afternoon, laughter ringing in the air as these charming cones become the centerpiece of conversation. The Banana Pudding Cheesecake Cones transform familiar flavors into a fun and portable treat, perfect for picnics, birthday parties, or just a delightful surprise at dessert time. Each cone offers the timeless taste of banana pudding, reimagined in a way that feels fresh and exciting, binding nostalgia with a modern twist. This dessert is a treasure trove of textures, flavors, and fun that leaves everyone asking for more.
Why You’ll Love This Banana Pudding Cheesecake Cone
This delightful concoction stands out for many reasons, not just because of its sumptuous flavor profile. The creamy, dreamy banana pudding cheesecake filling hits all the right notes—sweet, creamy, and utterly indulgent. The contrast between the airy whipped cream and the crunchy graham cracker crumbs creates a textural play that keeps every bite interesting. It’s not merely a dessert; it’s an experience woven with memories of childhood, family gatherings, and sunlit afternoons.
Perfect for both casual get-togethers and festive celebrations, these cones allow guests to savor a beloved dessert without the need for plates and spoons. The portability of these cones makes them an instant hit, ensuring your guests can grab a cone and mingle or settle into their favorite chair, indulging in this creamy delight. Plus, the simplicity of preparation means you can easily whip them up even on a busy day. They invite creativity, too, letting you tweak and personalize them with your favorite toppings or flavor variations.
Preparation Phase & Tools to Use
Before diving into the scrumptious realm of Banana Pudding Cheesecake Cones, gather your tools. The right equipment makes the process easier, ensuring that your delightful cones turn out flawlessly.
-
Mixing Bowls: Have a set of two bowls ready—one for the banana pudding and one for the cheesecake mixture. Using separate bowls helps maintain the integrity of the flavors as you blend them together later.
-
Whisk: A sturdy whisk combines ingredients smoothly, ensuring there are no clumps in your pudding or cheesecake mixture. If non-electric tools are your vibe, a manual whisk does wonders.
-
Electric Mixer: Essential for beating the cream cheese to the perfect creamy consistency, an electric mixer speeds up the process—making your batter light and fluffy.
-
Rubber Spatula: This dainty tool gently folds in whipped cream without deflating it, keeping the mixture airy and luscious.
-
Cone Holder (optional): If you want to display your cones beautifully, a cone holder makes them look Instagram-ready while keeping them upright.
Preparation Tips:
- Always soften the cream cheese ahead of time to eliminate lumps effortlessly.
- Chill your mixing bowls and beaters for whipped cream to whip up perfectly fluffy clouds that enhance the richness of the overall dessert.
Ingredients for Banana Pudding Cheesecake Cones
-
1 box of instant banana pudding mix: This quick base delivers that classic banana flavor without the fuss. Feel free to use vanilla pudding if you prefer a more subtle taste.
-
1 cup of milk: Whole milk adds richness, but any milk variety will work, including almond or oat milk for a dairy-free option.
-
8 oz cream cheese, softened: Cream cheese contributes a rich, creamy texture essential for cheesecakes. Non-dairy cream cheese is a great substitute for vegan versions.
-
1/2 cup powdered sugar: This sweetener brings the perfect balance to your cheesecake layer. You can use coconut sugar for a healthier alternative, though it may slightly alter the flavor.
-
1 tsp vanilla extract: Pure vanilla extract elevates the dessert with its warm undertone.
-
2 cups whipped cream: The fluffiness of whipped cream lightens up the pudding mixture. You can make your own or use store-bought.
-
Graham cracker crumbs: Use crushed graham crackers for an authentic cheesecake base, while gluten-free options offer an equal crunch.
-
Waffle cones: These provide a delightful crunch, and any cone variety will work. For a twist, chocolate-coated cones add richness.
-
Sliced bananas for garnish: Fresh bananas elevate both presentation and flavor, while adding a healthy touch.
How to Make Banana Pudding Cheesecake Cones
-
In a mixing bowl, whisk together the instant banana pudding mix and milk until you achieve a smooth and creamy consistency. Be sure to mix thoroughly—no lumps should remain.
-
In a separate bowl, use an electric mixer to beat the softened cream cheese until creamy and smooth. Gradually incorporate the powdered sugar and vanilla extract until the mixture is light and fluffy.
-
Gently fold in the whipped cream into the cream cheese mixture using a rubber spatula. This step is crucial for making the filling airy and light.
-
Now, embrace the decadence by combining the banana pudding mixture with the creamy cheesecake mixture. Allow the two to meld together, creating a banana cheesecake fusion.
-
To assemble, crush graham crackers into fine crumbs and add a layer to the bottom of each waffle cone, ensuring a satisfying crunch at every bite.
-
Spoon a generous layer of the banana pudding cheesecake mixture over the graham cracker base. Add delightful slices of banana on top and finish with another dollop of whipped cream.
-
Sprinkle additional graham cracker crumbs on top, ensuring each cone looks inviting and flavorful. Garnish with extra banana slices for a pop of color.
-
Serve immediately to enjoy the crunchy and creamy contrast at its freshest.
Chef’s Notes & Helpful Tips
-
Make-Ahead Tips: You can prepare the cheesecake filling a few hours in advance and store it in the fridge. Just assemble the cones right before serving to retain that satisfying crunch.
-
Cooking Alternatives: While this dessert shines in a cone, you can also turn this recipe into a delightful banana pudding cheesecake layered in a jar for a stunning presentation.
-
Customization Ideas: Add chocolate chips or crushed nuts to the filling for texture. Try swapping the graham crackers for crushed Oreos for a twist on flavor.
Common Mistakes to Avoid
-
Using Cold Cream Cheese: Make sure to soften the cream cheese completely to prevent lumps in your cheesecake filling. Leave it out at room temperature for about 30 minutes before use.
-
Overwhipping the Cream: Keep a close eye when whipping the cream. If it becomes too stiff, it can turn butter-like and lose that light texture essential for your dessert.
-
Soggy Cones: Avoid a soggy cone by not waiting too long to serve the assembled cones. The graham crackers act as a moisture barrier, but excessive filling can still leak through.
What to Serve With Banana Pudding Cheesecake Cones
-
Iced Coffee: Pair the creaminess of the cones with a refreshing iced coffee for a delightful balance of flavors.
-
Fresh Fruit Salad: A vibrant mix of berries and citrus can cut through the richness, offering a light contrast.
-
Chocolate Ganache: Drizzling warm chocolate ganache compliments the banana flavor beautifully.
-
Homemade Whipped Cream: Serve extra whipped cream on the side for those who crave a bit more fluffiness.
-
Vanilla Ice Cream: For an indulgent treat, serve alongside a scoop of vanilla bean ice cream.
-
Caramel Sauce: Drizzle over the top for an added layer of sweetness and sophistication.
-
Lemonade: A chilled glass of homemade lemonade can cleanse the palate perfectly.
-
Savory Snacks: Cheese and cracker platters can balance the sweetness of your cones without overwhelming the palate.
Storage & Reheating Instructions
Store any leftover filling in an airtight container in the refrigerator for up to 3 days. However, assembled cones are best eaten fresh. If you must store them, keep the filling separate and assemble just before serving to maintain the crunch of the waffle cones. The mixture freezes well too; store in a labeled container for up to 1 month. Just thaw completely in the refrigerator before mixing it back into the cones.
Estimated Nutrition Information
Approximate values per cone:
- Calories: 250
- Protein: 4g
- Carbohydrates: 32g
- Total Fat: 12g
- Sugar: 15g
(Nutrition values may vary based on ingredient brands and substitutions made. Use it as a guideline.)
FAQs
Can I make this recipe gluten-free?
Absolutely! Choose gluten-free waffle cones and substitute graham crackers with gluten-free alternatives.
Can I use fresh bananas in the filling?
While it’s best to use ripe bananas for a smoother texture, you can certainly introduce sliced bananas in the filling for an exciting twist.
How long can the filling be stored in the refrigerator?
The cheesecake filling can remain fresh in the fridge for up to 3 days. Just mix it up before filling your cones.
What can I use instead of whipped cream?
You can substitute whipped cream for whipped coconut cream or a dairy-free alternative for a lighter texture.
Is this recipe suitable for kids?
Absolutely! This dessert is fun for kids to enjoy and even to make with adult supervision.
As you finish reading this warm description of Banana Pudding Cheesecake Cones, a sweet anticipation should fill the air. The combination of tastes and textures beckons you to indulge. Whether you treat them as a dessert centerpiece for gatherings or a fun, refreshing snack, your journey into sweet creation awaits. Gather your loved ones, share the joy of baking and assembling together, and dive into the deliciousness that these cones deliver. Happy cooking!
Print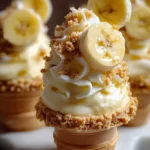
Banana Pudding Cheesecake Cones
- Total Time: 20 minutes
- Yield: 4 servings 1x
- Diet: Vegetarian
Description
Indulge in the delightful layers of banana pudding and creamy cheesecake in a portable cone format, perfect for gatherings.
Ingredients
- 1 box of instant banana pudding mix
- 1 cup of milk
- 8 oz cream cheese, softened
- 1/2 cup powdered sugar
- 1 tsp vanilla extract
- 2 cups whipped cream
- Graham cracker crumbs
- Waffle cones
- Sliced bananas for garnish
Instructions
- Whisk together the instant banana pudding mix and milk until smooth and creamy.
- Beat the softened cream cheese in a separate bowl until creamy and smooth, then incorporate the powdered sugar and vanilla extract.
- Fold in the whipped cream into the cream cheese mixture gently using a rubber spatula.
- Combine the banana pudding mixture with the creamy cheesecake mixture.
- Crush graham crackers into fine crumbs and layer at the bottom of each waffle cone.
- Spoon a generous layer of the banana pudding cheesecake mixture over the graham cracker base, topping with banana slices and whipped cream.
- Sprinkle additional graham cracker crumbs on top and garnish with extra banana slices.
- Serve immediately to enjoy the crunch and creaminess at its freshest.
Notes
For best results, serve assembled cones immediately. Prepare the cheesecake filling in advance and assemble just before serving to maintain cone crunch.
- Prep Time: 20 minutes
- Cook Time: 0 minutes
- Category: Dessert
- Method: No-Cook
- Cuisine: American
Nutrition
- Serving Size: 1 cone
- Calories: 250
- Sugar: 15g
- Sodium: 200mg
- Fat: 12g
- Saturated Fat: 7g
- Unsaturated Fat: 5g
- Trans Fat: 0g
- Carbohydrates: 32g
- Fiber: 1g
- Protein: 4g
- Cholesterol: 30mg
Keywords: banana pudding, cheesecake, dessert, portable treat, picnic, party