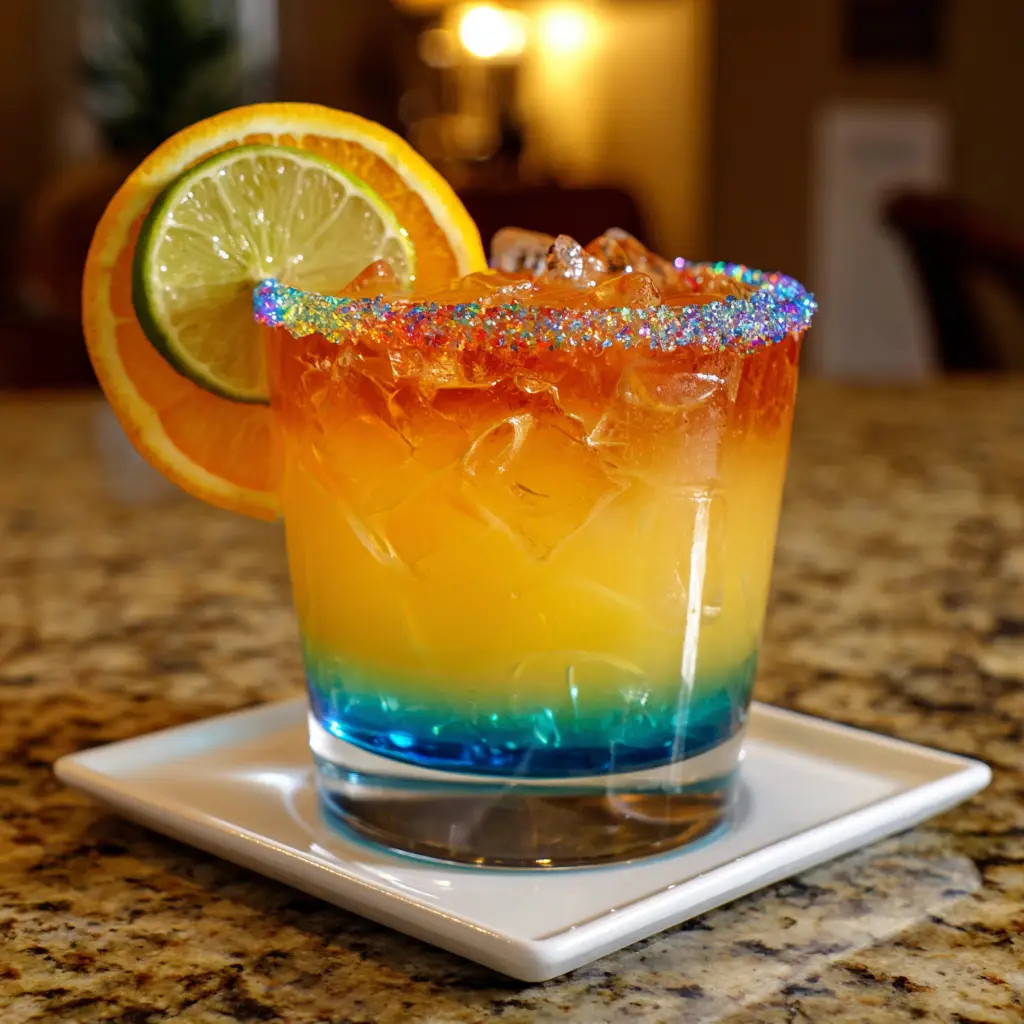
Rainbow Layered Sparkler: Colorful Vodka & Soda Cocktail

Imagine a cocktail that isn’t just a drink, but a vibrant, celebratory spectacle, a tall, elegant glass that holds a stunning, gravity-defying rainbow within its walls. This is the Rainbow Layered Sparkler. It is the undisputed star of the party, a drink that embodies pure joy, creativity, and the magic of mixology. This cocktail is a masterpiece of visual artistry, meticulously crafted to separate into the brilliant bands of a rainbow, typically using naturally colored liqueurs and spirits. But its beauty is matched by its effervescent and refreshing taste; a crisp, bubbly base that tickles the palate, while each layer contributes its own unique fruity or herbal note.
Why Is This Rainbow Layered Sparkler So Popular?
The popularity of the Rainbow Layered Sparkler is a direct result of its unparalleled visual drama and its fun, customizable nature. First and foremost, it is an unstoppable visual spectacle. The “wow” factor of presenting a perfectly layered rainbow in a glass is immense. It looks complex, scientific, and incredibly professional, creating an instant focal point at any gathering. In the age of social media, its photogenic quality is undeniable, making it a viral hit and a guaranteed way to make any event feel more special and intentional.
Secondly, it offers a delightful and versatile tasting experience. The base is often a clean, bubbly soda or sparkling wine, making the drink inherently refreshing. As you sip, the layers slowly begin to mix, creating an evolving flavor profile that keeps your palate engaged. Whether crafted as a sophisticated cocktail with liqueurs or a fun mocktail with syrups, it can be tailored to be sweet, tart, or herbal, appealing to a wide range of preferences.
Finally, its thematic power and interactive appeal make it a go-to choice. It instantly sets a festive, joyful, and creative tone. The process of creating the layers is a fun, almost meditative activity that guests love to watch, and it empowers the host to feel like a master mixologist. This powerful combination of breathtaking aesthetics, delicious taste, and emotional resonance is a recipe for instant and enduring popularity.
Why You’ll Love This Rainbow Layered Sparkler:
You will love this recipe because it empowers you to perform a kind of liquid artistry, creating a drink that is as beautiful as a piece of abstract art and as delicious as a crafted cocktail. You will love the patient, precise process of layering each color—a satisfying technique that feels like a fun science experiment. You will appreciate the creative control, allowing you to choose the color palette and flavors that match your party’s theme, from classic ROYGBIV to pastel hues or even specific team colors.
But beyond the technical creation and customization, you will love the pure, unadulterated joy it brings. Serving a Rainbow Layered Sparkler is an act of celebration in itself. It tells your guests that they are in for a unique and special experience. The vibrant colors are an instant mood-lifter, and the collective amazement when you present the finished drink is a reward like no other. It’s a recipe that feels impressively complex to the recipient but is wonderfully straightforward for the maker, a combination that is the true spirit of memorable hosting.
Here’s what you’ll need:
The magic of the rainbow effect relies entirely on the different densities (specific gravities) of the liquids. Pouring them in the correct order, from heaviest (most dense) to lightest, is the absolute key to success.
The Base Spirit & Bubbles (The “Sparkler”):
-
1 oz (30 ml) Vodka or White Rum: A neutral spirit that won’t affect the colors. This is optional for a mocktail.
-
Chilled Champagne, Prosecco, or Clear Soda (like Club Soda or Lemon-Lime Soda): To fill the glass. The bubbles add the “sparkle” and help separate the layers.
The Rainbow Layers (Classic ROYGBV):
You will need six different liqueurs or syrups, each with a distinct color and density. This is a classic combination:
-
Red (Heaviest): Grenadine (very dense and sugary)
-
Orange: Peach Schnapps or Aperol
-
Yellow: Galliano or Yellow Chartreuse
-
Green: Green Crème de Menthe or Midori (Melon Liqueur)
-
Blue: Blue Curaçao
-
Violet/Purple (Lightest): Crème de Violette or Chambord (Raspberry Liqueur)
Essential Tool:
-
A Bar Spoon with a twisted handle: This is NON-NEGOTIABLE for achieving clean layers.
For the Garnish:
-
Edible Glitter (for an extra “sparkle”)
-
A long cocktail pick with rainbow sprinkles or berries
-
A paper straw

How to Make Rainbow Layered Sparkler:
Now that you have your ingredients ready, let’s dive into the steps for making this delightful Rainbow Layered Sparkler. It’s as easy as pie, and I promise you’ll feel like a master mixologist!
Step 1: Prepare Your Glassware and Tool
Start with a tall, slender Collins or highball glass. This shape best showcases the beautiful layers. Place it on a stable, level surface. Have your bar spoon ready.
Step 2: Pour the First (Heaviest) Layer – Red
This is the foundation. Slowly and gently pour your red liquid (e.g., grenadine) directly into the bottom of the empty glass. Let it settle completely.
Step 3: The Layering Technique – The Key to the Rainbow
This step must be repeated for every single subsequent layer.
-
Hold the back of the bar spoon upside down, with the bowl of the spoon touching the inside of the glass, just above the surface of the previous layer.
-
Slowly and gently pour the next liquid (e.g., peach schnapps for orange) over the back of the spoon. The spoon will disperse the pour, allowing the liquid to float gently on top of the denser layer below without mixing.
-
Pour as slowly as you can muster. Patience is your most important ingredient.
Step 4: Build the Rainbow, Color by Color
Continue this process, following the order of density:
-
Red: Grenadine
-
Orange: Peach Schnapps
-
Yellow: Galliano
-
Green: Crème de Menthe
-
Blue: Blue Curaçao
-
Violet: Crème de Violette
Step 5: Add the Base Spirit
After all six colored layers are perfectly stacked, use the spoon technique one more time to pour the 1 oz of clear vodka or rum over the top violet layer.
Step 6: The Grand Finale – The “Sparkler” Top-Off
Now, for the dramatic finish. Still using the bar spoon, slowly top off the entire glass with your chilled Champagne, Prosecco, or clear soda. The bubbles will rise through the layers, creating a beautiful, effervescent “sparkler” effect.
Step 7: Garnish and Serve with a Wow
For the final touch, carefully add a sprinkle of edible glitter over the top. Spear a few rainbow sprinkles or berries on a cocktail pick and rest it on the rim. Insert a paper straw. Present the cocktail immediately, encouraging your guest to admire the rainbow before they sip.
Tips for Success:
-
The Spoon is Law: Never try to layer by pouring directly from the bottle. The spoon is essential for breaking the flow and preventing mixing.
-
Pour with Painful Slowness: Rushing is the number one cause of failed layers. The slower you pour, the cleaner your layers will be.
-
Use Room Temperature Ingredients: Very cold liquids can sometimes have slightly different densities and be more prone to mixing.
-
Order is Everything: Always pour from the heaviest liquid to the lightest. The order listed is a reliable guide, but if you use different brands, you may need to experiment.
-
A Steady Hand: Ensure your glass is on a level surface and your hand is steady as you pour over the spoon.
Equipment Needed:
-
Tall Collins or Highball Glass
-
Jigger (for precise measurement)
-
Bar Spoon with a twisted handle
Variations of Rainbow Layered Sparkler:
-
Non-Alcoholic Rainbow Sparkler: Create the layers using flavored syrups (e.g., raspberry, peach, lemon, lime, blueberry, grape) and top with lemon-lime soda or sparkling water.
-
Tequila Sunrise Sparkler: A simpler version using just grenadine (red), orange juice (orange), and tequila, topped with soda.
-
“Unicorn” Sparkler: Use pastel-colored liqueurs or syrups for a softer, magical look.
-
Patriotic Sparkler: Use red (grenadine), blue (blue curaçao), and white (coconut rum or cream) layers for a national flag theme.
-
Frozen Rainbow Sparkler: Blend each colored layer individually with ice and carefully spoon them into the glass in order for a frozen treat (this is very advanced!).
Serving Suggestions for Rainbow Layered Sparkler:
This cocktail is the star of any festive party. Serve it alongside vibrant appetizers like rainbow fruit skewers, caprese salad skewers (red, white, green), or a colorful crudité platter. For a dessert pairing, it goes perfectly with funfetti cake, sugar cookies with rainbow sprinkles, or a white chocolate cheesecake.
Prep Time:
10 minutes
Cooking Time:
0 minutes
Total Time:
10 minutes
Nutritional Information:
(Please note: This is a very rough estimate due to the variety of liqueurs used.)
-
Calories: ~250-350
-
Protein: 0g
-
Sodium: 10mg
-
Sugar: 30g
-
Fat: 0g
-
Carbohydrates: 35g
-
Fiber: 0g
FAQs about Rainbow Layered Sparkler:
Q: My layers keep mixing together. What am I doing wrong?
A: This is almost always due to one of three things: 1) Pouring too quickly. 2) Not using a bar spoon. 3) Pouring in the wrong density order. Slow down, use the spoon every time, and double-check your order.
Q: Can I use food coloring instead of liqueurs?
A: You can, but you’ll need a base for the color. Mix the food coloring with simple syrup or a clear spirit. The density of the simple syrup will be similar for all colors, so layering will be much more difficult and may require adjusting the sugar concentration for each layer.
Q: I don’t have all those liqueurs. Can I make a rainbow with fewer colors?
A: Absolutely! A three- or four-layer sparkler is still stunning and impressive. Just ensure you research the densities of the liqueurs you do have to pour them in the correct order.
Q: What’s the best way to drink it?
A: The classic way is to sip it through the straw to experience the layers individually at first. As you drink, the layers will naturally mix, creating a new, combined flavor. You can also give it a gentle stir partway through to create a uniform, colorful drink.
Q: Can I make a large pitcher of this for a party?
A: Layering is a technique that must be done one glass at a time to maintain the distinct bands. Pre-mixing everything in a pitcher will create a single, mixed color. You can, however, pre-measure your liqueurs into small containers for speedy assembly.
Final Thoughts:
The Rainbow Layered Sparkler is more than a recipe; it is a liquid celebration, a testament to the playful and artistic side of mixology. It represents the beautiful precision that can be achieved with patience and a simple tool, turning basic ingredients into a stunning, show-stopping masterpiece. From the careful, deliberate pour of each vibrant layer to the final, effervescent top-off that brings it to life, the process is a rewarding experience in itself. It’s a drink that celebrates color, joy, and the simple act of coming together. So, find your tallest glass, steady your hand, and get ready to create a rainbow that you can not only see but taste and share. Cheers to a more colorful world.
Print
Rainbow Layered Sparkler: Colorful Vodka & Soda Cocktail
- Total Time: 10 minutes
Description
Create a stunning Rainbow Layered Sparkler! This colorful, fizzy vodka cocktail is as fun to make as it is to drink. Perfect for parties!
Ingredients
The magic of the rainbow effect relies entirely on the different densities (specific gravities) of the liquids. Pouring them in the correct order, from heaviest (most dense) to lightest, is the absolute key to success.
The Base Spirit & Bubbles (The “Sparkler”):
-
Chilled Champagne, Prosecco, or Clear Soda (like Club Soda or Lemon-Lime Soda): To fill the glass. The bubbles add the “sparkle” and help separate the layers.
1 oz (30 ml) Vodka or White Rum: A neutral spirit that won’t affect the colors. This is optional for a mocktail.
The Rainbow Layers (Classic ROYGBV):
You will need six different liqueurs or syrups, each with a distinct color and density. This is a classic combination:
-
Orange: Peach Schnapps or Aperol
-
Yellow: Galliano or Yellow Chartreuse
-
Green: Green Crème de Menthe or Midori (Melon Liqueur)
-
Blue: Blue Curaçao
-
Violet/Purple (Lightest): Crème de Violette or Chambord (Raspberry Liqueur)
Red (Heaviest): Grenadine (very dense and sugary)
Essential Tool:
A Bar Spoon with a twisted handle: This is NON-NEGOTIABLE for achieving clean layers.
For the Garnish:
-
A long cocktail pick with rainbow sprinkles or berries
-
A paper straw
Edible Glitter (for an extra “sparkle”)
Instructions
Now that you have your ingredients ready, let’s dive into the steps for making this delightful Rainbow Layered Sparkler. It’s as easy as pie, and I promise you’ll feel like a master mixologist!
Step 1: Prepare Your Glassware and Tool
Start with a tall, slender Collins or highball glass. This shape best showcases the beautiful layers. Place it on a stable, level surface. Have your bar spoon ready.
Step 2: Pour the First (Heaviest) Layer – Red
This is the foundation. Slowly and gently pour your red liquid (e.g., grenadine) directly into the bottom of the empty glass. Let it settle completely.
Step 3: The Layering Technique – The Key to the Rainbow
This step must be repeated for every single subsequent layer.
-
Hold the back of the bar spoon upside down, with the bowl of the spoon touching the inside of the glass, just above the surface of the previous layer.
-
Slowly and gently pour the next liquid (e.g., peach schnapps for orange) over the back of the spoon. The spoon will disperse the pour, allowing the liquid to float gently on top of the denser layer below without mixing.
-
Pour as slowly as you can muster. Patience is your most important ingredient.
Step 4: Build the Rainbow, Color by Color
Continue this process, following the order of density:
-
Red: Grenadine
-
Orange: Peach Schnapps
-
Yellow: Galliano
-
Green: Crème de Menthe
-
Blue: Blue Curaçao
-
Violet: Crème de Violette
Step 5: Add the Base Spirit
After all six colored layers are perfectly stacked, use the spoon technique one more time to pour the 1 oz of clear vodka or rum over the top violet layer.
Step 6: The Grand Finale – The “Sparkler” Top-Off
Now, for the dramatic finish. Still using the bar spoon, slowly top off the entire glass with your chilled Champagne, Prosecco, or clear soda. The bubbles will rise through the layers, creating a beautiful, effervescent “sparkler” effect.
Step 7: Garnish and Serve with a Wow
For the final touch, carefully add a sprinkle of edible glitter over the top. Spear a few rainbow sprinkles or berries on a cocktail pick and rest it on the rim. Insert a paper straw. Present the cocktail immediately, encouraging your guest to admire the rainbow before they sip.
Notes
-
Tall Collins or Highball Glass
-
Jigger (for precise measurement)
-
Bar Spoon with a twisted handle
- Prep Time: 10 minutes
- Category: Drinks
- Cuisine: American
Nutrition
- Calories: 250
- Sugar: 30g
- Sodium: 10mg
- Carbohydrates: 35g