Hocus Pocus Halloween Milkshake: A Magical Delight!
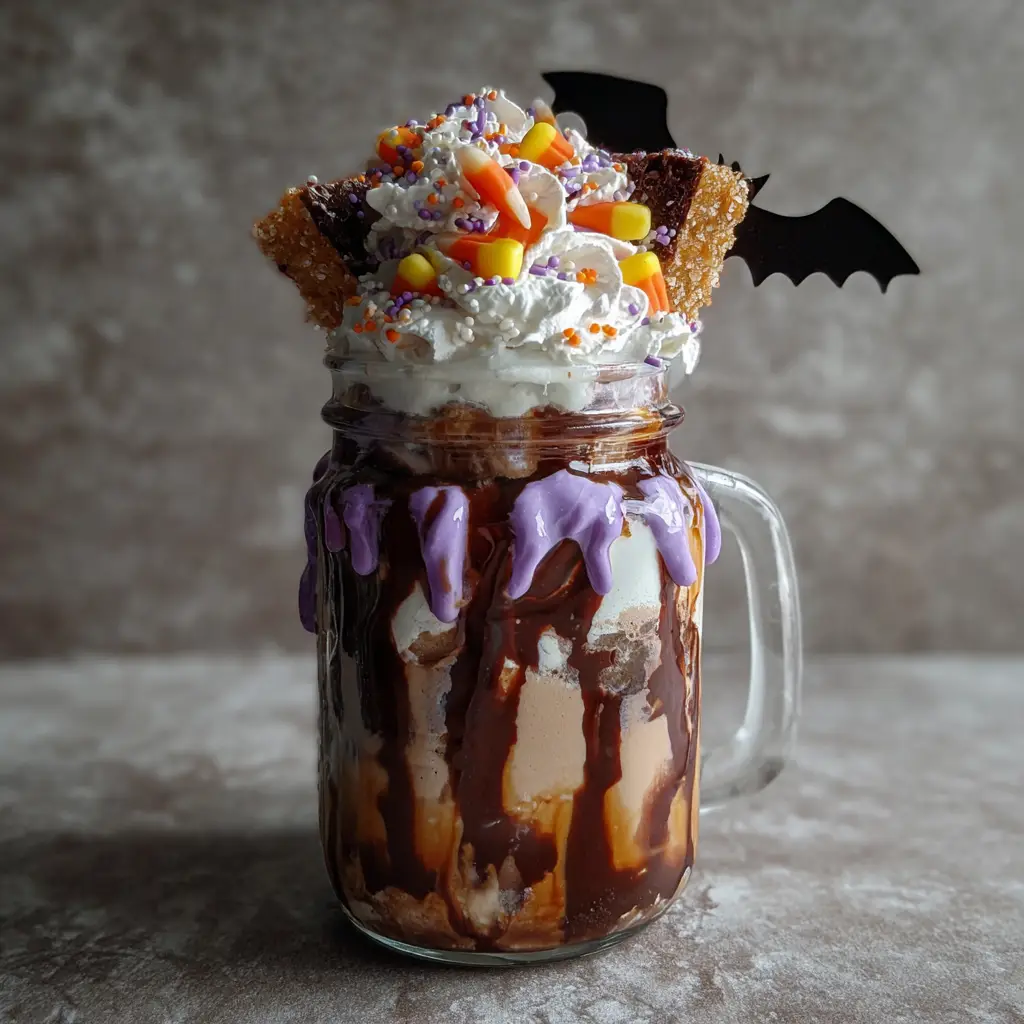
“BooOOOooK!” Imagine a potion so enchanting, so visually spectacular, that it could only have been concocted by the Sanderson Sisters themselves under a full moon. This is the Hocus Pocus Halloween Milkshake, a spellbinding, over-the-top dessert beverage that captures the mischievous and magical spirit of the beloved film. This isn’t just a milkshake; it’s a theatrical experience in a glass, a centerpiece for any Halloween celebration that will have both children and adults gasping in delight. With a deep, black vanilla base representing the witches’ cauldron, a shocking green “potion” swirl, and a tombstone of a brownie skewer, this milkshake is a masterpiece of flavor and fun.
Why Is This Hocus Pocus Halloween Milkshake So Popular?
The popularity of this milkshake is a spell woven from the threads of nostalgia, social media virality, and pure, unadulterated creativity. It taps into a cultural love for both the classic film and extravagant, shareable desserts.
First, it is a powerful nostalgia bomb. For generations who grew up with the 1993 film, Hocus Pocus is synonymous with Halloween. This milkshake is an edible tribute, a way to engage with the movie beyond just watching it. The color scheme, the thematic toppings, and the very name instantly evoke the film’s quirky, spooky-fun atmosphere, creating a deep emotional connection before the first sip is even taken.
Second, it is an Instagram and TikTok dream. In the age of social media, a dessert’s visual appeal is paramount. The dramatic contrast of the black shake, vibrant green swirl, and elaborate toppings is inherently “share-worthy.” It’s a show-stopping creation that looks complex and professional, guaranteeing it will be the star of any party feed and inspire countless recreations.
Finally, its interactive and customizable nature makes it a hit for all ages. The process of building the milkshake is part of the fun, allowing everyone to cast their own “spell” by choosing their favorite toppings. It’s a conversation starter and a collaborative dessert experience that is as enjoyable to make as it is to drink, making it perfect for family activities or party dessert stations.
Why You’ll Love This Hocus Pocus Halloween Milkshake:
You will love this specific recipe because it provides a perfect balance between spectacular visual drama and genuinely delicious flavor. You will love the simple method for creating a vibrant black vanilla base using activated charcoal or black cocoa powder, which provides a deep, gothic color without a chalky taste. You will appreciate the clever “potion” swirl made from tangy lime sherbet, which cuts through the richness of the vanilla and adds a shocking pop of green that looks like it was stirred straight from Mary’s potion book.
You will adore the flexibility to customize the toppings based on what you have available, from brownie “tombstones” to gummy worms and witch hat cookies. You will love the professional touch of a chocolate drip and a salted caramel rim, which add layers of flavor and texture that elevate the entire experience far beyond a standard milkshake. Most of all, you will love the sheer joy and magic it brings—the process of assembling this potion is a spell in itself, and the final, breathtaking result is a dessert that is guaranteed to create unforgettable Halloween memories.
Here’s what you’ll need:
For the Black Vanilla “Cauldron” Base:
- 4 large scoops (about 3 cups) high-quality vanilla ice cream
- ¼ cup whole milk (adjust for desired thickness)
- 1 teaspoon pure vanilla extract
- Black Colorant (Choose One):
- ½ teaspoon ACTIVATED CHARCOAL POWDER (food-grade, ensure it’s safe for consumption)
- OR 2 tablespoons Black Cocoa Powder (for a deep black color and oreo-like flavor)
For the Green “Potion” Swirl:
- 2 large scoops (about 1.5 cups) lime sherbet or green apple sorbet
For the Salty-Sweet “Spellbook” Rim:
- ¼ cup salted caramel sauce
- ¼ cup black sanding sugar or crushed chocolate cookie crumbs
For the Toppings & Garnishes (The Magic!):
- The “Tombstone”: 1 rectangular brownie, perched on a paper straw or skewer
- “Witch’s Fingers”: 2-3 green candy fingers or sour punch straws
- “Gravel”: Crushed chocolate cookies (Oreos)
- “Eye of Newt”: Candy eyeballs
- “Worm”: A gummy worm, crawling out of the shake
- “Witch’s Hat”: A black ice cream cone or a chocolate-dipped cookie
- Chocolate “Drip”: 2 tablespoons chocolate shell topping (like Magic Shell)
Equipment:
- High-Powered Blender
- Tall, Chilled Milkshake Glasses
- Small plates for rimming
- Spatula
- Icing Spatula or Butter Knife (for building the swirl)

How to Make Hocus Pocus Halloween Milkshake:
Now that you have your ingredients ready, let’s dive into the steps for making this delightful Hocus Pocus Halloween Milkshake. It’s as easy as pie, and I promise you’ll feel like a culinary superstar!
Step 1: Prepare the Glasses – The “Spellbook” Rim
Pour the salted caramel sauce onto one small plate and the black sanding sugar or cookie crumbs onto another. Take your chilled milkshake glasses and dip the rims first into the caramel sauce, then into the sugar/crumbs, twisting to coat evenly. Set the glasses upright to let the caramel set slightly.
Step 2: Create the Chocolate Drip
Drizzle the inside of each prepared glass with the chocolate shell topping, allowing it to run down the sides in a dramatic, drippy pattern. Place the glasses in the freezer for 5 minutes to allow the chocolate to fully harden.
Step 3: Blend the Black “Cauldron” Base
In your blender, combine the vanilla ice cream, milk, vanilla extract, and your chosen black colorant (activated charcoal or black cocoa powder). Blend on medium speed until smooth and uniformly black. If it’s too thick, add milk one tablespoon at a time. If it’s too thin, add another scoop of ice cream.
Step 4: Create the Green “Potion” Swirl
In a separate bowl, briefly stir the lime sherbet to soften it slightly. You want it to be pliable but not melted.
Step 5: The Layering Incantation
Remove the glasses from the freezer. Pour the black vanilla milkshake base into the glasses, filling them about ¾ of the way full. Now, take dollops of the softened green sherbet and use a long skewer or thin spatula to carefully swirl it into the black base. Do not overmix; you want distinct, marbled streaks of green.
Step 6: The Toppings Spell
This is where the magic comes to life! Pile a generous mound of crushed chocolate cookies on top to represent “gravel.” Carefully insert your brownie “tombstone” on its skewer into the center. Add the gummy worm so it looks like it’s crawling out. Scatter candy eyeballs around, place the witch hat cookie on the rim, and lean the candy fingers against the glass.
Step 7: The Final Enchantment
Add a paper straw (or a reusable black one!) and serve immediately with a spoon. Instruct your guests to stir their potion before drinking to combine all the magical flavors!
Tips for Success:
- Chill Your Glasses: A frosty glass is essential for keeping your milkshake cold and preventing it from melting too quickly during the elaborate decorating process.
- Activated Charcoal Warning: While effective, activated charcoal can absorb medications. Inform your guests if you use it, or opt for the safer black cocoa powder.
- Softened, Not Melted: The key to a good swirl is sherbet that is soft enough to dollop but still cold. Let it sit on the counter for just 5 minutes.
- Work Quickly: Have all your toppings prepped and ready to go before you blend. This is an assembly-line process for the best results.
- Texture is Key: Don’t over-blend the base. A slightly thick milkshake is needed to support the weight of all the fantastic toppings.

Equipment Needed:
- High-Powered Blender
- Tall Milkshake Glasses (Pint glasses work perfectly)
- Small Plates (for rimming)
- Skewers or Paper Straws
- Spatula
Variations of Hocus Pocus Halloween Milkshake:
- “Amuck, Amuck, Amuck!” Chocolate Cauldron: Use chocolate ice cream as the base and swirl with orange sherbet for a classic Halloween color scheme.
- “Binx’s Curse” Salted Caramel Shake: Use a salted caramel ice cream base, a black chocolate swirl, and top with a black cat cookie.
- “Virgin’s Blood” Strawberry Potion: A non-alcoholic version using a strawberry ice cream base for a deep red color, swirled with white vanilla ice cream.
- “Black Flame Candle” Espresso Shake: For an adult version, use coffee ice cream as the base and add a shot of espresso or coffee liqueur.
- Dairy-Free/Potion: Use your favorite dairy-free vanilla ice cream and sorbet to accommodate dietary restrictions.
Serving Suggestions for Hocus Pocus Halloween Milkshake:
This milkshake is a dessert event all on its own! Serve it as the grand finale to a Hocus Pocus movie marathon. It pairs perfectly with other spooky snacks like witch finger pretzel rods, mummy pigs in a blanket, or cheesy ghost pizza bites. For an adult party, offer a round of “BooOOOooK!”-tails alongside it.
Prep Time:
20 minutes
“Cooking” Time:
5 minutes (for blending and assembly)
Total Time:
25 minutes
Nutritional Information:
(Please note: This is a wildly speculative estimate for one fully-loaded milkshake. It is a celebratory dessert!)
- Calories: ~750
- Protein: 10g
- Sodium: 350mg
- Sugar: 95g
- Fat: 25g
- Carbohydrates: 125g
- Fiber: 2g
FAQs about Hocus Pocus Halloween Milkshake:
Q: I can’t find activated charcoal or black cocoa. What can I use?
A: You can use black food coloring gel, which is highly concentrated. Start with a small amount and blend until you achieve the desired shade of black. Alternatively, use chocolate ice cream for a dark base.
Q: Can I make this ahead of time?
A: The components can be prepped ahead. Make the brownies, crush the cookies, and rim the glasses. However, the milkshake itself should be blended and assembled just before serving for the best texture and presentation.
Q: My milkshake is too thin to hold the toppings. Help!
A: The shake needs to be very thick. Use minimal milk and more ice cream. After blending, you can quickly place the blender pitcher in the freezer for 10-15 minutes to firm it up before assembling.
Q: Is activated charcoal safe for everyone?
A: No. It can interfere with the absorption of prescription medications. It is always best to disclose its use to your guests. For a kids’ party or if you’re unsure, black cocoa or food coloring is the safer bet.
Q: What’s the best way to get the green swirl?
A: Use a piping bag or a zip-top bag with the corner snipped off to pipe the softened sherbet in a spiral on top of the black shake. Then, use a skewer to drag it through in an up-and-down motion to create the marbled effect.
Final Thoughts:
The Hocus Pocus Halloween Milkshake is more than a recipe; it is a potion of pure, unbridled joy and a testament to the playful side of Halloween. It’s a dessert that encourages creativity, celebrates nostalgia, and brings people together through a shared sense of wonder and fun. The process of casting this culinary spell, from the dramatic drip to the final placement of the gummy worm, is a magical ritual in itself. It proves that food can be an experience, a story, and a memory-maker. So, gather your ingredients, put on your best Sanderson Sisters cackle, and prepare to brew a potion that is so deliciously fun, it’s almost… magical.
Print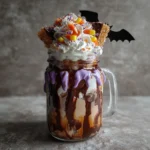
Hocus Pocus Halloween Milkshake: A Magical Delight!
- Total Time: 7 hours 50 minutes (mostly hands-off)
Description
Discover this delicious Hocus Pocus milkshake! A spellbinding, creamy delight that will wow your Halloween party guests. You’ll love this magical treat!
Ingredients
Here’s what you’ll need:
For the Chicken Stew Base:
-
2 tablespoons unsalted butter
-
1 medium yellow onion, diced
-
3 carrots, peeled and sliced into ½-inch rounds
-
2 celery stalks, diced
-
3 cloves garlic, minced
-
4 cups (32 oz) low-sodium chicken broth
-
1 teaspoon poultry seasoning
-
½ teaspoon dried thyme
-
2 bay leaves
-
1 teaspoon kosher salt
-
½ teaspoon black pepper
-
⅓ cup all-purpose flour
-
⅔ cup heavy cream, half-and-half, or whole milk (at room temperature)
1.5 lbs boneless, skinless chicken thighs (or breasts)
For the Thickening Slurry:
-
3 tablespoons cold water
3 tablespoons cornstarch
For the From-Scratch Dumplings:
-
1 tablespoon baking powder
-
1 teaspoon sugar
-
1 teaspoon kosher salt
-
¾ cup whole milk (or buttermilk for extra tang)
-
4 tablespoons (½ stick) unsalted butter, melted
-
2 tablespoons fresh parsley, chopped (optional)
2 cups all-purpose flour
Optional for Extra Flavor:
1 cup frozen peas (added at the end)
Instructions
Now that you have your ingredients ready, let’s dive into the steps for making this delightful Crockpot Chicken and Dumplings. It’s as easy as pie, and I promise you’ll feel like a culinary superstar!
Step 1: Sauté the Aromatics (The Flavor Foundation)
This optional but highly recommended step will elevate your soup. In a skillet, melt the 2 tablespoons of butter over medium heat. Add the onion, carrots, and celery and cook for 5-7 minutes until slightly softened. Add the minced garlic and cook for one more minute. Transfer this mixture to the slow cooker. (If skipping this step, simply add the raw vegetables to the crockpot).
Step 2: Build the Stew Base
Place the chicken thighs in the slow cooker. Sprinkle with the poultry seasoning, thyme, salt, and pepper. Pour the chicken broth over the top and add the bay leaves.
Step 3: Slow Cook the Chicken
Cover and cook on LOW for 6-7 hours or on HIGH for 3-4 hours. The chicken should be incredibly tender and easy to shred.
Step 4: Thicken the Broth
About 30 minutes before serving, remove the chicken and bay leaves from the slow cooker. Shred the chicken with two forks. In a small bowl, make a slurry by whisking the 3 tablespoons of cornstarch with the 3 tablespoons of cold water until smooth. While stirring the broth in the slow cooker, slowly pour in the slurry.
Step 5: Create a Creamy Roux (Optional, for Extra Richness)
In the now-empty skillet, melt the 4 tablespoons of butter for the dumplings. Whisk in the ⅓ cup of flour and cook for 1-2 minutes to make a pale roux. Slowly whisk in the heavy cream until smooth. This mixture will be very thick. Slowly whisk this roux into the broth in the slow cooker until fully incorporated. This step creates an incredibly rich and creamy base.
Step 6: Prepare the Dumpling Dough
In a medium bowl, whisk together the 2 cups of flour, baking powder, sugar, and salt. In a separate bowl, combine the milk and melted butter. Pour the wet ingredients into the dry ingredients and stir with a fork until just combined. Do not overmix! A shaggy, lumpy dough is perfect.
Step 7: Cook the Dumplings
Return the shredded chicken to the slow cooker. If using, stir in the frozen peas. Drop the dumpling dough by rounded tablespoons directly onto the surface of the simmering stew. They will expand, so leave a little space between them. Cover the slow cooker and increase the heat to HIGH. Cook for 25-30 minutes. DO NOT PEEK during this time. The steam is essential for cooking the dumplings through. They are done when they are puffed up and a toothpick inserted into the center comes out clean.
Notes
-
6-Quart or larger Slow Cooker
-
Skillet (optional, for sautéing)
-
Whisk
-
Two Mixing Bowls
-
Measuring Cups and Spoons
- Prep Time: 20 minutes
- Cook Time: 7 hours (on LOW) + 30 minutes (for dumplings)
- Category: Drinks
- Cuisine: American
Nutrition
- Calories: 480
- Sugar: 6g
- Sodium: 950mg
- Fat: 22g
- Carbohydrates: 40g
- Fiber: 3g
- Protein: 30g