Trick-or-Treat Tini: Spooky Halloween Martini

Introduction to Trick-or-Treat Tini
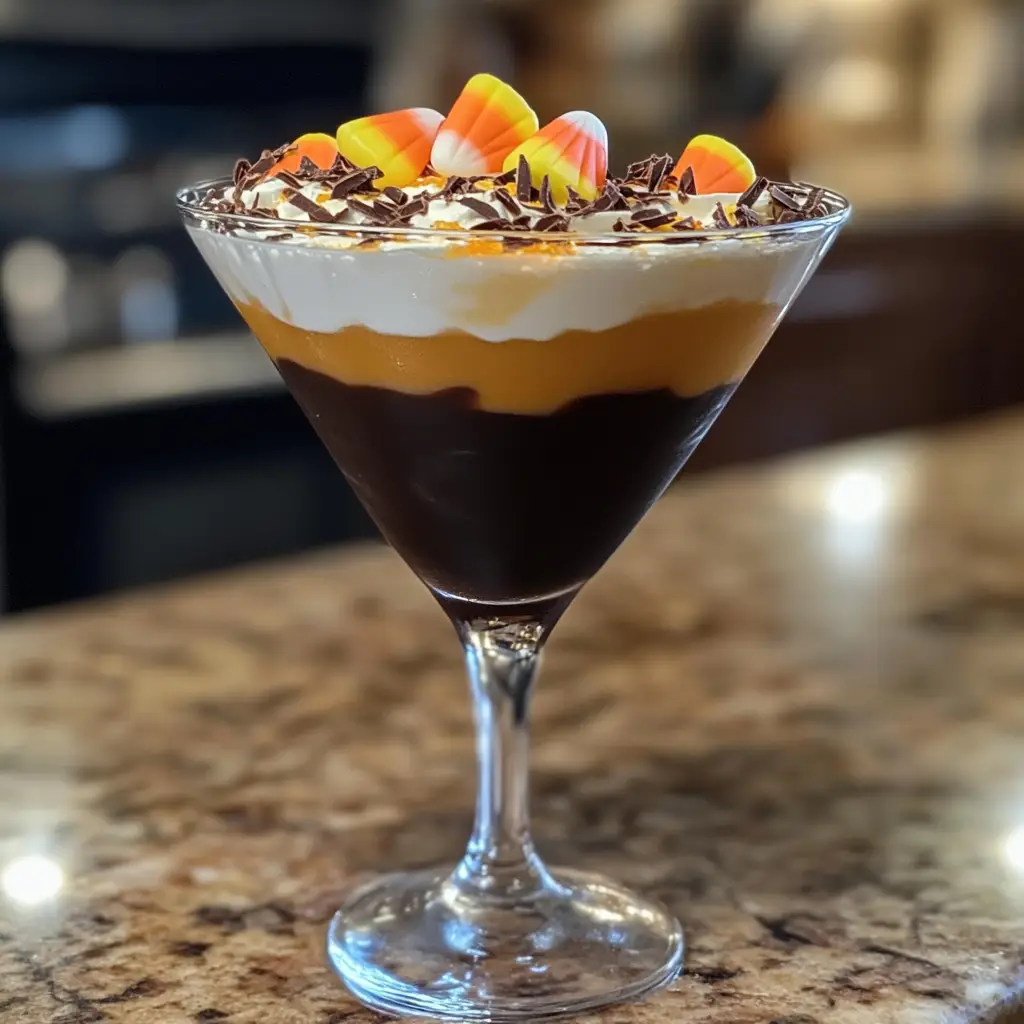
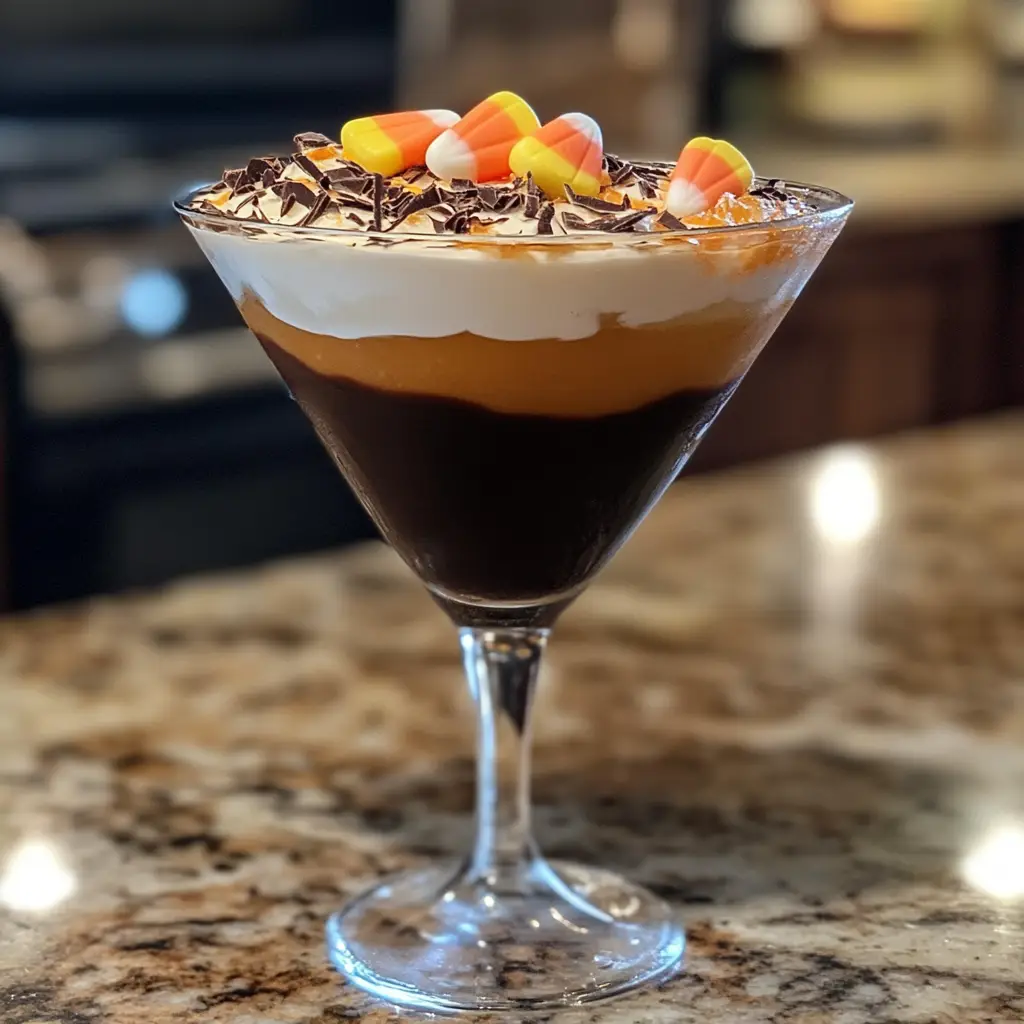
As the autumn moon rises and the streets fill with tiny ghosts and goblins, the adults deserve a potion that captures the magic, and mischief, of the season. Enter the Trick-or-Treat Tini: a sophisticated, whimsical, and irresistibly delicious cocktail that elegantly translates the joy of a candy-filled pillowcase into a shimmering martini glass. This is not merely a drink; it is a liquid homage to Halloween, a crafted experience designed for those who have graduated from apple cider but still hold a deep-seated love for the night’s festive traditions.
Why Is This Trick-or-Treat Tini So Popular?
The popularity of the Trick-or-Treat Tini is a direct result of its unique ability to blend nostalgia with modern mixology. Firstly, it offers a powerful hit of sensory nostalgia. The flavor profiles are intentionally designed to evoke the cherished candies of childhood, creating an immediate emotional connection and a sense of playful fun that is central to the Halloween spirit. It allows adults to participate in the “treat” part of the holiday in a way that is both sophisticated and celebratory.
Secondly, it boasts immense visual appeal and Instagram-worthiness. A well-made Trick-or-Treat Tini, complete with a rimmed glass, a dramatic garnish, and a creatively layered or colored liquid, is a stunning visual centerpiece. It shows thoughtfulness and creativity from the host, instantly elevating the party’s ambiance and providing a guaranteed conversation starter among guests.
Finally, its popularity is driven by its customizable core recipe. It is not one static drink but a foundational formula. This versatility means a host can offer a entire menu of “Trick-or-Treat Tinis” without needing a bar stocked with dozens of obscure liqueurs. Guests can choose their candy-inspired adventure, making the drinking experience interactive and personalized.
Why You’ll Love This Trick-or-Treat Tini:
Nostalgia in a Glass: It perfectly captures the essence of your favorite Halloween candies in a sophisticated, adult format.
Impressive & Easy: It looks like it came from a high-end cocktail lounge but is surprisingly simple to shake up at home.
The Ultimate Party Trick: Offering a signature themed cocktail makes you a legendary host and eliminates the need for a complex full bar.
Endless Creative Possibilities: The base recipe is a canvas for your imagination, allowing you to create new spooky variations every year.
A Complete Dessert Replacement: This cocktail is rich, creamy, and sweet enough to serve as the perfect capstone to your Halloween feast.
Here’s what you’ll need:
The Universal Base Foundation:
2 oz Vanilla Vodka (provides a smooth, sweet backbone)
1 oz Coffee Liqueur (e.g., Kahlúa) OR 1 oz Butterscotch Schnapps
1 oz Cream Liqueur (e.g., Baileys Irish Cream)
1 oz Half-and-Half, Heavy Cream, or Canned Coconut Cream (for richness and texture)
Ice (for shaking)
The Garnish & Rim Station:
1 tablespoon Chocolate Syrup
1 tablespoon Orange Sprinkles, Black Sanding Sugar, or Crushed Oreos (for the rim)
1 tablespoon Honey, Agave Nectar, or Chocolate Syrup (for rim adhesion)
Candy Corn, a Mini Chocolate Bar, Gummy Worms, or a Peanut Butter Cup for garnish
How to Make Trick-or-Treat Tini
Now that you have your ingredients ready, let’s dive into the steps for making this delightful Trick-or-Treat Tini. It’s as easy as pie, and I promise you’ll feel like a culinary superstar!
Step 1: Prepare the Chilled, Rimmed Glass
Start by placing your martini glass in the freezer for at least 15 minutes. A frosty glass is essential for a perfectly cold cocktail. Pour your chosen rimming material (e.g., orange sprinkles, black sugar) onto a small plate. On a separate plate, add a thin layer of your “glue” (honey, agave, or chocolate syrup). Remove the chilled glass from the freezer, dip the rim first into the adhesive, then gently into the sprinkles, twisting to ensure an even, dramatic coating. Set the glass aside.
Step 2: Choose Your Flavor Adventure & Combine
This is where the magic happens. Select your desired flavor profile from the variations listed below and add the corresponding ingredients to a cocktail shaker. For a Classic “Snickers” Tini, this means adding the vanilla vodka, coffee liqueur, cream liqueur, and half-and-half directly to the shaker.
Step 3: The Shaking Ritual
Fill your cocktail shaker two-thirds full with fresh, high-quality ice. Secure the lid tightly. Shake with vigor and purpose for a full 15-20 seconds. You are not just chilling the ingredients; you are diluting the cocktail to the perfect level, emulsifying the creamy elements, and creating a wonderfully frothy, smooth texture. The shaker should feel ice-cold in your hands.
Step 4: The Drizzle and Strain
Before straining, take the chocolate syrup and drizzle it in a spiral pattern down the inside of your prepared martini glass. This creates a beautiful, layered look when the drink is poured in. Then, using your strainer, pour the shaken cocktail into the glass over the drizzled syrup.
Step 5: The Grand Garnish
The garnish is the final trick and treat. Skewer a piece of your chosen candy—like a few candy corns, a miniature peanut butter cup, or a chunk of a chocolate bar—and rest it across the rim of the glass. For an extra touch, you can lightly spritz the garnish with an edible gold or silver spray for a magical sheen.
Step 6: Serve Immediately
Present the cocktail immediately while it is beautifully chilled and the layers are distinct. Instruct the drinker to give it a gentle stir before their first sip to integrate the drizzle and create the perfect homogeneous flavor.
Tips for Success:
Quality Matters: The flavor of your cream and coffee liqueurs will define the drink. Use brands you enjoy on their own.
Shake Until Frosty: Don’t under-shake. The aeration and dilution from a proper shake are what transform the ingredients from separate components into a unified, silky cocktail.
Temperature is Key: Ensure all your liquid ingredients are at room temperature before shaking. Cold cream can sometimes cause the liqueurs to seize or clump slightly.
Taste and Adjust: The base recipe is a guide. Prefer it less sweet? Reduce the cream liqueur by 1/4 oz. Want it stronger? Add an extra 1/2 oz of vodka.
Non-Alcoholic Version: Create a “Mocktail Tini” by using non-alcoholic vanilla syrup instead of vodka, a non-alcoholic coffee syrup, and a cream base like half-and-half. Shake with ice and strain.
Equipment Needed:
Cocktail Shaker (Boston or Cobbler style)
Hawthorne or Julep Strainer
Jigger (for precise measurement)
Martini Glasses
Small Plates (for rimming)
Cocktail Skewers or Picks
Variations of Trick-or-Treat Tini:
The “Candy Corn” Tini: Use 2 oz Vanilla Vodka, 1 oz Butterscotch Schnapps, 1 oz Orange Liqueur (e.g., Triple Sec), and 1 oz Cream. Rim the glass with yellow and orange sanding sugar.
The “Almond Joy” Tini: Use 2 oz Coconut Rum (instead of vodka), 1 oz Dark Crème de Cacao, 1 oz Amaretto, and 1 oz Cream. Garnish with toasted coconut and a slivered almond.
The “Reese’s” Tini: Use 2 oz Vanilla Vodka, 1 oz Peanut Butter Whiskey, 1 oz Crème de Cacao (dark), and 1 oz Cream. Garnish with a mini Reese’s cup.
The “Caramel Apple” Tini: Use 2 oz Sour Apple Schnapps, 1 oz Butterscotch Schnapps, 1 oz Cinnamon Whiskey (Fireball), and a splash of cream. Rim with caramel and crushed graham crackers.
The “Witch’s Brew” Tini: Add 1/4 oz of Green Chartreuse or Midori to the classic base for a herbal, green-hued potion.
Serving Suggestions for Trick-or-Treat Tini:
This cocktail is a standalone star, but it can be brilliantly paired with other Halloween treats. Serve it alongside a platter of dark chocolate-covered pretzels, salted nuts, or a charcuterie board with smoky cheeses and meats to balance the sweetness. For the full experience, pair it with a slice of pumpkin cheesecake or a decadent brownie. It is best served as the opening cocktail of the evening or as a digestif after the main meal.
Prep Time:
7 minutes
Cooking Time:
0 minutes
Total Time:
7 minutes (plus 15 minutes for glass chilling)
Nutritional Information (Per cocktail, classic “Snickers” version estimated):
Calories: ~320
Protein: ~2g
Sodium: ~45mg
Sugar: ~25g
Fat: ~7g
Carbohydrates: ~28g
Fiber: ~0g
(Please note: This is an estimate and can vary dramatically based on the specific brands of liqueurs and ingredients used. This is an indulgent dessert cocktail.)
FAQs about Trick-or-Treat Tini:
Q: Can I batch-make these for a party?
A: Absolutely! Multiply the ingredient quantities by the number of servings and mix them in a large pitcher, omitting the ice. Cover and refrigerate for up to 24 hours. When ready to serve, shake individual portions with ice or stir the entire batch vigorously before pouring into pre-rimmed glasses.
Q: My cocktail is curdled. What happened?
A: This can happen if the acidity from certain liqueurs (like those with a high citrus content) reacts with the dairy. To prevent this, always add the cream last when building the shaker and shake for a shorter duration (10-12 seconds). Using a higher-fat cream can also help.
Q: I don’t have vanilla vodka. What can I use?
A: You can use plain vodka and add 1/4 teaspoon of pure vanilla extract to the shaker. Alternatively, whipped cream vodka is an excellent substitute.
Q: How can I make a vegan version?
A: Use vegan vanilla vodka (most are), a plant-based coffee liqueur, a vegan cream liqueur (like Baileys Almande), and canned coconut cream instead of dairy cream.
Q: What’s the best way to get a perfect drizzle on the glass?
A: Use a plastic bottle with a narrow tip (like those used for condiments) for maximum control. Practice the spiral motion on an empty glass first.
Final Thoughts
The Trick-or-Treat Tini is more than a seasonal novelty; it is a testament to the joy of thematic entertaining and the art of the cocktail. It proves that with a little creativity and a handful of quality ingredients, you can transport your guests to a place of wonder and whimsy. From the meticulous preparation of the rim to the final, satisfying sip that tastes like a liquified candy bar, every aspect of this drink is designed to delight. It’s the perfect way to celebrate the season, connect with your inner child, and indulge in a truly spellbinding concoction. So, don your witch’s hat or vampire cape, raise your glass, and toast to the magic of Halloween with this unmistakable potion of pleasure. Cheers!
Print
Trick-or-Treat Tini: Spooky Halloween Martini
- Total Time: 7 minutes
Ingredients
The Universal Base Foundation:
-
1 oz Coffee Liqueur (e.g., Kahlúa) OR 1 oz Butterscotch Schnapps
-
1 oz Cream Liqueur (e.g., Baileys Irish Cream)
-
1 oz Half-and-Half, Heavy Cream, or Canned Coconut Cream (for richness and texture)
-
Ice (for shaking)
2 oz Vanilla Vodka (provides a smooth, sweet backbone)
The Garnish & Rim Station:
-
1 tablespoon Orange Sprinkles, Black Sanding Sugar, or Crushed Oreos (for the rim)
-
1 tablespoon Honey, Agave Nectar, or Chocolate Syrup (for rim adhesion)
-
Candy Corn, a Mini Chocolate Bar, Gummy Worms, or a Peanut Butter Cup for garnish
1 tablespoon Chocolate Syrup
Instructions
Now that you have your ingredients ready, let’s dive into the steps for making this delightful Trick-or-Treat Tini. It’s as easy as pie, and I promise you’ll feel like a culinary superstar!
Step 1: Prepare the Chilled, Rimmed Glass
Start by placing your martini glass in the freezer for at least 15 minutes. A frosty glass is essential for a perfectly cold cocktail. Pour your chosen rimming material (e.g., orange sprinkles, black sugar) onto a small plate. On a separate plate, add a thin layer of your “glue” (honey, agave, or chocolate syrup). Remove the chilled glass from the freezer, dip the rim first into the adhesive, then gently into the sprinkles, twisting to ensure an even, dramatic coating. Set the glass aside.
Step 2: Choose Your Flavor Adventure & Combine
This is where the magic happens. Select your desired flavor profile from the variations listed below and add the corresponding ingredients to a cocktail shaker. For a Classic “Snickers” Tini, this means adding the vanilla vodka, coffee liqueur, cream liqueur, and half-and-half directly to the shaker.
Step 3: The Shaking Ritual
Fill your cocktail shaker two-thirds full with fresh, high-quality ice. Secure the lid tightly. Shake with vigor and purpose for a full 15-20 seconds. You are not just chilling the ingredients; you are diluting the cocktail to the perfect level, emulsifying the creamy elements, and creating a wonderfully frothy, smooth texture. The shaker should feel ice-cold in your hands.
Step 4: The Drizzle and Strain
Before straining, take the chocolate syrup and drizzle it in a spiral pattern down the inside of your prepared martini glass. This creates a beautiful, layered look when the drink is poured in. Then, using your strainer, pour the shaken cocktail into the glass over the drizzled syrup.
Step 5: The Grand Garnish
The garnish is the final trick and treat. Skewer a piece of your chosen candy—like a few candy corns, a miniature peanut butter cup, or a chunk of a chocolate bar—and rest it across the rim of the glass. For an extra touch, you can lightly spritz the garnish with an edible gold or silver spray for a magical sheen.
Step 6: Serve Immediately
Present the cocktail immediately while it is beautifully chilled and the layers are distinct. Instruct the drinker to give it a gentle stir before their first sip to integrate the drizzle and create the perfect homogeneous flavor.
Notes
-
Cocktail Shaker (Boston or Cobbler style)
-
Hawthorne or Julep Strainer
-
Jigger (for precise measurement)
-
Martini Glasses
- Prep Time: 7 minutes
- Category: Drinks
- Cuisine: American
Nutrition
- Calories: 320
- Sugar: 25g
- Sodium: 45mg
- Fat: 7g
- Carbohydrates: 28g
- Protein: 2g