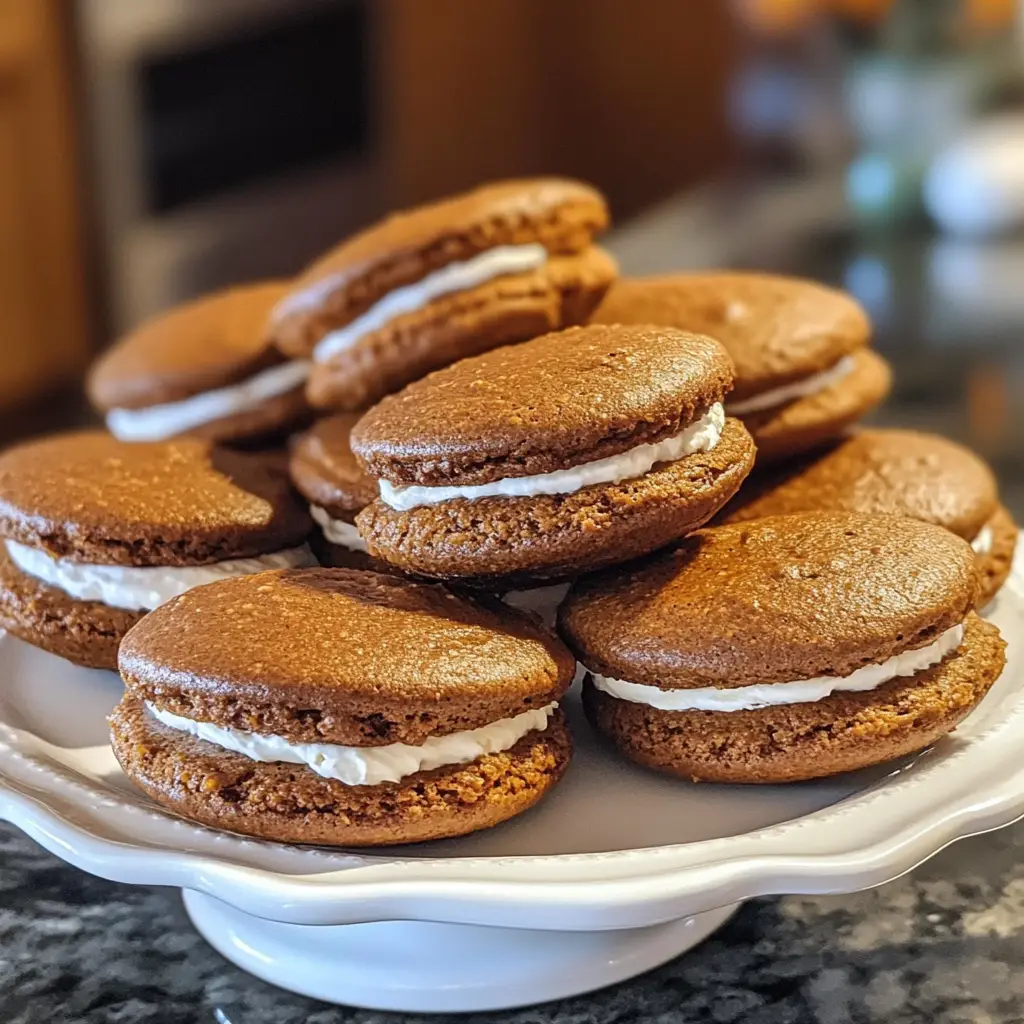
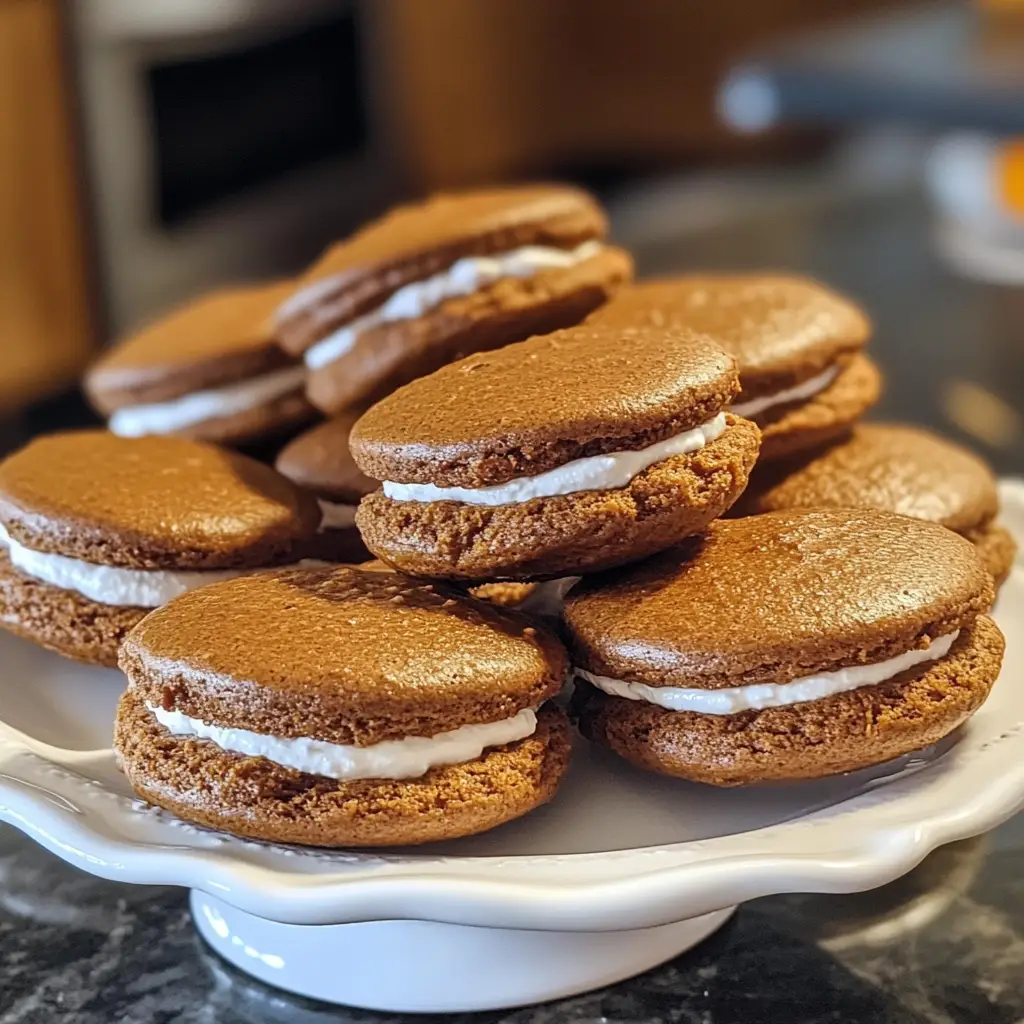
Pumpkin Whoopie Pies: Discover the Secret Recipe Today!
Introduction to Pumpkin Whoopie Pies
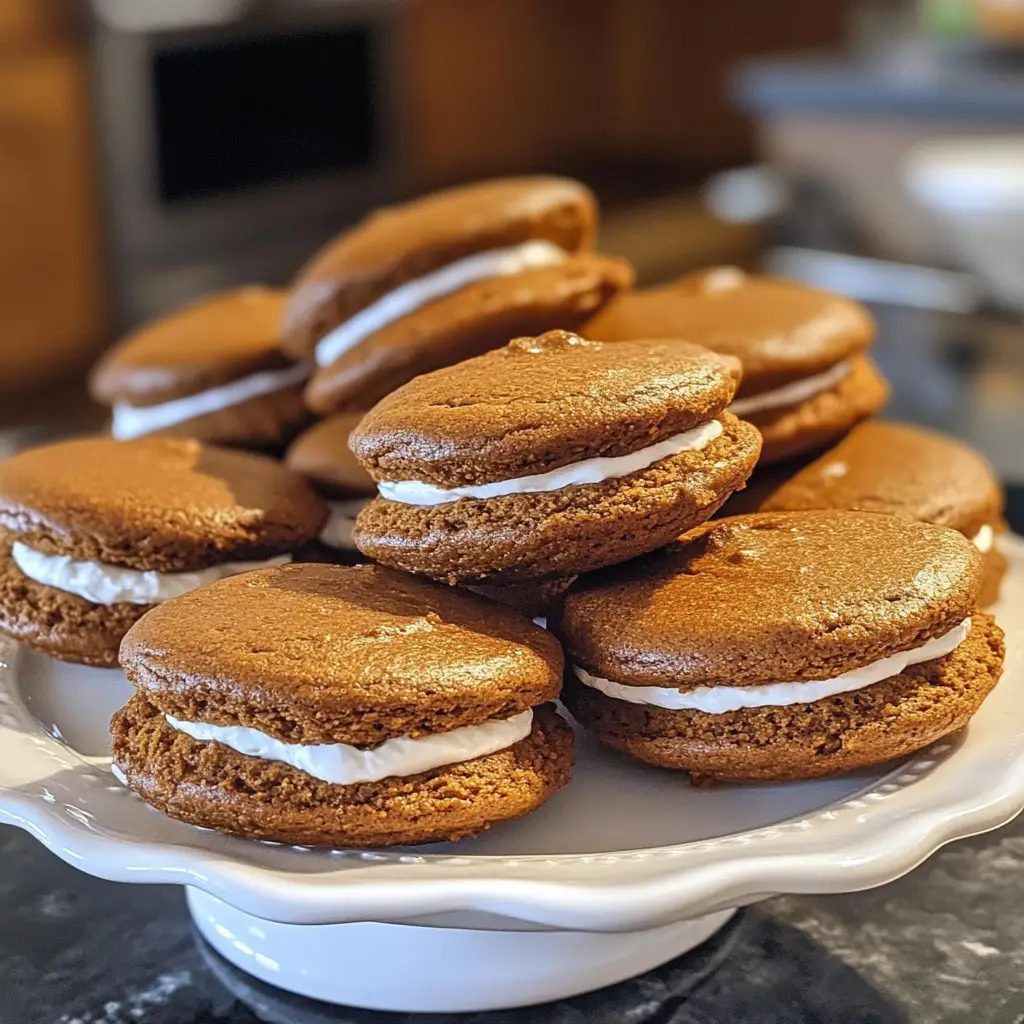
As the leaves turn and the air gets crisp, there’s nothing quite like the warm embrace of a freshly baked treat. That’s where my beloved Pumpkin Whoopie Pies come in! These delightful little desserts are not just a feast for the eyes; they’re a quick solution for busy days when you want to impress your loved ones without spending hours in the kitchen. Soft, spiced, and filled with creamy goodness, they capture the essence of fall in every bite. Trust me, once you try these, they’ll become a staple in your home, bringing smiles to faces young and old!
Why You’ll Love This Pumpkin Whoopie Pies
These Pumpkin Whoopie Pies are the perfect blend of ease and flavor. With just a handful of ingredients, you can whip up a batch in no time. They’re soft, moist, and bursting with that cozy pumpkin spice flavor we all adore. Plus, they’re a hit with both kids and adults, making them an ideal treat for family gatherings or a simple afternoon snack. Who wouldn’t love that?
Ingredients for Pumpkin Whoopie Pies
Gathering the right ingredients is the first step to creating these delightful Pumpkin Whoopie Pies. Here’s what you’ll need:
- All-purpose flour: This is the base of your cookies, providing structure and a soft texture.
- Baking soda and baking powder: These leavening agents help the cookies rise, giving them that fluffy bite.
- Ground cinnamon: A warm spice that adds a cozy flavor, making these pies feel like a hug in dessert form.
- Ground nutmeg: This spice complements the cinnamon, enhancing the fall flavor profile.
- Salt: Just a pinch balances the sweetness and brings out the flavors.
- Pumpkin puree: The star of the show! It adds moisture and that signature pumpkin flavor.
- Granulated sugar: Sweetens the cookies, making them irresistible.
- Vegetable oil: Keeps the cookies moist and tender, ensuring they don’t dry out.
- Large egg: Acts as a binder, helping to hold everything together.
- Vanilla extract: A splash of this adds depth and enhances the overall flavor.
- Cream cheese: This is for the luscious filling, providing a rich and tangy contrast to the sweet cookies.
- Powdered sugar: Sweetens the cream cheese filling, making it smooth and delightful.
- Additional vanilla extract (for filling): A little extra vanilla in the filling makes it even more delicious.
For those looking to spice things up, consider adding a pinch of ground ginger for an extra kick. You can find all the exact measurements at the bottom of the article, ready for printing. Happy baking!
How to Make Pumpkin Whoopie Pies
Now that you have all your ingredients ready, let’s dive into the fun part: making these delightful Pumpkin Whoopie Pies! Follow these simple steps, and you’ll have a batch of delicious treats in no time.
Step 1: Preheat the Oven
First things first, preheat your oven to 350°F (175°C). Preheating is crucial because it ensures that your cookies bake evenly. If the oven isn’t hot enough, your whoopie pies might turn out flat and sad. We want them fluffy and perfect!
Step 2: Prepare the Dry Ingredients
In a large bowl, whisk together the all-purpose flour, baking soda, baking powder, ground cinnamon, ground nutmeg, and salt. This step is essential for blending the spices and leavening agents evenly. A well-mixed dry mixture means every bite will be bursting with flavor!
Step 3: Mix the Wet Ingredients
In another bowl, combine the pumpkin puree, granulated sugar, vegetable oil, egg, and vanilla extract. Mix until everything is smooth and well combined. The pumpkin puree is the star here, adding moisture and that lovely fall flavor. You’ll want to make sure it’s creamy and lump-free!
Step 4: Combine Wet and Dry Ingredients
Now, it’s time to bring the two mixtures together. Gradually add the dry ingredients to the wet ingredients, mixing gently until just combined. Be careful not to overwork the batter; we want to keep those whoopie pies soft and tender. A few lumps are perfectly fine!
Step 5: Shape the Cookies
Using a spoon or a cookie scoop, drop spoonfuls of the batter onto a baking sheet lined with parchment paper. Make sure to leave some space between each dollop, as they will spread while baking. Aim for about two inches apart to give them room to grow!
Step 6: Bake the Cookies
Pop the baking sheet into the preheated oven and bake for 10-12 minutes. Keep an eye on them! You’ll know they’re done when a toothpick inserted into the center comes out clean. The edges should be set, but the centers might still look a bit soft—that’s okay!
Step 7: Cool the Cookies
Once baked, remove the cookies from the oven and let them cool on the baking sheet for a few minutes. Then, transfer them to a wire rack to cool completely. Cooling is essential before adding the filling; otherwise, it might melt and make a gooey mess!
Step 8: Prepare the Cream Cheese Filling
While the cookies cool, let’s whip up that creamy filling! In a separate bowl, beat together the softened cream cheese, powdered sugar, and a splash of vanilla extract until smooth and fluffy. This filling is what takes these whoopie pies to the next level—rich, tangy, and oh-so-delicious!
Step 9: Assemble the Whoopie Pies
Now comes the fun part—assembling your whoopie pies! Take one cookie, spread a generous amount of cream cheese filling on the flat side, and top it with another cookie. Press gently to sandwich them together. Repeat this with the remaining cookies and filling. You’ll have a beautiful stack of Pumpkin Whoopie Pies ready to enjoy!
Tips for Success
- Use room temperature ingredients for a smoother batter.
- Don’t skip the cooling step; it prevents the filling from melting.
- For even cookies, use a cookie scoop to measure the batter.
- Experiment with spices; a pinch of ginger can add a delightful twist.
- Store leftovers in an airtight container to keep them fresh.
Equipment Needed
- Baking sheet: A standard sheet works, but a silicone mat can help prevent sticking.
- Parchment paper: Great for lining your baking sheet; aluminum foil is a good alternative.
- Mixing bowls: Use any size, but a large bowl is best for mixing.
- Whisk: A hand whisk is perfect, but an electric mixer speeds things up.
- Cookie scoop: This helps with even portions; a tablespoon works too!
Variations of Pumpkin Whoopie Pies
- Chocolate Chip Pumpkin Whoopie Pies: Add a handful of chocolate chips to the batter for a delightful chocolatey twist.
- Gluten-Free Option: Substitute all-purpose flour with a gluten-free blend to make these treats suitable for gluten-sensitive friends.
- Vegan Pumpkin Whoopie Pies: Replace the egg with a flax egg (1 tablespoon ground flaxseed mixed with 2.5 tablespoons water) and use a plant-based cream cheese for the filling.
- Spiced Pumpkin Whoopie Pies: Enhance the flavor by adding a pinch of ground ginger or cloves to the spice mix for an extra kick.
- Maple Cream Cheese Filling: Swap out the vanilla extract in the filling for maple syrup to give it a unique flavor profile.
Serving Suggestions for Pumpkin Whoopie Pies
- Pair with a warm cup of spiced chai or apple cider for a cozy fall treat.
- Serve on a rustic wooden platter for a charming presentation at gatherings.
- Dust with powdered sugar for an elegant touch.
- Offer alongside a scoop of vanilla ice cream for an indulgent dessert.
- Garnish with a sprinkle of cinnamon for added flavor and visual appeal.
FAQs about Pumpkin Whoopie Pies
As you embark on your journey to create these delightful Pumpkin Whoopie Pies, you might have a few questions. Here are some common queries I’ve encountered, along with helpful answers to guide you along the way!
Can I make Pumpkin Whoopie Pies ahead of time?
Absolutely! You can bake the cookies a day in advance and store them in an airtight container. Just wait to fill them until you’re ready to serve. This keeps the filling fresh and the cookies soft!
How do I store leftover Pumpkin Whoopie Pies?
Store your whoopie pies in an airtight container in the refrigerator. They’ll stay fresh for up to a week. If you want to keep them longer, you can freeze them for up to three months!
Can I use fresh pumpkin instead of canned?
Yes, you can! Just make sure to cook and puree the pumpkin until it’s smooth. Canned pumpkin puree is convenient, but fresh pumpkin can add a lovely flavor and texture to your whoopie pies.
What can I substitute for cream cheese in the filling?
If you’re looking for a lighter option, you can use Greek yogurt or mascarpone cheese. For a dairy-free alternative, try a plant-based cream cheese. Each will give a unique twist to your filling!
Can I add nuts or chocolate chips to the batter?
Definitely! Adding chocolate chips or chopped nuts can elevate the flavor and texture of your Pumpkin Whoopie Pies. Just fold them in gently after mixing the batter for a delightful surprise in every bite!
Final Thoughts
Creating these Pumpkin Whoopie Pies is more than just baking; it’s about sharing warmth and joy with those you love. Each bite is a reminder of cozy fall days, laughter, and cherished moments around the table. Whether you’re whipping them up for a family gathering or a quiet afternoon treat, these pies are sure to bring smiles. Plus, the delightful combination of soft cookies and creamy filling makes them irresistible! So, roll up your sleeves, embrace the season, and let the aroma of pumpkin spice fill your home. Happy baking, my friends!
Print
Pumpkin Whoopie Pies: Discover the Secret Recipe Today!
- Total Time: 32 minutes
- Yield: 12 whoopie pies 1x
- Diet: Vegetarian
Description
Delicious and soft pumpkin whoopie pies filled with creamy frosting, perfect for fall treats.
Ingredients
- 2 cups all-purpose flour
- 1 teaspoon baking soda
- 1 teaspoon baking powder
- 1 teaspoon ground cinnamon
- 1/2 teaspoon ground nutmeg
- 1/2 teaspoon salt
- 1 cup pumpkin puree
- 1 cup granulated sugar
- 1/2 cup vegetable oil
- 1 large egg
- 1 teaspoon vanilla extract
- 1 cup cream cheese, softened
- 1/2 cup powdered sugar
- 1 teaspoon vanilla extract (for filling)
Instructions
- Preheat the oven to 350°F (175°C).
- In a bowl, whisk together flour, baking soda, baking powder, cinnamon, nutmeg, and salt.
- In another bowl, mix pumpkin puree, sugar, oil, egg, and vanilla until smooth.
- Gradually add the dry ingredients to the wet ingredients, mixing until just combined.
- Drop spoonfuls of the batter onto a baking sheet lined with parchment paper.
- Bake for 10-12 minutes or until a toothpick comes out clean.
- Let the cookies cool completely.
- In a separate bowl, beat together cream cheese, powdered sugar, and vanilla until smooth.
- Spread the cream cheese filling on the flat side of one cookie and sandwich it with another cookie.
- Repeat with remaining cookies and filling.
Notes
- Store in an airtight container in the refrigerator for up to a week.
- For a spicier flavor, add a pinch of ground ginger.
- These can be frozen for up to 3 months.
- Prep Time: 20 minutes
- Cook Time: 12 minutes
- Category: Dessert
- Method: Baking
- Cuisine: American
Nutrition
- Serving Size: 1 whoopie pie
- Calories: 200
- Sugar: 15g
- Sodium: 150mg
- Fat: 8g
- Saturated Fat: 3g
- Unsaturated Fat: 5g
- Trans Fat: 0g
- Carbohydrates: 30g
- Fiber: 1g
- Protein: 2g
- Cholesterol: 20mg
Keywords: Pumpkin Whoopie Pies, Fall Desserts, Pumpkin Recipes