Cherry Crisp: Uncover the Secret to Perfect Recipe!

Introduction to Cherry Crisp
There’s something magical about a warm dessert that fills your home with sweet aromas. Cherry Crisp is one of those delightful treats that can turn an ordinary day into a special occasion. Whether you’re a busy mom juggling work and family or a professional looking to impress guests, this recipe is your secret weapon. It’s quick, easy, and oh-so-satisfying! With just a handful of ingredients, you can create a dish that brings smiles and happy memories. Trust me, once you try this Cherry Crisp, it will become a staple in your dessert repertoire!
Why You’ll Love This Cherry Crisp
This Cherry Crisp is a game-changer for busy days. It comes together in just 15 minutes, making it perfect for those last-minute dessert cravings. The combination of sweet cherries and a crunchy topping is simply irresistible. Plus, it’s versatile! You can swap in your favorite fruits or even make it gluten-free. With every bite, you’ll savor the warmth and comfort that only a homemade dessert can bring.
Ingredients for Cherry Crisp
Gathering the right ingredients is the first step to creating a delicious Cherry Crisp. Here’s what you’ll need:
- Fresh or Frozen Cherries: The star of the show! Sweet cherries bring a burst of flavor. If fresh cherries are out of season, frozen ones work just as well.
- Rolled Oats: These add a hearty texture to the crumble topping. They soak up the juices from the cherries, creating a delightful contrast.
- All-Purpose Flour: This helps bind the crumble together. You can substitute with gluten-free flour if needed.
- Brown Sugar: It adds a rich sweetness and depth of flavor. Feel free to use coconut sugar for a healthier twist.
- Unsalted Butter: Melted butter gives the crumble its signature crispiness. You can swap it for coconut oil for a dairy-free option.
- Cinnamon: A sprinkle of cinnamon enhances the flavor profile, making it warm and inviting. You can also experiment with nutmeg for a different spice kick.
- Salt: Just a pinch balances the sweetness and elevates the overall taste.
For exact measurements, check the bottom of the article where you can find everything listed for easy printing. Happy baking!
How to Make Cherry Crisp
Now that you have your ingredients ready, let’s dive into the steps to create this delightful Cherry Crisp. Each step is simple, and I promise you’ll feel like a pro in no time!
Step 1: Preheat the Oven
First things first, preheat your oven to 350°F (175°C). This step is crucial because it ensures even baking. If you skip this, your Cherry Crisp might end up unevenly cooked. Trust me, a well-preheated oven is like a warm hug for your dessert!
Step 2: Prepare the Cherry Filling
In a mixing bowl, combine your cherries with half of the brown sugar. This step is essential for drawing out the natural sweetness of the cherries. Let them sit for a few minutes. You’ll notice the juices start to flow, creating a luscious filling that’s bursting with flavor. It’s like magic!
Step 3: Make the Crumble Topping
In another bowl, mix the rolled oats, flour, remaining brown sugar, cinnamon, and salt. Stir them together until well combined. Then, pour in the melted butter. This is where the fun begins! Mix everything until it resembles a crumbly texture. You want it to be a bit chunky for that perfect crunch. It’s like creating a cozy blanket for your cherries!
Step 4: Assemble the Dish
Now, it’s time to bring it all together. Spread the cherry mixture evenly in a baking dish. Then, sprinkle the crumble topping generously over the cherries. Make sure to cover them well; you want every bite to be a delightful mix of sweet cherries and crunchy topping. It’s like a beautiful sunset in a dish!
Step 5: Bake to Perfection
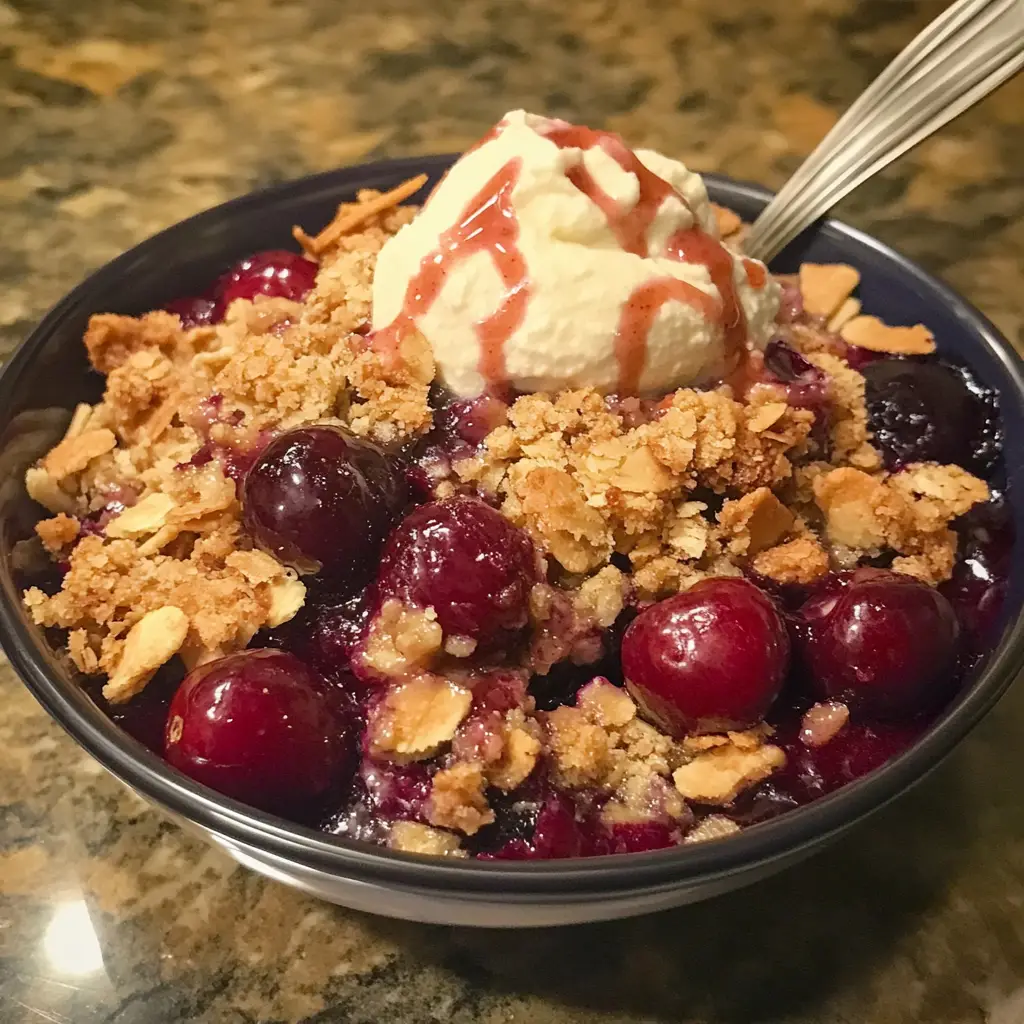
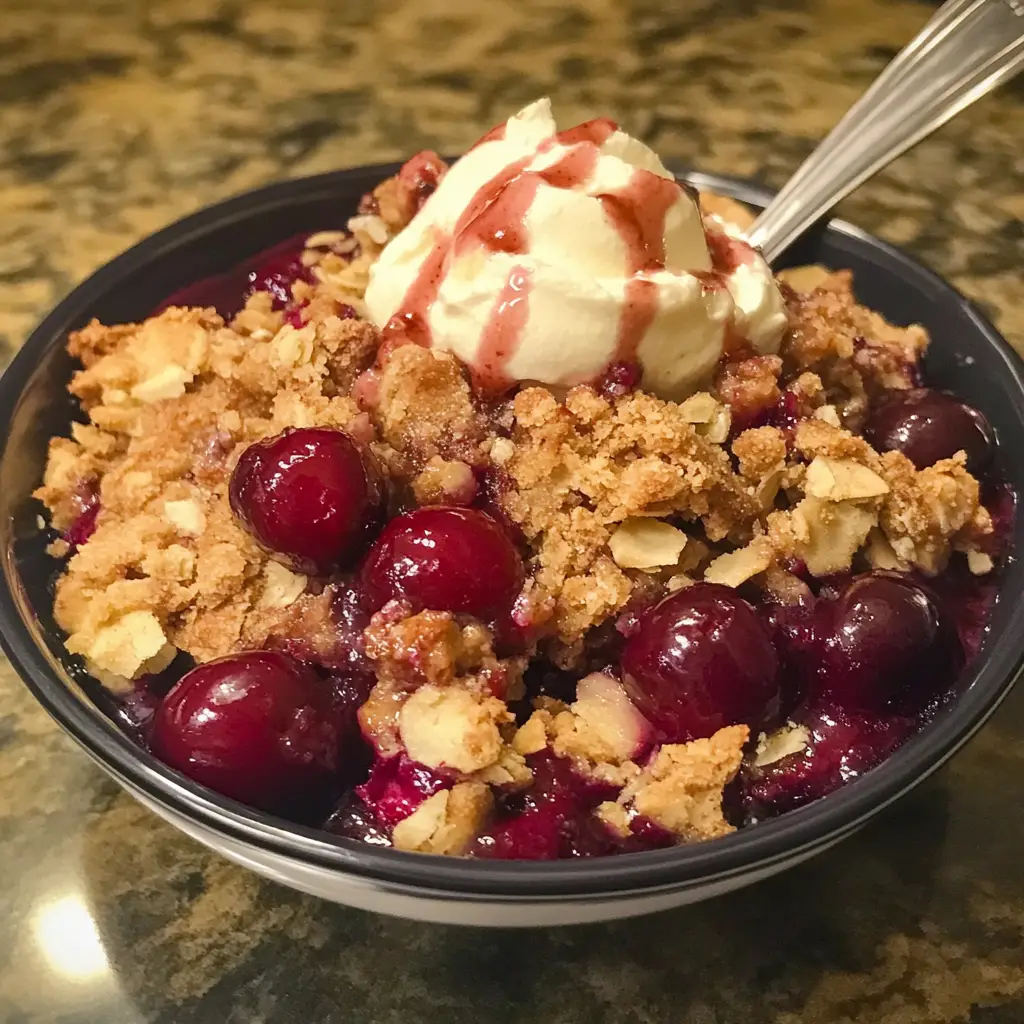
Pop your dish into the preheated oven and bake for 30-35 minutes. Keep an eye on it! You’ll know it’s done when the top is golden brown and the cherries are bubbling. This is the moment when your kitchen will smell heavenly, and you’ll be counting down the minutes until you can dig in!
Step 6: Cool and Serve
Once baked, let your Cherry Crisp cool for about 10 minutes. This cooling time is important; it allows the juices to settle. Serve it warm, perhaps with a scoop of vanilla ice cream on top. The contrast of warm and cold is simply divine. Enjoy every bite, and watch your loved ones smile!
Tips for Success
- Use ripe, sweet cherries for the best flavor. If using frozen, thaw and drain excess juice.
- Don’t skip the cooling time; it helps the crisp set up nicely.
- For a twist, add a splash of almond extract to the cherry filling.
- Experiment with different fruits like peaches or blueberries for variety.
- Store leftovers in an airtight container to keep the topping crispy.
Equipment Needed
- Baking Dish: A 9×13 inch dish works perfectly. You can also use a pie dish if that’s what you have on hand.
- Mixing Bowls: A couple of medium-sized bowls will do. Use one for the cherry filling and another for the crumble.
- Measuring Cups: Essential for accurate ingredient portions. If you don’t have them, use a standard coffee mug as a rough guide.
- Spatula: Great for mixing and spreading. A wooden spoon can also work in a pinch.
Variations of Cherry Crisp
- Berry Medley: Combine cherries with blueberries and raspberries for a colorful twist. The mix of flavors is delightful!
- Peach Crisp: Substitute cherries with fresh peaches for a summery version. The juicy sweetness pairs beautifully with the crumble.
- Gluten-Free Option: Use gluten-free oats and flour to make this Cherry Crisp suitable for those with dietary restrictions.
- Nutty Crunch: Add chopped nuts like almonds or pecans to the crumble topping for an extra layer of texture and flavor.
- Spiced Up: Experiment with spices like nutmeg or ginger in the crumble for a warm, cozy flavor profile.
Serving Suggestions for Cherry Crisp
- Serve warm with a generous scoop of vanilla ice cream for a classic pairing.
- Drizzle with caramel sauce for an extra touch of sweetness.
- Pair with a dollop of whipped cream for a light, airy contrast.
- Enjoy with a cup of hot tea or coffee to balance the sweetness.
- Garnish with fresh mint leaves for a pop of color and freshness.
FAQs about Cherry Crisp
As you embark on your Cherry Crisp journey, you might have a few questions. Here are some common queries that can help you along the way:
Can I use frozen cherries for this recipe?
Absolutely! Frozen cherries work wonderfully in this Cherry Crisp. Just make sure to thaw and drain any excess juice before mixing them with sugar. This will help prevent a soggy bottom.
How do I store leftovers?
Store any leftover Cherry Crisp in an airtight container in the refrigerator. It will stay fresh for up to three days. Just reheat it in the oven for a few minutes to restore that crispy topping!
Can I make Cherry Crisp ahead of time?
Yes, you can prepare the cherry filling and crumble topping separately a day in advance. Just assemble and bake when you’re ready to serve. It’s a great way to save time on busy days!
What other fruits can I use in this recipe?
Feel free to get creative! You can substitute cherries with blueberries, peaches, or even a mix of your favorite fruits. Each variation brings its own unique flavor to the dish.
Is Cherry Crisp gluten-free?
To make a gluten-free Cherry Crisp, simply swap out the all-purpose flour for a gluten-free flour blend and ensure your oats are certified gluten-free. Enjoy a delicious dessert without the gluten!
Final Thoughts
Making Cherry Crisp is more than just baking; it’s about creating moments of joy and connection. The sweet aroma wafting through your kitchen can transport you back to cherished memories, whether it’s family gatherings or cozy nights in. Each bite is a delightful blend of flavors and textures that warms the heart. Plus, it’s a simple recipe that invites creativity, allowing you to experiment with different fruits and toppings. So, gather your loved ones, share a slice, and relish the happiness that comes from homemade goodness. Trust me, this Cherry Crisp will become a beloved tradition in your home!
Print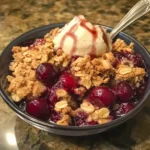
“Cherry Crisp: Uncover the Secret to Perfect Recipe!”
- Total Time: 50 minutes
- Yield: 8 servings 1x
- Diet: Vegetarian
Description
A delightful dessert featuring sweet cherries topped with a crispy oat and brown sugar crumble.
Ingredients
- 4 cups fresh or frozen cherries
- 1 cup rolled oats
- 1 cup all-purpose flour
- 1 cup brown sugar
- 1/2 cup unsalted butter, melted
- 1 teaspoon cinnamon
- 1/4 teaspoon salt
Instructions
- Preheat the oven to 350°F (175°C).
- In a mixing bowl, combine the cherries with half of the brown sugar and set aside.
- In another bowl, mix the oats, flour, remaining brown sugar, cinnamon, and salt.
- Pour the melted butter into the dry mixture and stir until crumbly.
- Spread the cherry mixture in a baking dish and top with the crumble mixture.
- Bake for 30-35 minutes or until the top is golden brown.
- Let it cool slightly before serving.
Notes
- Serve warm with vanilla ice cream for an extra treat.
- Can substitute cherries with other fruits like blueberries or peaches.
- Store leftovers in the refrigerator for up to 3 days.
- Prep Time: 15 minutes
- Cook Time: 35 minutes
- Category: Dessert
- Method: Baking
- Cuisine: American
Nutrition
- Serving Size: 1 serving
- Calories: 250
- Sugar: 20g
- Sodium: 150mg
- Fat: 10g
- Saturated Fat: 5g
- Unsaturated Fat: 3g
- Trans Fat: 0g
- Carbohydrates: 38g
- Fiber: 3g
- Protein: 3g
- Cholesterol: 15mg
Keywords: Cherry Crisp, Dessert, Fruit Crisp, Baking